|
© Copyright 2017, 2018, 2023, 2025 Jeffrey R. Charles. All Rights Reserved. URL: http://www.eclipsechaser.com/eclink/image/total17.htm |
 |
| Total Solar Eclipse of 21 August 2017. Sequence photo showing dark gray color of smoke-filled sky during totality. Copyright 2017 Jeffrey R. Charles, All Rights Reserved. This material is protected by Intellectual property laws. Any reproduction or commercial or monetized use without the prior express written and signed consent of Jeffrey R. Charles (and any other contributors, if applicable) is prohibited. Where permission for reproduction or use is granted, this notice and all credits must be preserved on each copy. Use of material herein subject to conditions in Versacorp Legal Information Page (www.versacorp.com/vlink/legal/legal.htm). |
| This material is optimized for viewing on monitors as small as 800x600, and is "retro browser friendly" (HTML 2, for Netscape 2 or newer), to make it accessible to people throughout the world who may only have older computers. |
| About THIS Version of J. Charles' 2017 Eclipse Images and Text Work(s): (Ver. 250302) |
|
This material includes work(s) that may later be published in separate (shorter) books or web pages, etc. Copyright registered prior to publication. Since this document is long, a few changes may gradually be made: * LENS TESTS in Appendix B now include tests performed AFTER the 2017 eclipse. Lens tests for the 2024 eclipse are also included. These are included here so as not to repeat the entire lens test section in the 2024 eclipse web page. * Over 80 percent of the introduction text (plus some other text) will probably be moved to a separate (not yet started) "Eclipse Chaser's Journal" chapter or web page, as was text describing all 4 of my other total solar eclipse expeditions. * Preparation, Summary of Failures, and Idiot Proofing sections may be separate web pages (or other resources), for reference before other eclipses. Some engineering/educational people said failure analysis would be their favorite part! * A few images might be added in 2018, including: A third corona image with some inner corona detail. * All Creek Fire material (Appendix I) will probably be in a separate web page and/or other type of publication. * All ISS transit material (no transits occurred during eclipse from our site) may later be a separate web page, etc. |
The Rough One: Total Solar Eclipse of 21 August, 2017
Introduction (Site, Eclipse Description, Instruments, Objectives, Setbacks, Results, etc.)
|
Photos below are from my trip to Idaho for the 21 August 2017 total solar eclipse in the United States. This was my fifth total solar eclipse expedition. It was also the second shortest in terms of distance from home, and it was my second domestic (in country) total solar eclipse. The total eclipse path in the area of Mackay, Idaho was about 1450 km from my 2017 home in southern California. By road, the selected eclipse site (Mackay) was somewhat farther away than it would have been from my former home in Colorado.
When I first arrived in Mackay late at night, the dark skies blew me away. It was as though the stars were bright beacons in front of a coal black background. I just stayed by the car at the motel and gawked at the sky for 10 or 15 minutes, observing numerous naked eye deep sky objects that I had not seen for years. As I looked upward, a distant airplane silently flew westward across Corona Borealis and a few meteors graced the sky. It was amazing, and almost worth the trip by itself.
While in the Mackay area, I had the pleasure of meeting with my brother and his wife (who had both come up from Colorado), plus several people in Mackay. I stayed in the Mackay area almost 2 weeks, taking advantage of the area's dark skies to acquire several deep-sky photos a few days after the eclipse.
| |
 |
|
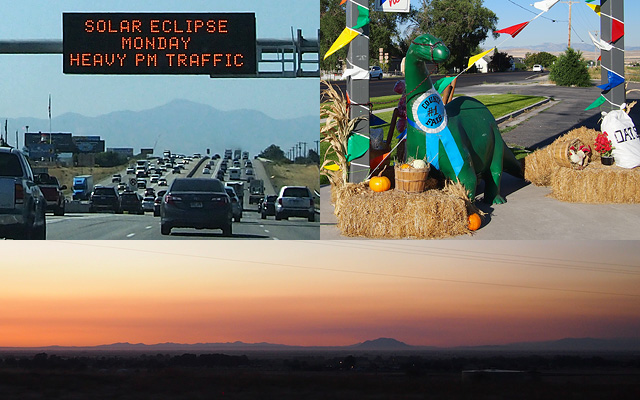
| A few Sights on the way to the Eclipse in Idaho. | |
|
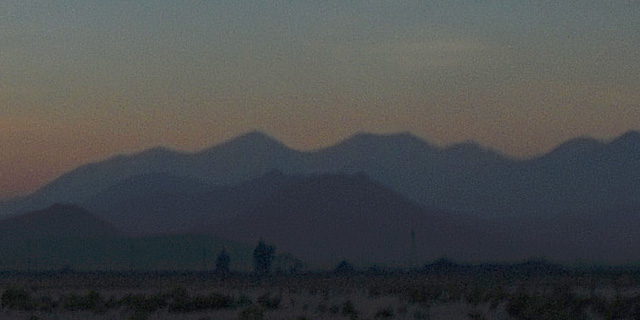
UPPER LEFT: A traffic sign near Salt Lake City warns that there will be heavy traffic after the 21 Aug. eclipse. Going north on the afternoon of 18 Aug., it took 3 hours to get through the SLC area (from Provo to Ogden) on I-15. After that, I can't imagine what the "heavy" traffic would be like. In my opinion, the traffic sped up way too quickly between log jams, and some drivers on the inner lanes didn't slow down for each log jam until the last possible second. I witnessed two near-collisions on inner lanes to my left, where people did not slow down soon enough and had to swerve into the MOV lane to keep from rear ending the car in front of them. Local radio reported about 5 accidents on I-15 that afternoon. UPPER RIGHT: Sinclair dinosaur at gas station near the I-15 exit for Logan, UT. Looks like this one has plenty to eat! BOTTOM: This 18 Aug. southern Idaho sunset shows that smoke from distant forest fires has become thick. The appearance of the smoke at sunset is remarkably similar to the way it looked during totality. Copyright 2017 Jeffrey R. Charles, All Rights Reserved. | |
|
The Eclipse Site
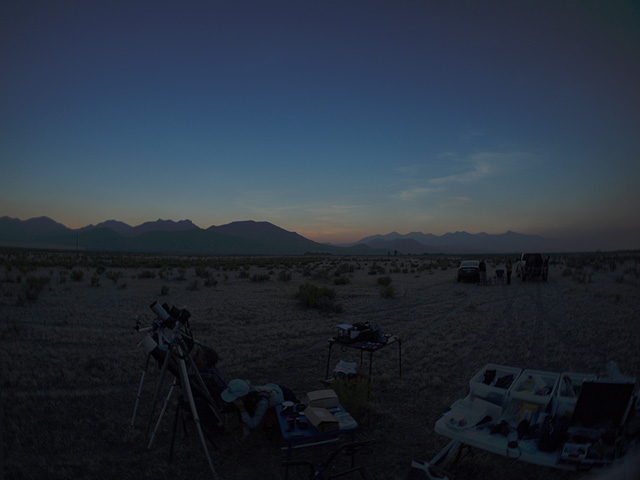
The 21 August 2017 eclipse was observed from a site about 11 kilometers southeast of the small incorporated city of Mackay, Idaho; specifically from a remote site on the north side of Houston Road, a little east of the intersection with 4080W. A remote site is desirable because it is free of buildings, trees, and other obstructions that could obscure views of the lunar umbra covering local mountains. I also prefer to be away from the jostling, whooping and hollering that many people do at eclipses. This is partly because the hollering seems less and less spontaneous with each eclipse. A site close to Mt. McCaleb and the alluvial fan below it was preferred in order to image the lunar umbra moving over them, but I did not get to come to Mackay as soon as planned and scout a site farther north. (Reasons for that are below). The owners of the Houston Road site were kind enough to let us use their land on short notice, and the site was perfect in all respects except the distance from Mt. McCaleb. Given the short time before the eclipse, I was not going to "look a gift lot in the gate."
The owners of the White Knob Motel and RV park where I stayed were particularly friendly and helpful. I am also grateful that both they and two guests at the motel moved equipment from my van to where my equipment was being set up several yards away on the morning of the eclipse. This saved a lot of time and energy because it kept me from having to move stuff around little by little on the seat of my walker. They also loaned me one of their lightweight folding tables to use beside my own table. I may not have acquired some of the images below without all of this kind assistance. | |
 |
|
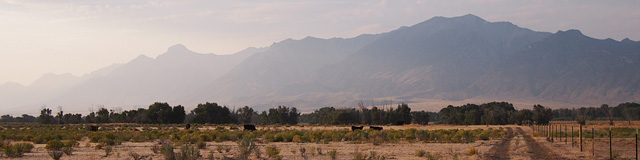
| Eclipse Site on Houston Road, Southeast of Mackay, Idaho. | |
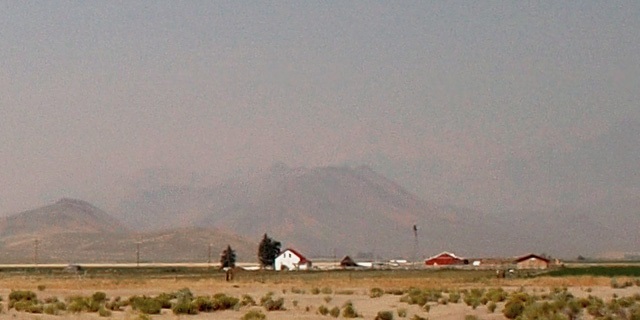
| This site on Houston Road (used by permission of its owners) provided a good view of area mountains two days before the eclipse, when the smoke was not as thick. Mt. McCaleb is in the distance toward the left. Other than the site owners, two of their guests, and my brother's family, the only others around us were the pictured cows. Approximate coordinates are: 43:51.5 N, 113:30.5 W. Copyright 2017 Jeffrey R. Charles, All Rights Reserved. | |
|
The Eclipse (pictures are in the eclipse photo sections that follow)
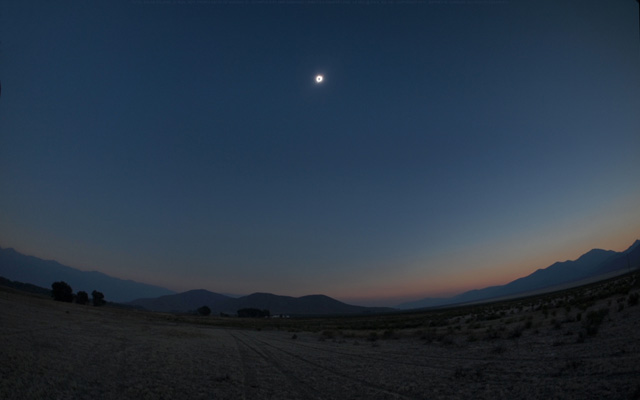
By the morning of the eclipse, considerable smoke from distant forest fires had drifted into the Lost River Valley. The smoke obscured many area mountains and the boundary of the lunar umbra in ways described below. Toward the northwest, Mt. McCaleb was almost completely obscured by smoke. Fortunately, the smoke did not significantly obscure the corona. Both before and after totality, smoke obscured many local mountains as well as all traces of the approaching lunar umbra. This meant that the failed 360 degree 11k resolution panoramas of totality would have had little scientific value, though they would have been interesting to look at. (Failed aspects are covered later.) However, some mountains within about 40 km were visible during totality. As the time of totality approached, the foreground began to "gray out" in the familiar way, with both contrast and color becoming more muted. I expected to see some trace the lunar umbra in the sky by at least two minutes before totality, but it never appeared. Instead, gradual darkening seemed to envelop the entire sky, with the exception of a 90 degree wide area low on the southeastern horizon near the solar azimuth. The area low in the southeast soon began to look somewhat yellow. The rest of the sky looked grayish blue, with the blue being a warmer shade than twilight blue. The 2017 total solar eclipse is the only eclipse I've observed at which there was no sense that the approaching umbra was coming from a certain direction. Instead, the sky appeared to darken fairly evenly in almost all directions just before totality. One exception was that the above noted lower part of the sky near the solar azimuth did not look quite as dark as the rest of the sky as totality drew near. Sky darkening from nearly all directions was also the impression of other area observers I spoke with. (Panoramic and all-sky images would have shown if it was actually like this at our site.) Videos from other regions show that this lack of directionality for sky darkening was not the case for sites relatively free of smoke. Even though the umbra was not obvious in the sky just before or just after totality, some traces of it were visible in other ways. Mountain ranges emerged from the smoke haze and became visible as the moon's shadow approached. This came about as the umbra covered the smoke (and reduced scattered sunlight) between the mountains and our site. Isolated examples of this effect are shown in the few wide angle images I was able to get. The boundary of the umbra was barely detectable in the sky during totality, but was very diffuse. The diffuse boundary of the umbra made its motion undetectable to the unaided eye. As the light level began rapidly dropping about a minute before second contact (the beginning of totality), harsh light from the thinning solar crescent, combined with weaker diffuse light that appeared to come mostly from low in the southeastern sky, began to appear slightly yellow-gold in color where it illuminated aluminum parts in my setup and lighter parts of the ground. The effect was slight, but I had not seen it at other eclipses. A hint of this color is in the first set of umbra sequence pictures in the "Wide Angle" section. The same color was not obvious just after totality. Soon, the sunlight dimmed at the expected accelerated pace, much like the dimming of lights in a theatre before movie. A few seconds before totality, yellow color was visible around more of horizon, but still mostly in the area near the solar azimuth. Before I knew it, the diamond ring was in progress, but there was very little glow in the sky around the last few beads of sunlight. I had expected more glow around the last bit of sunlight during the diamond ring effect because of the smoke. This was the first total eclipse at which I (unintentionally) observed Baily's beads for more than a fraction of a second. The glare around them was fairly dim, and most of the visible glare was in front of the moon, dimly reaching maybe 2/3 of the way to the center. The glare around the last beads of sunlight must have been dimmer than the inner corona, because corona was observable all the way down to maybe 1/10 of a lunar diameter from the beads. Pictures do not show it this way, since even a small amount of sunlight causes a lot of flare in pictures. As the last few beads of sunlight rapidly disappeared, totality began. Baily's beads are a dramatic sight, but are not really safe to look at. This is because the total amount of glare is not sufficient to make you reflexively look away, but the visible parts of the sun are just as bright as the equivalent area on an un-eclipsed sun. I did not intentionally look at the beads, and would not have looked at them as long as I did (2-3 seconds) if I had not been fatigued and sleep deprived. This condition left me a bit detached from both experiencing the eclipse and the risks associated with looking at Baily's beads. (Why I was fatigued and sleep deprived is covered later.) The beginning of totality was more dramatic than average because a wide extent of corona was visible even during even the last part of the diamond ring. Not sure why this was the case, unless maybe I was more dark adapted than usual at that point. Totality isn't described in the "exciting" way I described totality at previous eclipses, mostly because I was too fatigued and sleep deprived to experience it in a memorable way. My memory of the 2017 eclipse is fairly foggy and clinical. At second contact, the sky in the immediate area of totality was grayish cyan-blue with a slight warm yellow tinge, but not exactly what I'd call fully cyan or gray-green. This gave way to a grayish blue color in the same part of the sky several seconds later. The sky was not the deep twilight blue that I had seen at some other eclipses. I did not get to take notice of the horizon just then because both of my tracking mounts had unexpectedly stopped, as will be covered later. While the smoke scattered a great deal of light, it did not attenuate much, so we had a good view of the solar corona. To the naked eye, polar streamers were obvious and well defined out to nearly 2/3 of a solar diameter beyond the lunar limb, and faintly observable out to almost a full solar diameter. Some equatorial streamers faintly extended out to approximately two solar diameters. The corona seemed slightly brighter than usual. It also looked slightly blue in color, which was unusual. It was not actually blue, but just seemed like a slight cold shift from pure white. The slight color shift was noted most while focusing my gaze on prominent inner corona features on the east side of the sun, and the polar steamers on either side. At other eclipses, I thought the corona was best described as pearly white, where it had a purely neutral color or seemed to have a barely perceptible warm shift from pure white. The corona also appeared to have a little less radial gradient on the inner part of the polar streamers than some previous eclipses. This may be because I had not seen this much polar streamer extent in a naked eye view before. The sky was much more gray-blue than it was a dark blue during totality, so some effects (particuarly the apparent subtle color shift) were no doubt caused by the smoke and visual impressions from subtle contrasts in color. This has to be the case because the corona color between eclipses probably does not vary enough to actually see. Effects around the horizon were also unusual for an eclipse of only 2 minute duration in which the solar elevation angle is high. There was much more red, orange, and yellow around the horizon than I expected from such a small umbra cross section. Smoke from distant forest fires may have also played a role in this. The color was strongest in areas where the horizon was lower. I noticed that brighness of the horizon seemed about the same as the the dim red light from my 23 year old Cam-Lite appeared to be on the black shutter speed dial on my Nikon N2020 film camera. My own brief visual observation emphasized the south and east, but another observer said that "sunset colors" were visible around the entire horizon during totality. The ambient light level during totality was about a quarter f-stop brighter than it was even for the short duration 1995 eclipse in Thailand, which was surprising. I could almost read the shutter speed dials on my film cameras near the end of totality. Details about the light level are in the eclipse light curve section. All too soon, bright light from the solar photosphere appeared toward the top side of the dark moon, and totality was over.
Equipment More cameras were brought to the 2017 eclipse than I had used at any previous eclipse. This was partly because my medical situation might make it difficult or impossible to use very much equipment at a future eclipse, or perhaps even get to one. So, if I was going to use a lot of cameras at an eclipse, it probably had to happen in 2017. Many of the cameras had built-in interval timers or were otherwise envisioned to be at least partially automated. Therefore, using the cameras was not expected to be unduly difficult, based on my successful practice runs. In all, 25 cameras were brought to Idaho in order to to be available at the eclipse, but not all of them were set up. One reason for using so many cameras was to capture enough images, video, and data that I could gradually produce this document (with many times more content than you'll see below), an eclipse video, and even 11k resolution VR eclipse re-creations and simulations as I felt up to it. The 2017 eclipse was the first one at which I used digital cameras. Prior to the 2017 eclipse, my most recent total solar eclipse expedition had been way back in 1995, when digital cameras were rare. Relatively small digital cameras (mostly Micro 4/3 format) were used in 2017. This made it possible to mount several cameras on each tripod. This reduced the weight and mechanical complexity of the equipment, though it did not reduce operational complexity. A home brew interval timer that fires shutters on up to 12 cameras was envisioned, but I could only finish 4 of its 12 channels due to the weeks-long health insurance acquisition nightmare noted below. Most of the Micro 4/3 (MFT) cameras were older (and thus more affordable) models. Nearly all lenses were acquired used, to keep the setup cost more reasonable. Only about half of the utilized lenses were made specifically for Micro 4/3, and all but one of these were manual focus only. (The one lens that was not manual focus proved to be problematic in low light.) Other MFT cameras were used with various 35mm format telephoto lenses. As with all eclipses I've observed since 1991, high resolution wide angle and 360 degree VR images were emphasized over photographing the corona, though a few cameras were used for the corona. Film cameras were also in the setup to take corona images that were free of digital artifacts, and comparable to film images of previous eclipses. (See Appendix B for details about digital artifacts.) I was no longer physically able to machine items such as custom camera brackets for medical reasons, but a neighbor kindly made several items. (Thanks Justin!)
A good part of the conventional camera gear found a new home after the eclipse. It did not make sense to hang on to so much stuff until the next domestic eclipse in 2024, especially when no other subject required using very many cameras. The weight and volume of equipment was also too high to even think of transporting it to a distant eclipse. Certain items such as the custom metal plates were retained because they worked so well. The multi camera interval timer will also be handy.
| |
 |
|
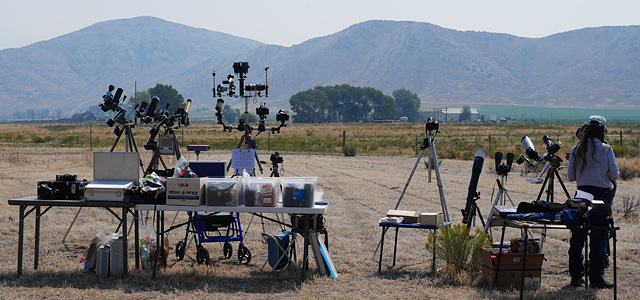
| Equipment at Eclipse Site, Southeast of Mackay, Idaho. | |
| Equipment set up for the 2017 eclipse, at a site about 11km southeast of Mackay, ID. My setup is on the left, and equipment used by my brother and his wife is on the right. Equipment details are noted throughout this document, but most is described in Appendix A, which was written mostly before the eclipse. Copyright 2017 Jeffrey R. Charles, All Rights Reserved. | |
|
Objectives
The continuing goal of wide angle and panoramic imaging I've done at total solar eclipses since 1991 has been to acquire images and data that are sufficient to facilitate accurate simulation of the entire 360 degree experience of observing a total solar eclipse from different areas, and under a variety of conditions. One emphasis is to measure the visible projection altitudes of the lunar umbra in the atmosphere at different latitudes, as opposed to the VR eclipse images themselves being the only objective. Obtaining panoramas for this purpose requires manually changing the camera shutter speeds at appropriate times. By 1995, I had gathered enough solar eclipse data to develop means to forecast certain local effects of the lunar umbra (moon's shadow) with reasonable accuracy, but there were still a few details I wanted to document at another eclipse before putting resources into implementing high precision (8k to 16k resolution) eclipse re-creations or simulations. For the 2017 eclipse, 12 wide angle cameras were transported to the eclipse, but only 9 were set up because the battery in one had failed to take a charge and I was too fatigued to set up two others. Two of the deployed wide angle cameras were on the motorized panoramic platform I built for the 1991 eclipse, then automated for the 1995 eclipse. A few more cameras had fisheye lenses pointed in various directions. Another was an all-sky camera (not deployed due to fatigue), one had a 14mm rectilinear lens, and two were VR cameras (Entaniya Entapano 2 and Ricoh Theta S, neither of which were deployed, again due to fatigue). Additional cameras were set up to image the corona and record light meter readings. The intent was to acquire a variety of images that show many different aspects of the 2017 total solar eclipse. Many more aspects than what a person could observe or note in only two minutes. One additional thing I wanted to try in 2017 was to use an H-Alpha filter to image the lunar limb if it passed over a prominence shortly before first contact on the photosphere. Preparation Because I fatigue easily, the eclipse preparation, expedition itinerary, and even details of the eclipse procedure, were all carefully planned months in advance. This was done in order to prevent exacerbation of my condition, especially during the critical time shortly before the eclipse and during the eclipse. To avoid over-exertion and maintain both my physical therapy and 3-4 days per week of doctor advised bed rest, the design, acquisition, assembly, and testing of equipment not already on hand in 2016 was spread out over almost an entire year. Departure was set for 9 days before the 2017 eclipse, in order to allow for short driving days and plenty of time for rest. Preparing for the 2017 eclipse was a major undertaking for someone in my condition, as was writing this web page. However, I just approached it the same way I approached my day job in healthier times. Namely, break a project down into "bite size chunks" that can be worked off little by little, even if it takes up to a year or more to finish. This makes for sub-tasks of manageable size. Eventually (Lord willing), a day arrives when you can list the remaining sub-tasks on one page. Then a day arrives when remaining sub-tasks can be counted on one hand, then a day arrives when all of the sub-tasks are done. For eclipse lens selection, I was able to leverage some of my own independent lens test results from as far back as the 1990's in rounding up lens performance data, then use that to evaluate eclipse lenses. Setbacks: The Giant Monkey Wrench (a "health" insurance company that can make you sick!) Of the 5 total solar eclipses I've observed, external circumstances other than the weather adversely affected results for only two of them. The first was a solo trip in 1994, when influential locals interfered with my itinerary in a major way after I arrived in the destination country. The second was the 2017 eclipse, but the cause was very different, in that everything adversely impacting the expedition (sans equipment failure) happened before I even left home. There was no local interference at the destination. Quite the opposite, in that the people of Idaho were amazingly friendly and helpful. The 2017 monkey wrench was a big one that lasted over a month. In 2017, several weeks of eclipse preparation and rest time were lost to a weeks-long health insurance company issue shortly before the eclipse. The company was trying to avoid insuring me (deliberately or by incompetence), even though that's against my State's laws on the matter. This huge high stress distraction and resulting loss of time and rest changed everything by exacerbating my condition, as will be seen in my meager results. Health insurance may seem unrelated to eclipses, but it had everything to do with the outcome of my 2017 eclipse expedition, and the state of my health for months. The health insurance company actions proved to be the complete undoing of a carefully planned schedule that had been in place for months, causing a 5-day delay in departure for the eclipse, a compressed (by 2:1) travel schedule, and very little time for rest or on-site preparation before the eclipse. This in turn resulted in a lot of equipment sitting idle during totality, because I'd become too fatigued to set up and operate it the way I had during numerous successful practice runs. As impressive as total solar eclipses are, most things in life are obviously more important. Health insurance falls into this category, so it had to be prioritized over anything related to the eclipse. It was also a great deal more stressful than anything eclipse related, since health insurance isn't exactly optional these days. These events are why the 2017 eclipse is called "the rough one" in the journal title. The experience also showed first hand that the "free market" does NOT work for an inclusive insurance based health care system. Details about this and certain equipment failures are in Appendix F: Summary of 2017 Eclipse Failures (what went wrong, lessons learned, etc.) 'Nuff said. Results (Not what I'd hoped for, based on many successful practice runs.) Unfortunately, owing to being more drained than at any time in the last two years from over five weeks of health insurance nonsense, my eclipse results were considerably less (about 4 times less) than what was planned. Comparatively meager results I did get are listed here and shown below:
* About 70 percent of the eclipse in a single sequence image. For the first time since 1991, there are zero 360 degree panoramas of totality and zero still images of the corona. Some corona still images were derived from my video, but the video lacks inner corona detail. Putting this web page together from partial results and video frames took a lot longer than what would have been needed to simply compile a good, complete, image and data set. In the end, no amount of preparation could overcome losing 5 weeks of time to the high stress insurance nightmare. It all boils down to my condition after the insurance nightmare. My resulting condition also made it impossible to assist other people in preparing for the eclipse in the ways I usually have. Repercussions went far beyond the eclipse itself, in that I had to spend about half of the entire trip in bed, followed by over a month of doctor ordered rest when I got home. More details about the eclipse imaging failures are in Appendix F: Summary of 2017 Eclipse Failures (what went wrong, lessons learned, etc.) Appendix F covers equipment failures as well as medical causes, with emphasis on the former. Some relatively specific combinations of hardware and circumstances contributed to a few of the more significant imaging failures. For example, my Olympus E-P3 camera (a model I later found has unstable focus mode settings if switching in and out of iAUTO mode) with an Olympus 8mm f/1.8 AF fisheye lens (which lacks an MF switch), proved to be a fatal combination as the light level fell just before totality. Just about any other combination of camera and lens would have worked fine. In another case, brand new batteries (but untested, so I was unaware of flaw) did not perform as they should. The tracking mount powered by them ran fine at their output voltage - except when the ambient temperature was what it was at the eclipse! Both tracking mounts also failed to track as long as indicated in their specifications or related product reviews. In total, the number of imaging failures (caused mostly by the insurance nonsense), combined with my reduced perception of the eclipse (due to fatigue and sleep deprivation), caused both the data and my recollection of the eclipse to be insufficient to implement accurate 360 degree simulations of total solar eclipses for planetariums and other venues. Owing to the high cost of hardware and software needed to implement 8k to 16k eclipse simulations, and the considerable effort (given my condtion) that would be involved, there is little point in pursuing high precision VR eclipse re-creations or simulations when the data is insufficient to provide reasonable accuracy. It also does not make sense to wait 7 years for another shot at acquiring more eclipse data, so many aspects of this long duration (decades-long) project will probably have to be abandoned. The light intensity curves are sufficient for eclipse simulations, but there is not enough data to reliably simulate the appearance of the lunar umbra in the sky under a very wide variety of conditions, particularly for high latitudes. However, as noted above, the vast majority of things in life are obviously more important than eclipses, and plenty of other things in life are a better use of time, particularly when handicapped. Just in case I do get to see another total solar eclipse, a simpler eclipse setup was developed in a short time. It is made mostly from items used in 2017, and allows for getting older, and perhaps being even more susceptible to health crashes from insurance nonsense and such. It was developed early so I would not spend too much time or energy on it, and so I would not inadvertently sell off items that could be useful in a smaller eclipse setup while downsizing. Details are in Appendix H: New Eclipse Setup Incorporating Lessons Learned. It is important to repeat that no one in the Mackay area had anything to do with the eclipse related problems. Quite the opposite. People there were very helpful. Everything contributing to the problems I experienced at the eclipse had been set in motion by the health insurance issues before I even left home. It was all ripple effects from inadequately regulated aspects of health insurance. Comments: Some of this material was written months in advance of the eclipse, then edited in order to shorten the time between the eclipse and when it could be published. It is envisioned that most appendices in this document (which were written before the eclipse and used for my own reference during eclipse preparations) will be eventually recast as a separate eclipse preparation resource. Eclipse preparation appendices are retained for now, in the event they are useful to other eclipse chasers, or entertaining for other "gadgeteers." | |
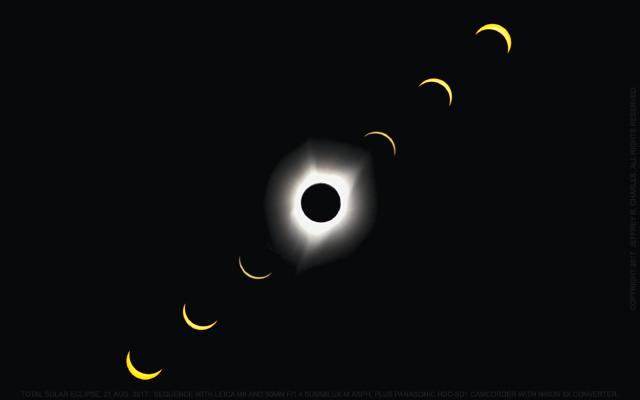
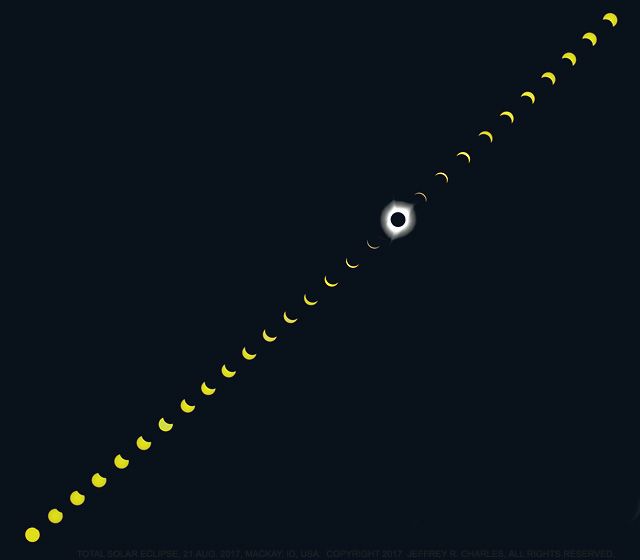
Sequence Image of 2017 Solar Eclipse (Partial and Total Phases)
| |
| Sequence image of partial and total phases of the 21 August 2017 total solar eclipse. | |
|
Most partial eclipse sequence images were taken with Leica M9 camera and 50mm f/1.4 Summilux-M ASPH lens, plus a Seymour Solar threaded glass solar filter stacked with Hoya X1 dark green filter, to get a yellow (rather than orange) solar image. Exposures were 1/125 sec. at f/6.8, ISO 200. Since I missed taking a few sequence images with the Leica, gaps were filled in with partial eclipse images taken with a Panasonic GX7 and a Leica 350mm f/4.8 Telyt-R lens working at f/6.8. The totality image is a composite of video frames with a Panasonic HDC-SD1 camcorder and Nikon TC-E3ED 3x converter lens, plus video frames from an Olympus E-P3 camera and a Leica 250mm f/4 Telyt-R lens working at f/5.6. The whole eclipse is not imaged because, due to fatigue, I oriented the camera differently than planned. I also intended to take the totality image with the Leica, but (you guessed it) I was too fatigued to remove the solar filter before totality. (Didn't forget to do it, but was just too tired and slow to remove it.) The sky color is similar to the sky during totality, though maybe a little darker and more saturated than the real thing. Copyright 2017 Jeffrey R. Charles, All Rights Reserved. | |
| Obtaining a properly registered solar eclipse sequence image with a modern digital camera can be more difficult than with an older digital camera or a film camera. The problem arises partly from the freedom of motion that sensors in some cameras with in-camera mechanical image stabilization may have. Accurate repeatability of the image sensor position is not guaranteed after cycling the camera power, even if image stabilization is turned off.
The solution was to use a digital camera without internal image stabilization, in this case, a Leica M9. The Leica image sensor does not move with respect to the camera, but the shutter must be fired with a mechanical cable release. (There is no electrical remote port.) Lack of an electronic remote makes automation of sequence images less practical, but at least the images are properly registered. A good sequence image is something I'd long wanted to acquire at a total solar eclipse. The last time I acquired a sequence image at a total eclipse was back in 1979, when I took one with a 4" x 5" film camera. It was OK for a first attempt, but the 1979 partial phase shots were taken about 7 minutes apart, and the background photo was not taken during totality. I had acquired sequences of a few partial solar eclipses since then, but not at another total eclipse until 2017.
I had practiced setting up for the above sequence and had even written down the angle at which the camera should be tilted to capture the full scope of all partial phases in one shot. However, due to being so fatigued on eclipse day, I mixed up right and left, and tilted the camera the opposite direction it should have been tilted. Therefore, the last several partial eclipse shots are not in the frame. The missing solar images above the top could be "added on" from my individual partial eclipse images, but that would be "cheating", so I may not bother doing it. | |
Return to Local Table of Contents
2017 Total Solar Eclipse Images: Partial Phases, Baily's Beads and Corona:
 |
|
| Total Solar Eclipse of 21 Aug. 2017. Early Partial Phases. | |
|
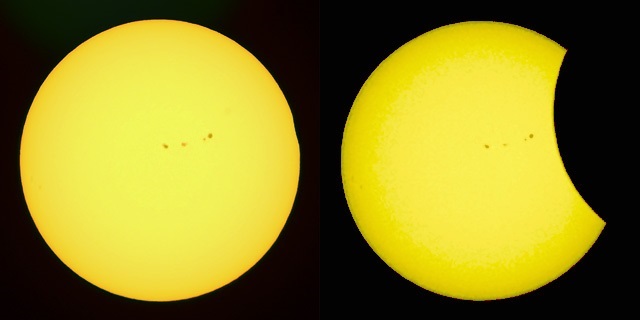
LEFT: The moon takes its first bite out of the sun, just barely covering the limb at the 2:30 position. The camera was on a tracking mount, and celestial north is toward the top. Panasonic GX7 camera and Leica 350mm f/4.8 Telyt-R lens at f/6.8, with a solar filter stacked with a green filter. Exposure is 1/160 sec., ISO 200. So far, so good. But it wasn't going to last. RIGHT: The moon is about to cover some sunspots as the eclipse progresses. Same camera and lens as for the left image, but at 1/125 sec. The 1/125 second speed overexposed the sun a little (no idea why I used that speed for this shot), so I had to use more of the noisy blue image data to adequately show the sunspots. Copyright 2017 Jeffrey R. Charles, All Rights Reserved. | |
 |
|
| Total Solar Eclipse of 21 Aug. 2017. Later Partial Phases. | |
|
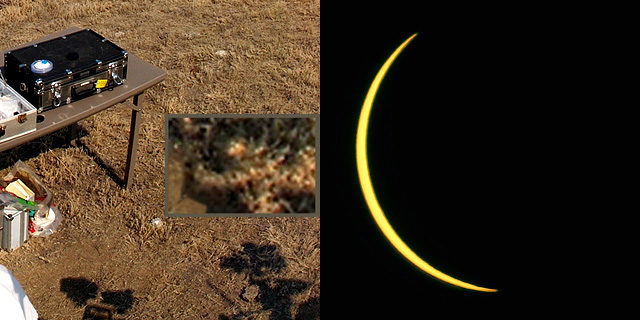
LEFT: By about 16 minutes before totality, most of the sun was covered. The time corresponds to one of the 360 degree panoramas below, in which a relatively large and unexpected image of the crescent sun appeared on the ground. The eclipse image is near the lower right corner of this picture, and a higher contrast enlargement is in the inset at center right. The 10 to 12 cm solar image was too large to be caused by a small hole between cameras on the tripods. After some head scratching following the eclipse trip, I found that the solar image was caused by a reflection from a slightly convex part of the chrome fitting at the upper right corner of the black camera case on the table. The bright spot in what would be near the center of the solar image (if it was not a crescent) is from a flat part of the same chrome fitting. The same size solar image was later reproduced at the same distance by reflecting sunlight from the chrome corner of the case. The convex area must be of very limited size to provide an image this sharp. RIGHT: Getting down to the wire. Only 3 minutes until totality. This photo was taken about when the tracking mount stopped tracking, but I did not know it had stopped until later. By second contact, the solar image had drifted well off center, and there was not enough time to re-point this camera and one other corona still image camera during totality. 1/125 Sec. at f/6.8, ISO 200, with solar filter. Copyright 2017 Jeffrey R. Charles, All Rights Reserved. | |
 |
|
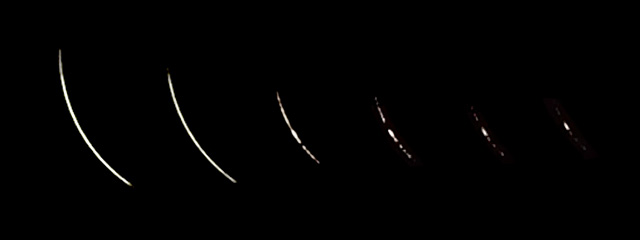
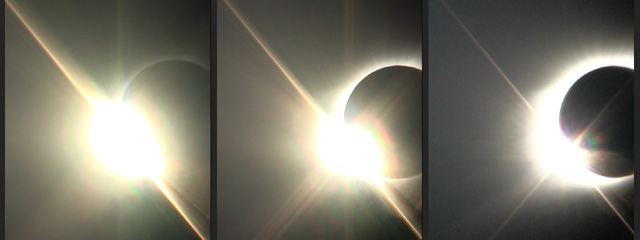
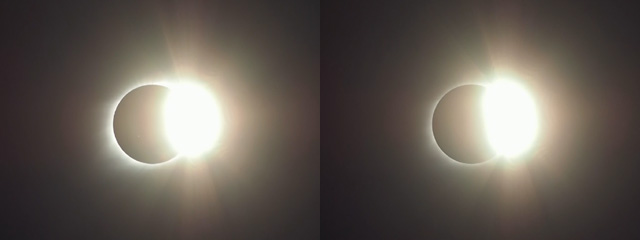
| Total Solar Eclipse of 21 Aug. 2017. Baily's Beads at 2nd Contact, with Solar Filter. | |
|
These images of Baily's Beads just before second contact were taken through a solar filter. The 6 images here are from video frames taken with Micro 4/3 cameras and 250mm and 500mm lenses, but are over-exposed a little. This makes them easier to see, but loses some of the actual razor thin appearance. The time between the third image from the left and the last image (on the right) was about 4 seconds. These images were incidentally acquired because I was not able to remove the solar filter as soon as planned, but proved useful anyway. The next group of images show the appearance of the eclipse in video frames from the same times as images 2, 3, and 6, but without a solar filter. The time gap between photos 2 and 3 was caused by the camera being jarred after I knocked a clock off of another tripod, then (of all places) the clock hit a tripod leg for this camera as it fell. Copyright 2017 Jeffrey R. Charles, All Rights Reserved. | |
 |
|
| Total Solar Eclipse of 21 Aug. 2017. Baily's Beads at 2nd Contact, without Filter. | |
|
These images of Baily's Beads just before second contact were taken without a solar filter, and are also from video frames. Photos here show how bright a tiny sliver of the solar photosphere can be. The glare is exaggerated by flare in the camcorder zoom lens. From left to right, these images were taken at the same time as images 2, 3, and 6 in the above sequence. The LEFT image is 15 seconds before totality. Long diagonal lines are diffraction spikes from the asymmetrical camcorder lens iris. It is extremely dangerous to look at the sun without a proper filter at this time, because there is not enough glare to make you reflexively look away, yet the sliver of sun is just as bright on your retina as the equivalent area of the un-eclipsed sun. The CENTER image is 5-6 seconds before totality. Uneven diffraction streaks to the lower left of the glare reveal some of the bead structure. The RIGHT image is less than 2 seconds before totality. The corona looks brighter here because the camcorder auto exposure brightens the picture when more of the sun is covered. (The corona obviously does not get brighter during an eclipse. It just becomes visible as light from the bright solar photosphere is blocked by the moon.) The entire corona is not shown because the tracking mount had stopped tracking a few minutes earlier. It had only 107 minutes of tracking time rather than the specified 2 hours. After being informed of this after the eclipse, the manufacturer changed the specification in their user manual to match the actual 107 minute tracking time. | |
 |
|
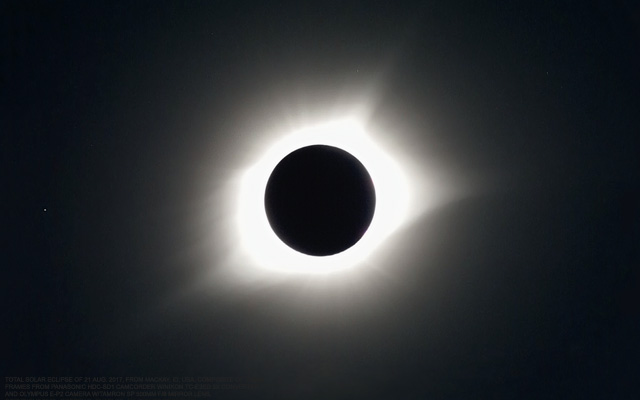
| Total Solar Eclipse, 21 Aug. 2017. Composite of video frames from two cameras. | |
| Totality 2017. Composite from video frames with a Panasonic HDC-SD1 camcorder and Nikon TC-E3ED 3x converter lens, plus video frames from an Olympus E-P3 camera and Leica 250mm f/4 Telyt-R lens working at f/5.6. The white dot on the left is the star Regulus. A digital radial gradient mask was used to recover some outer corona streamer detail, but even this could not recover inner corona detail where the video images are saturated. Some inner corona on the lower left side may later be recoverable from 3rd contact diamond ring images below. This image is about what an unprocessed 1 second exposure at f/8 would look like at ISO 100. (Better corona images were acquired for my 1994 eclipse web page.) Copyright 2017 Jeffrey R. Charles, All Rights Reserved.
| |
 |
|
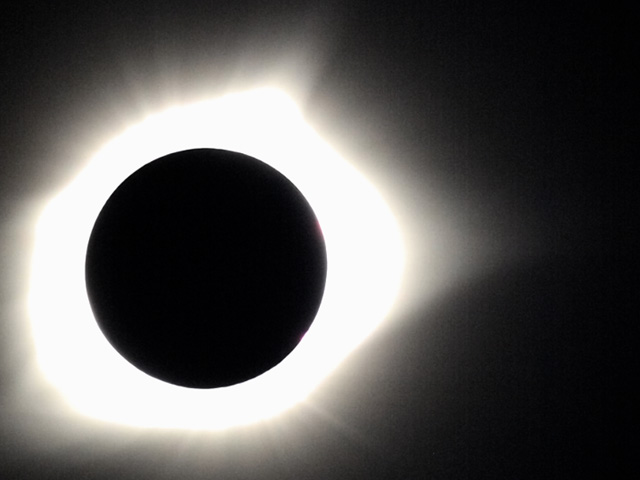
| Total Solar Eclipse, 21 Aug. 2017. Single (off-center) video frame with 500mm lens. | |
| This seriously off-center image of totality shows a little more polar streamer detail in the part that is not over-exposed or cut off by the edge of the frame. The tracker stopped just before totality, and my rushed attempt to get the eclipse back in the frame did not center it very well. Cropped video frame from Olympus E-P3 camera and 500mm f/8 Tamron mirror lens. Camera was (unintentionally) on auto exposure. (It should have been manually set on 1/320 second, to image prominences and the inner corona.) Copyright 2017 Jeffrey R. Charles, All Rights Reserved.
| |
 |
|
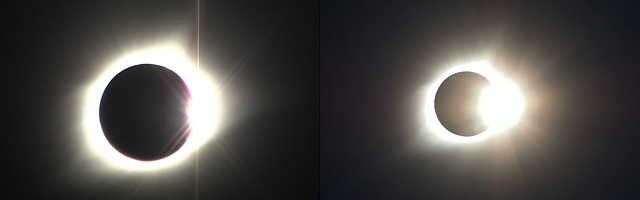
| Total Solar Eclipse of 21 Aug. 2017. Diamond Ring at Third Contact | |
| Diamond ring at the end of totality. Images are from the same video cameras used for totality, except that these are not composites. On the LEFT, the diamond ring is just starting. The RIGHT image shows that even 5 seconds after third contact, plenty of corona is still visible beyond the left side of the moon. It has a little less glare than the diamond ring image taken just before totality because it is taken with a 250mm lens rather than the more complex zoom lens of a camcorder. At this point, it would NOT be safe to look at the eclipse without a solar filter. Copyright 2017 Jeffrey R. Charles, All Rights Reserved.
| |
 |
|
| Total Solar Eclipse of 21 Aug. 2017. Persistence of Lunar Silhouette after Third Contact. | |
| Continuation of the diamond ring effect. LEFT: By 15 seconds after totality, the auto gain in the camcorder has clamped down enough that some features in the inner corona toward the left are faintly visible, including the base of the eastern equatorial streamer. The red cast that runs in orthogonal directions from the highlight (and not as much toward the image corners) is a digital camera artifact noted in Appendix B. RIGHT: By 38 seconds after totality the silhouette of the moon is still clearly visible, but the corona has less observable structure. There is more elongation in the glare on the right, indicating that the length of the exposed solar crescent is growing. At this point, about 0.5 percent of the solar photosphere is exposed. The actual appearance is fascinating, but not safe to look at. In reality, the crescent sun is well defined, and the glare is much dimmer. At previous eclipses, I've imaged the outline of the moon against the corona up to nearly 2 minutes before and after totality, and (carefully, with specially baffled optics) observed it for even longer under magnification that was sufficient to put the exposed crescent of solar photosphere well outside the field of view. I was going to try for an even longer time before and after totality at this eclipse, but was too fatigued to attempt it, in spite of having prepared for it. Extensive precautions and appropriate optics with custom light baffles are required for this, to keep from frying your eyes or the microscopic color filters on a camera's sensor pixels. Not something to attempt unless at the top of one's game, as it were. Copyright 2017 Jeffrey R. Charles, All Rights Reserved. | |
 |
|
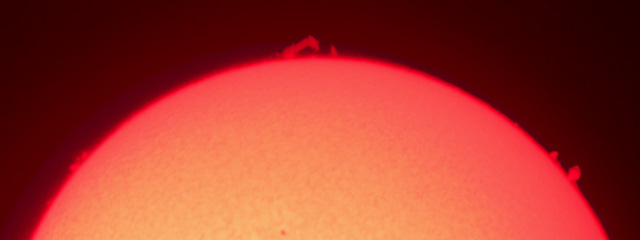
| Prominences on Sun a few hours after totality, imaged with (pre-Meade) Coronado PST. | |
| Since I didn't get any still pictures of prominences during totality, I set up a Coronado PST after getting a few hours of rest and imaged these prominences. The prominences here are the same ones that were visible during totality, but the shapes have changed in the 2-3/4 hours since then. The plan had been to use the PST to image the lunar limb covering promiences immediately before 1st contact or after 4th contact, but I was too fatigued to acquire the sun in the PST before or during the eclipse. Based on the position of the center prominence, it is likely that the lunar limb would have been visible in front of it before 1st contact. For this picture, optics from an Apogee Barlow lens were used to provide the back focus needed for a micro 4/3 camera on the PST. Exposure is 1/2 sec at f/17 (680mm effective focal length with the Barlow lens), ISO 125. Copyright 2017 Jeffrey R. Charles, All Rights Reserved.
| |
| The 2017 eclipse was near the time of sunspot minimum, so the corona extended considerably farther from the solar equatorial regions than it did from polar areas. However, elongation of the corona was not as extreme as it was in 1995. The 2017 corona had more similarity to the 1994 corona.
Unique aspects of the 2017 corona were that it appeared to be a little brighter than usual, and the base of lower (i.e. eastern) equatorial streamer had an eye catching amount of detail. None of this inner streamer detail is visible in the above photos from my overexposed video frames, however. | |
Return to Local Table of Contents
| The solar corona is the most often noted aspect of a total solar eclipse, but the visible appearance of the lunar umbra (moon's shadow) as it is projected onto the atmosphere is also an impressive sight. Smoke from local fires obscured a good view of the umbra boundary from our 2017 location before and after totality, and the boundary was very diffuse during totality.
For comparison, a few umbra images from the 1979 total solar eclipse are shown first. Thin clouds acted like a "projection screen" in 1979, and made the umbra boundary very obvious, but the clouds also obscured the outer corona. (More 1979 umbra images are in my 1979 eclipse web page.)
The 2017 umbra was relatively small (about 105 km wide) where it intercepted the earth's surface at our eclipse site, so even if there had been no smoke, its appearance would not have been as dramatic as the umbra was at the 1979, 1991, and 1994 eclipses. While the umbra boundary was not visible in the sky from our 2017 site, the location offered a view of mountain ranges to the north, east, and west that were engulfed by the lunar umbra as it raced over us at about 1,500 miles (2,400 km) per hour. | |
 |
 |
| Wide angle pictures of the 26 Feb. 1979 total solar eclipse, for comparison to 2017. | |
| LEFT: The umbra approaches our 1979 eclipse site, 65 seconds before totality. This 130 degree wide (180 degree diagonal) fisheye image was taken toward the west on ASA (now ISO) 100 print film, with a Minolta SRT 101 film camera and a Minolta 16 mm f/2.8 Rokkor-X full frame fisheye lens. The exposure is 1/15 second at f/4. RIGHT: The round edge of the umbra is obvious as it is projected onto thin clouds in this 1979 image, taken 13 seconds after the end of totality with a 16 mm fisheye lens. Exposure is 1/15 second at f/4 on ISO 100 film. Color beyond the umbra is fairly orange because the line of sight through the relatively wide local umbra cross section is fairly long. The same atmospheric effects that cause warm colors during a sunrise or sunset also contribute to the warm colors seen near the horizon during a total solar eclipse. This is a completely unprocessed image, scanned directly from a straight machine print. Due to its large angular size, the umbra was not obvious to the naked eye after totality, though looking through a fisheye "door peeper" would undoubtedly provide a clear view similar to this picture. I brought a door peeper to most subsequent eclipses. These images Copyright © 1979 (Registered Copyright 1998, shortly after first publication of my 1979 eclipse web page) Jeffrey R. Charles. All Rights Reserved. | |
| Wide angle images of the 21 Aug. 2017 total solar eclipse. | |
 |
|
| Photo of Lunar Umbra During Last Half of Totality, 21 Aug. 2017 (160 Degree FOV) | |
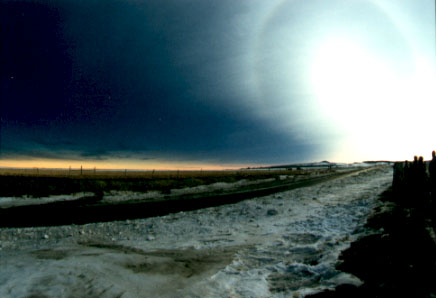
| The combination of smoke and a relatively small umbra cross section cause the umbral boundary to be poorly defined in the sky. Unlike at other eclipses, there was no sense that the umbra was approaching from any given direction in the sky, though the umbra was visible in the sense that it covered smoke and revealed nearby mountain ranges. Most of the mountains were hard to see because of the smoke until totality, but these became visible while backlit by light from outside the umbra during totality. Just above the horizon, light scattered into the umbra through the smoke has a stronger yellow-orange color than is normally seen when the umbra cross section is this small. Olympus E-P1 camera and Samyang 7.5mm f/3.5 fisheye lens. 1/2 second at f/4.8, ISO 100. A video framed like this would have been taken if my camera with an Olympus 8mm f/1.8 fisheye lens had not put itself into S-AF mode. This and other images Copyright © 2017 Jeffrey R. Charles, All Rights Reserved.
| |
| |
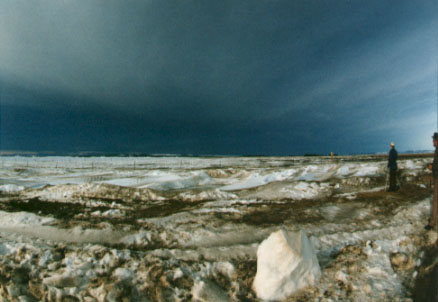
| Wide Angle View to the West-Southwest During Totality, 21 Aug. 2017. | |
| In this view to the west during totality, mountains that were formerly obscured by smoke are silhouetted against sunlight that is scattered toward us from beyond the trailing edge of the umbra. The right side of the photo is darker because it corresponds to a more distant part of the umbra boundary, so more smoke in the line of sight that is in shadow. The foreground has been lightened a little to show other observers. It looks like an ordinary sunset, but it is the middle of the day! Olympus E-P2 camera and Samyang 7.5mm f/3.5 fisheye lens. 1/2 second at f/4.8, ISO 100. Copyright © 2017 Jeffrey R. Charles, All Rights Reserved. | |
 |
|
| Wide Angle sequence showing lunar umbra cover a mountain range to the east. | |
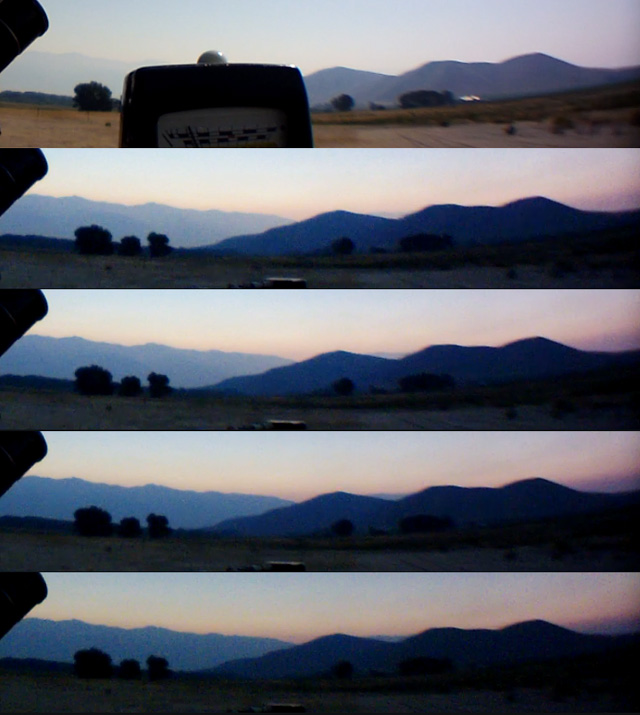
| These images are taken from video of a light meter that provided some data for the light curve on this web page, because the pre-focused camera intended for imaging the pictured area had put itself in S-AF mode just before totality, started hunting for focus, and would not take a picture. Then, manual focus would not work to restore focus for a video. (In tests after eclipse, this flaw was reliably repeated in all 3 of my E-P3 cameras.) These images are crops of video frames from a Pentax Q camera and compact generic 2.7mm f/2.5 C-mount wide angle lens. * In the TOP image, there are less than 30 seconds to go before totality, and the light level is dropping fast. Video of the light meter in the foreground showed that the meter needle was moving fast enough to see it move in real time. The foreground has taken on a slight yellow tinge (exaggerated by the camera here), possibly because a greater percentage of the ambient light is being scattered through smoke farther outside the umbra. The same color was not present just after totality. Darkening toward the right is from vignetting by the lens, not any effect of the umbra. * In the SECOND image, totality has just begun and the umbra has already covered the nearby bluff to the right, and has just reached the northern base of the more distant mountain range to the left. Haze from smoke almost completely obscured the distant mountain range until the umbra approached it. * The THIRD image shows the diffuse boundary of the umbra has moved a good part of the way over the mountain range. * The FOURTH image shows the mountain range is almost completely covered by the umbra. * The FIFTH image was taken after the umbra covered the entire mountain range, only a few seconds after the beginning of totality. The foreground has become a little darker as well. The only way I happened to get video of the ground during totality is that the ground and some sky were in the background of my video of a light meter. Copyright 2017 Jeffrey R. Charles. All Rights Reserved. | |
 |
|
| Wide Angle sequence showing lunar umbra uncover a mountain range to the east. | |
| These images are also taken from video of a light meter that provided some data for the light curve on this web page, but after the meter was dropped (and saved by a safety wire). * In the TOP image, it is 30 seconds before the end of totality and the foreground is still fairly dark. * The SECOND image was taken one second before the end of totality. The foreground has already brightened considerably. * The THIRD image is 9 seconds after totality. The umbra has uncovered the foreground and nearby bluff, but the mountain range on the left is still in shadow. Some haze has returned, which makes the shaded mountains look brighter. * The FOURTH image is taken 16 seconds after the end of totality. By now, the umbra has mostly uncovered the mountain range to the left. This happened fairly suddenly. * The FIFTH image is only 33 seconds after totality. The mountain range (and smoke filled air between the mountains and our site) are back in sunlight. The umbra no longer has much local effect, so the smoke haze has returned and is almost as strong as it was before the eclipse, obscuring the mountains. Copyright 2017 Jeffrey R. Charles. All Rights Reserved. | |
| Unique aspects of the 2017 umbra "light show" were mainly that the umbra was almost undetectable in the sky before and after totality, owing to the presence of smoke from distant fires. Unlike any other total eclipse I had seen, there was no sense that the darkness was coming from a given direction, though one observer did have the impression that darkness seemed to come down from near the zenith just before totality. If looking toward the solar azimuth, this impression would match the actual motion of the leading edge of the umbra.
Normally, the sky is notably darker in the direction the umbra is coming from, particularly if its azimuth is almost opposite that of the sun. However, it is not unusual for an umbra with a "small" local cross section (like the 2017 umbra) to be hard to see when near the same azimuth as the sun, as was the case just after totality. | |
Return to Local Table of Contents
360 Degree Panoramic Images of 2017 Total Solar Eclipse Site (not during totality):
(Health Issues and Equipment Anomalies Prevented Capturing VR Images of Totality)
| After seeing the dramatic appearance of the lunar umbra at the 26 Feb. 1979 total solar eclipse, I have taken 360 degree panoramic images at all subsequent total solar eclipses I had the opportunity to see. All-sky photos were also taken at some of eclipses. Combined with the panoramas, these provided nearly full sphere images.
I began taking 360 degree eclipse panoramas in 1991 because "imaging everything" was the best way to capture rare and unusual sights that can only happen during a total solar eclipse. Later, the emphasis of panoramic and all-sky imaging was to image the visible boundary of the lunar umbra and use this to calculate the altitudes in the atmosphere at which the umbra boundary is most prominent. This in turn can be used to forecast the appearance of the umbra at future eclipses. It was envisioned that the 2017 eclipse expedition would yield more high resolution (11k width) panoramas taken during totality than all of my previous eclipse panoramas combined. Specifically, one panorama every 9 seconds, for a total of 52 panoramas, at least 13 of which would be during totality. It was also envisioned that using two cameras at once would reduce "time distortion" in each panorama from the usual 6 to 14 seconds down to only 4.5 seconds. The process was automated except for manually changing the camera shutter speeds at appropriate times. Unfortunately, owing to health issues caused by the weeks long health insurance company nightmare just before the eclipse trip (and the resulting compressed travel schedule that added to a severe lack of rest, sleep, and preparation time), I was not in good enough shape to notice that cameras on the panoramic platform had turned themselves off while I was dealing with an equipment failure several minutes before totality. My procedure called for manually taking panoramas every 3 or 4 minutes over a short time prior to starting the automated panoramic sequence (partly to keep the cameras from turning themselves off), and for regularly checking camera status, but many steps were missed due to extreme fatigue.
So, the panoramic sequence was started on schedule, and the panoramic platform spun as it should. The camera relay coils also energized when they should, but the cameras had turned themselves off a few minutes earlier, so nothing happened. Thus, for the first time since I began taking 360 degree eclipse panoramas some 26 years before, there were zero 360 degree panoramas of totality. And it was all ultimately because the "free market" does not work for an inclusive insurance based health care system.
|
|
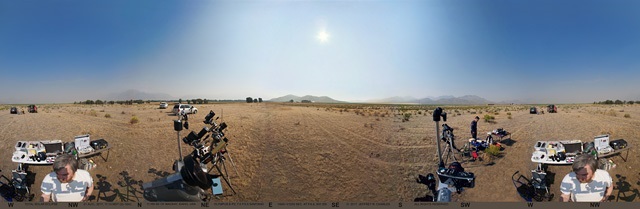
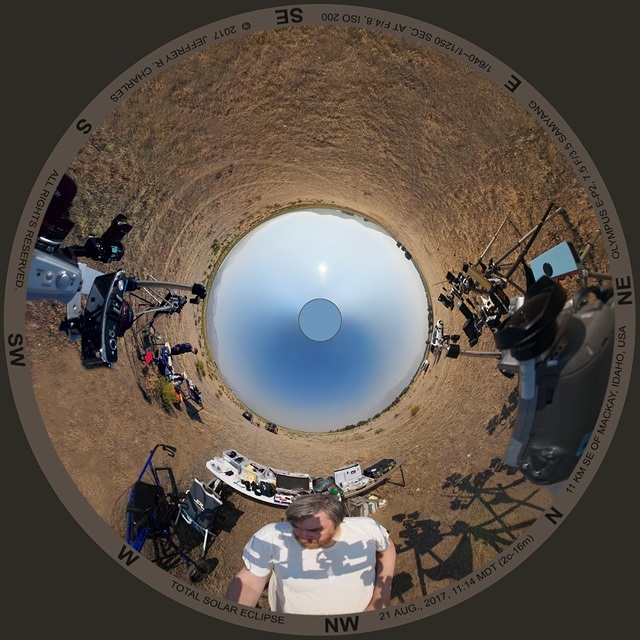
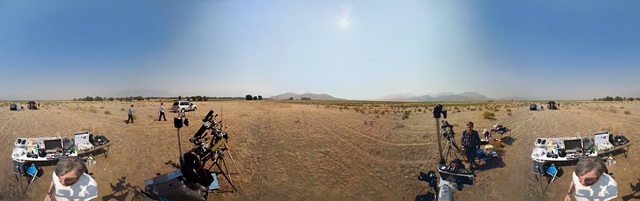
| 360 Degree Panorama of 21 Aug. 2017 Eclipse Site, about 16 Minutes Before Totality. |
|
This was the last panorama taken before totality in 2017. Vertical coverage is 136 degrees. Directions (north, etc.) are shown in small letters at the bottom. The foreground is a little "grayed out", which is not unusual for a strong partial eclipse, but the umbra is not yet a factor in the appearance of the sky. The cameras shut themselves off 5 minutes later (8 minutes before the automated panoramic sequence began), so zero panoramas were taken during totality in 2017. If they were, they would have had the same 11k resolution, as the original for this panorama. Panoramas taken near and during totality were to be taken with two cameras, and often enough that a lap dissolve between them would have made a serviceable 11k motion picture of all aspects of totality except for during the diamond ring effect at the beginning and end of totality. This panorama consists of 4 quasi stitched pictures, each taken with an Olympus E-P2 and Samyang 7.5mm f/3.5 lens. The exposure was 1/640 at f/4.8, ISO 200. Part of one picture is repeated at each end, for a little overlap. Blending was difficult because the shutter of the particular E-P2 used did not expose each frame evenly, particularly at faster shutter speeds. An electronic shutter is better for avoiding unwanted lateral gradients in each panoramic image. A 36 percent scale (3840 pixel wide) equidistant rectangular version of this panorama (without leveling compensation or overlap) can be seen HERE. It is viewable in some VR viewers, but may display sideways in some web browsers. Copyright 2017 Jeffrey R. Charles, All Rights Reserved. |
|
| Quasi-Stereographic All-Sky View of Panorama. 16 Min. Before Totality, SW is on Top. |
| This circular version of the first panorama has the coverage of a theoretical 316 degree fisheye lens with a 44 degree central obstruction. Directions are around the outside. The large dark area centered in the northwestern sky is not caused by the lunar umbra. It's just the natural gradient of the sky when there is so much smoke in the air. (With 16 minutes to go until totality, the umbra is too far away to influence the appearance of the sky.) If any of the panoramas had imaged totality, the field of view for circular images would have been cropped to about 270 degrees (to make the sky larger), and the center of a corresponding all-sky image would have been used to "fill in" the center of the sky. The projection here has a radial image scale that increases toward the edge. It is a projection I frequently use because it provides over 75 percent correction for proportions of subjects in the field, making them easier to identify. (100 percent correction would be stereographic projection, but would make the sky smaller. An even smaller sky would make the panorama look sort of like the inside of "Cooper Station" from the movie Interstellar.) Copyright 2017 Jeffrey R. Charles, All Rights Reserved. |
|
| Little Planet View of Panorama. 16 Minutes Before Totality, SW is on Top. |
| A small amount of blank space can be added to the top and bottom of the above panoramas in order to make the vertical image dimension half that of the 360 degree panorama width. Adding these blank areas creates a standard equidistant rectangular image of 360 x 180 degree proportion that is compatible with some VR viewers, including viewers for my Ricoh Theta and Theta S cameras. Many VR viewers provide both little planet views like this one, and all-sky (sky in center) views like the inner part of the top circular image. Multiple shot panoramas like this one usually have more angular resolution and dynamic range than consumer VR cameras, partly due to utilizing multiple frames from larger image sensors with larger pixels. Directions are shown around the center of this image. Copyright 2017 Jeffrey R. Charles, All Rights Reserved. |
|
| 100 Percent Crop from 360 Degree Panorama of Eclipse Site. 16 Min. Before Totality. |
| This 100 percent crop from the above panorama shows how much detail each panorama captures. This crop is less than 1/16 the width of the original panorama, covering 22 degrees horizontally, between west-southwest and due west. Mountains in the background are just barely visible through the smoke haze. (If health insurance companies did not get to jerk people around for weeks, there could have been 52 panoramas of this resolution, with 13 of them being during totality. Everyone who would have benefitted from seeing such panoramas loses when health insurance companies effectively hinder obtaining results.) Copyright 2017 Jeffrey R. Charles, All Rights Reserved. |
|
| 100 Percent Crop of Same 22 Deg. Area During Totality, from Single Fisheye Photo. |
| This 100 percent crop from a fisheye image (not part of a panorama) taken toward the west-southwest shows the same area as the above crop, but during totality. The mountains have become obvious because the moon blocked solar illumination of the smoke between the mountains and our site (and thus prevented scattering), while sunlight from beyond the trailing edge of the umbra backlights the mountains. This image is somewhat blurred because the camera was fired by hand. Firing the camera by hand was necessary because I lacked the finger dexterity to plug the interval timer cable into the camera on the day of the eclipse. Apparently, I also lacked the dexterity to softly press the shutter release for this 1/2 second exposure. Dexterity was not as much of a problem on days when I had enough rest. If I had been well enough to adequately see to the success of the panoramas (by being aware enough to notice cameras had turned themselves off, etc.), the entire horizon and the sky would have been imaged at far higher resolution than this, at least 13 times during totality. Copyright 2017 Jeffrey R. Charles, All Rights Reserved. |
|
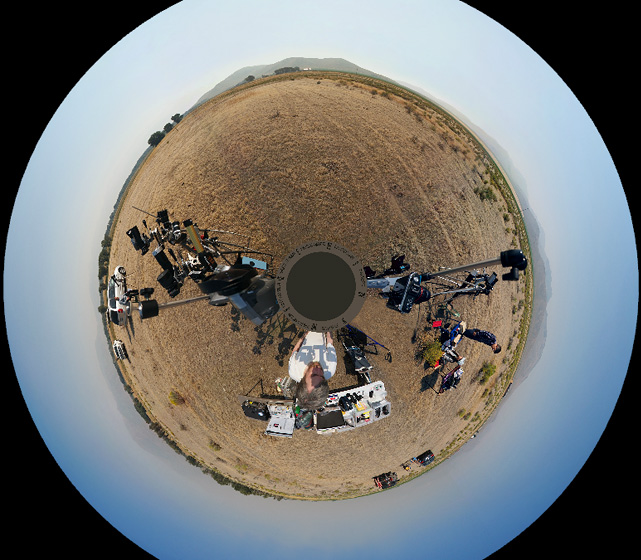
| 360 Degree Panorama of 21 Aug. 2017 Eclipse Site, about 41 Minutes After Totality. |
| This panorama of the 2017 eclipse site was taken well after totality. Shadows are less sharp than in the above panorama, and some cameras have been pointed away from the sun. This panorama consists of 4 shots with a single camera, so it has more "time distortion" than would be the case if both cameras on the panoramic platform were used. You can see time distortion toward the left, where the gal in the blue top is imaged twice as she walks toward her setup (by the silver van) that uses a 600mm lens. Blending this panorama was even more difficult because the shutter speed on the E-P2 camera was faster, increasing the lateral gradient in each frame. |
|
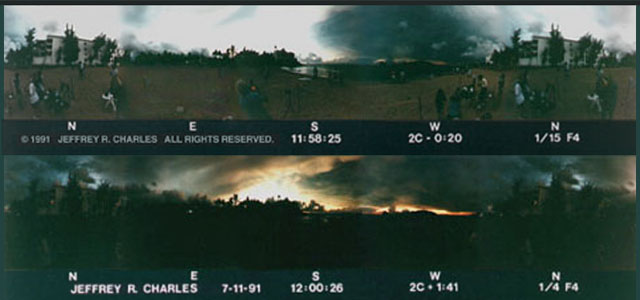
| 360 Degree Panoramic Images of a Previous Eclipse (11 July, 1991). |
| The TOP 360 degree panorama shows the lunar umbra only 20 seconds before totality at the 11 July 1991 total solar eclipse. It clearly shows the round shape of the lunar umbra toward the west. The film originals are higher resolution. The BOTTOM one is taken about a third of the way through the long 5.5 minute duration of totality in Mazatlan, Mexico. These photos are included just to show a few unique things that can be captured in 360 degree eclipse images. Exposures are shown at the lower right of each panorama. Ektar 100 film. Copyright 1991 (Registered Copyright 1998, shortly after first publication of my 1991 eclipse web page) Jeffrey R. Charles, All Rights Reserved. |
Return to Local Table of Contents
|
Light curves below have more detail during totality than is the case for most of my previous eclipse observations. The primary data source during partial phases was an incident light meter. Secondary sources included wide angle photos taken at manual settings, plus a video. The latter two were the primary data sources during totality in 2017. These were cross checked against the light meter at known light levels after the eclipse.
The minimum ambient light level during totality in 2017 was about a quarter f-stop brighter than it was even for the short duration 1995 eclipse in Thailand. It was expected that the ambient light during totality in 2017 would be brighter than average, but it was not necessarily expected to be brighter than the 1995 eclipse. It is possible that smoke scattered more sunlight toward our site from outside the umbra than would have been the case if the air was clear. The first light curve shows the full eclipse. Totality is centered, and occupies the central 131 seconds of time in the graph. The second light curve details totality, plus a short time before and after. In the detailed curve, totality is the first 131 seconds (2m 11s) after zero. The datum for the detailed curve is 2nd contact. In 2017, the light level began to increase considerably even before totality was over. This is best shown in the second graph, which covers a shorter time and has more detail during totality. The increase makes sense when you consider that the eclipse path and timing of totality is for ground level, but the visible position of the lunar umbra in the atmosphere plays a role in when the brightest or darkest parts of totality will occur. For sites where the 2017 eclipse was total in the morning, the leading edge of the lunar umbra as seen in the sky was out in front of the shadow on the ground. This is obvious when you consider that, for anywhere along the line of sight between an observer and the solar limb, the eclipse becomes total at the same time; whether it is on the ground or in the air.
Because of this, The umbra was almost centered in the sky a few tens of seconds after totality began (this would generally be the darkest time), while the umbra was confined to the southeastern quadrant of the sky at the end of totality. The ground was also brighter on video during the last few seconds of totality than it was even a second or two before totality began. |
|
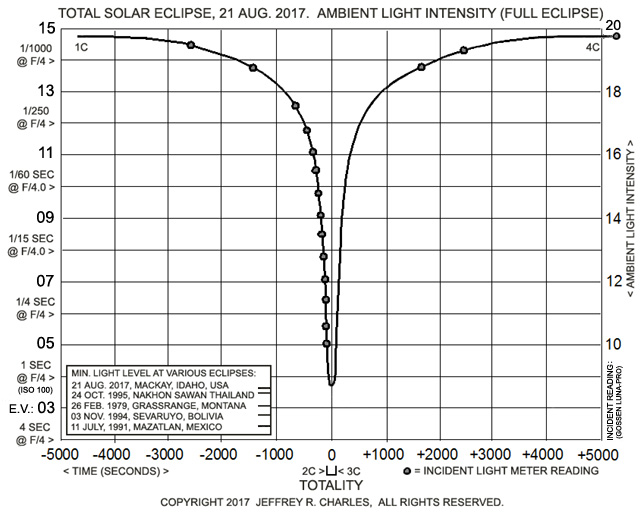
| Ambient Light Intensity Curve for the Entire 21 August 2017 Total Solar Eclipse |
| Dots represent incident light meter readings. Some readings were directly recorded. Others were acquired via video of the light meter. Interpretation of video and photos filled in most gaps, especially during totality. In the graph, EV and ISO 100 exposure values are on the left, and direct meter reading numbers from a Gossen Luna-Pro are on the right. The minimum incident light intensity at other eclipses (all except 1979 were measured with the same meter) are shown at lower left. Tolerances for light levels shown in the curve are as follows, starting with tolerances for indicated times: * +/- 2 seconds for values below 149 sec.; * 5 seconds for values between 150 and 299; * 10 seconds for values between 300 and 459; * 30 seconds for values over 460. Tolerance for light level data: * Approx. 0.2 EV (may be up to 0.3 for values below 12 or above 16). Observed contact times (MDT) were: 1st: Not recorded. 2nd: 11:30:26. 3rd: 11:32:37. 4th: 12:55:09. For all observed eclipses, minimum values (in EV) were: 1979: 3.1. 1991: 2.4. 1994: 2.8. 1995: 3.5. 2017: 3.7. |
| Copyright 2017 Jeffrey R. Charles. All Rights Reserved. |

|
| Ambient Light Intensity Curve Showing About 13 Min. of 21 Aug. 2017 Total Solar Eclipse |
| This light curve covers a shorter period of time and shows more detail for light levels just before totality, during totality, and just after totality. From this information, it can be seen that: * The light level dropped by a factor of about 100 in the last 5 minutes before totality. * The light level dropped by a factor of about 14 in the last minute before totality. * The light level dropped by a factor of about 4 in the last 10 seconds before totality. * The light level varied by a factor of more than 2 during totality. |
| Data Table for Ambient Light Intensity Detail Curve of 21 Aug. 2017 Total Solar Eclipse:
Data below shows the complexity of recovering a full light curve from different types of data that include light meter readings, video, digital images, and film images. In some cases, a series of digital pictures and videos were taken during twilight on different days (after the eclipse) until the image brightness matched that of various times during totality, then these were correlated to light meter readings. This was necessary for certain parts of the light curve because the light meter was dropped just before second contact. Film images have not yet been reviewed, so minor changes (probably less than 0.3 EV) may be made later.
The 13-minute graph above was generated from data in columns 2 and 7 in the following table. Local / Event / Meter Calib. / Act. / DataSrc. / Final / Time MDT / Time / Read / Offset / Value / OrOffset / Value / Notes 10:13:46 / -4600 / -NR- / NA / -NA- / Interpol./ 19.8 / Est1stCon (-76:40) 10:48:10 / -2536 / 19.7 / -0.2 / 19.5 / -0.1 / 19.4 / May be 0.1 too low 11:01:58 / -1708 / -NR- / NA / -NA- / Interpol./ 19.0 / May be 0.2 too low 11:07:10 / -1396 / 18.7 / -0.2 / 18.5 / 0 / 18.5 / May be 0.3 too low 11:15:26 / -900s / -NR- / NA / -NA- / Interpol./ 17.9 / May be 0.1 too low 11:21:10 / -556 / 17.5 / -0.2 / 17.3 / 0 / 17.3 / 11:22:46 / -460 / 17.0 / -0.3 / 16.7 / 0 / 16.7 / For 13 min. graph: 11:24:46 / -340 / 16.5 / -0.4 / 16.1 / 0 / 16.1 / First graph point 11:26:26 / -240 / 16.0 / -0.5 / 15.5 / 0 / 15.5 / 11:27:51 / -155 / 15.5 / -0.6 / 14.9 / -0.1 / 14.8 / 11:28:41 / -105 / 15.0 / -0.75 / 14.3 / -0.2 / 14.1 / 11:29:14 / -72 / 14.5 / -0.9 / 13.6 / -0.1 / 13.5 / 11:29:37 / -49 / 14.0 / -1.1 / 12.9 / -0.1 / 12.8 / 11:29:51 / -35 / 13.5 / -1.3 / 12.2 / -0.1 / 12.1 / 11:30:08 / -18 / 13.0 / -1.5 / 11.5 / -0.1 / 11.4 / 11:30:18 / -08 / 12.5 / -1.7 / 10.8 / -0.1Offst/ 10.7 / 11:30:23 / -03 / 12.0 / -1.9 / 10.1 / -0.1Video/ 10.0 / 11:30:26 / 0 /11.5eq/ -2.2 / 9.3vid/ +0.20Intp/ 9.50 / 2nd Contact (datum) 11:30:29 / +03 /11.2eq/ -2.3 / 8.9vid/ +0.15Intp/ 9.05 / EquivMeterValueOnly 11:30:50 / +24 /11.0eq/ -2.5 / 8.5vid/ +0.2Intrp/ 8.70 / 11.x=NotActReadings 11:31:10 / +44 / -NR- / NA / 8.4vid/ +0.2Intrp/ 8.60 / 11:31:17 / +51 / -NR- / NA / 8.4vid/ +0.2Intrp/ 8.60 / Minimum Brightness 11:31:32 / +66 / -NR- / NA / 8.5vid/ +0.16Intp/ 8.66 / Mid Eclipse 11:32:06 / 100 / -NR- / NA / 8.8vid/ +0.15pix / 8.95 / Reference photos 11:32:28 / 122 / -NR- / NA / 9.2vid/ +0.2Intrp/ 9.40 / 11:32:37 / 131 / -NR- / NA / 9.8vid/ +0.16Intp/ 9.96 / 3rd Contact 11:32:40 / 134 / -NR- / NA / 10.4v / +0.10Intp/ 10.5 / 11:32:45 / 139 / -NR- / NA / -NA- / Vid/Intrp/ 11.1 / 11:32:55 / 149 / -NR- / NA / -NA- / Vid/Intrp/ 11.7 / 11:33:08 / 162 / -NR- / NA / -NA- / Vid/Intrp/ 12.3 / 11:33:26 / 180 / -NR- / NA / -NA- / Vid/Intrp/ 12.9 / 11:33:49 / 203 / -NR- / NA / -NA- / Vid/Intrp/ 13.6 / 11:34:20 / 234 / -NR- / NA / -NA- / Vid/Intrp/ 14.2 / 11:35:12 / 286 / -NR- / NA / -NA- / Vid/Intrp/ 14.8 / 11:36:37 / 371 / -NR- / NA / -NA- / Vid/Intrp/ 15.5 / 11:38:12 / 466 / -NR- / NA / -NA- / Vid/Intrp/ 16.1 / Last graph point 11:40:17 / 591 / -NR- / NA / -NA- / Vid/Intrp/ 16.7 / 11:41:53 / 687 / -NR- / NA / -NA- / Interpol./ 17.3 / 11:47:37 / 1031 / -NR- / NA / -NA- / Interpol./ 17.8 / May be 0.1 too low 11:51:05 / 1239 / -NR- / NA / -NA- / Interpol./ 18.3 / May be 0.2 too low 12:01:05 / 1839 / 18.8 / -0.2 / 18.6 / +0.2Intrp/ 18.8 / May be 0.3 too low 12:10:05 / 2379 / 19.3 / -0.2 / 19.1 / +0.2Intrp/ 19.3 / May be 0.2 too low 12:55:09 / 5083 / 19.9 / -0.1 / 19.8 / 0 / 19.8 / 4thContact (+84:43) |
Return to Local Table of Contents
Eclipse Preparation, Instrumentation, and Procedure (Overview)
(Summary, with links to more details in appendices.)
|
The total phase of the 2017 total solar eclipse lasted only a little over two minutes. Needless to say, considerable preparation was required to facilitate operating up to 24 cameras in that time, yet still get to look at the eclipse. For this, a few aspects of preparation were more important than others. However, things did not go well at the eclipse due to extreme fatigue from the above mentioned health insurance nightmare. In spite of that, this summary notes the original goals to capture what was planned. Most of the referenced appendices were written months before both the insurance nightmare and the eclipse.
When using numerous cameras, it was first necessary to automate as many cameras as possible. The implemented automation did not change the shutter speed or aperture, but instead simply fired the camera shutters at regular intervals. If this aspect of the assembly had been completed (it wasn't because of the health insurance issues), at least 12 cameras would have been automated, and the video would have been more or less free running. Then, all I would have had to do manually was set the shutter speeds on a few cameras between automated shots, remove the solar filters before totality, and replace the solar filters after totality. The way it actually went down was much different, partly because there was only time to complete a third of the camera control circuits (after the insurance nightmare), and partly because I was very fatigued and had too much tremor to connect control cables to the cameras the morning of the eclipse. The equipment is detailed in Appendix A. Second, setup time (and difficulty) was radically reduced by mounting several cameras on each tripod with a combination of commercial and custom parts. Trackers were also used in order to keep from having to manually follow the eclipse before and during totality, and to facilitate sharper long exposure outer corona images. However, both trackers stopped tracking just before totality, so I may have been better off without them. Since some cameras were automated, I did not notice the trackers stopped in time to re-acquire the eclipse in any of the still image cameras. Here again, fatigue from the insurance nightmare played a big role, because I was too fatigued to keep up with my procedure (for the first time ever), and temporarily too dull to notice what was happening with my equipment, or to even "take in" the eclipse for that matter. Third, testing cameras, lenses and solar filters (mostly on the crescent moon and first quarter moon) made it possible to select equipment that was relatively well suited to eclipse photography, yet was not too heavy or complex. The test results led to my electing to use some film cameras instead of relying only on digital cameras. Testing was gradually done over a few years, and is covered in Appendix B. Fourth, as with any short duration event that does not offer a second chance to get things right, it is useful to develop a procedure that can be rehearsed before the eclipse, then used at the eclipse. This increases the number of cameras that it is practical to use. It was expected that writing and practicing a procedure for operating cameras and other instruments in subdued light may prove to be very important, just as it had at previous eclipses. The procedure at least helped keep things from going worse than they actually did. In spite of the number of cameras, the 2017 eclipse procedure was simpler than some of my other eclipse procedures because it was envisioned that over 2/3 of the cameras would be automated or free running. Even my first practice run came out within 20 seconds of the available time, and I had time to spare in all subsequent practice runs. It didn't happen that way at the eclipse though. An outline of the part of the procedure applicable to acquiring images and data at the 2017 total solar eclipse is in Appendix E. Since I don't have the anywhere near the stamina I did at previous eclipses, the procedure also prioritized certain activities in the event I was too tired or had too much tremor to complete the entire procedure during totality. However, no procedure could have anticipated how profoundly fatigued I was on eclipse day (from a 5 week insurance nightmare), or so many equipment failures. I'd never had eclipse equipment fail before, but had multiple equipment failures at the 2017 eclipse. The eclipse procedure outline in Appendix E shows only the part of the procedure that was referred to at the eclipse site. The full procedure was much longer, and covered many additional aspects of preparation, including performing practice runs with all cameras at once, and verifying camera menu and clock settings a day or two before the eclipse, etc. One notable equipment failure was when a digital camera changed its settings from MF to S-AF, even though I had not accessed the menu. This quirk turned out to be repeatable in all 3 utilized samples of the camera. It was not a failure in the usual sense, but was instead a quirk in that camera model. In addition to the equipment preparation, testing, and procedures, independent site selection was performed to supplement previously published weather information. A considerable amount of weather data for this was from webcams, since these could differentiate between days with completely clear skies and days with thin clouds. A simple site selection table is in Appendix C. Also, a brief list of rural roads in the part of the eclipse path west of Missouri that could potentially be used to dodge clouds was gradually developed from maps. The list of roads does not account for construction or weather related traffic delays, so it obviously was not intended to be relied on for all road information. In the end, I had to chuck the idea of last minute site changes because of fatigue. The list of roads and routes is in Appendix D. Unfortunately, no amount of preparation could overcome the extreme fatigue that resulted after health insurance nonsense used up weeks of time that was supposed to be used for rest and eclipse preparation, then required leaving for the eclipse 5 days later than planned. In spite of this extreme setback (and the lack of results it caused) some aspects of my preparation are covered anyway, in the event it is helpful to other eclipse observers, or entertaining for other "gadgeteers." After the eclipse, some very basic failure analysis was performed. A summary of this is in Appendix F: Summary of 2017 Eclipse Failures (what went wrong). Appendix F follows the appendices noted above. While it is obvious that the primary cause was exacerbation of my condition by the protracted health insurance nightmare and starting the trip late as a result, one of the equipment failures appeared to require a specific combination of temperature and reduced battery voltage. Another was caused by the combination of a camera that was later found to have unstable focus mode settings, with a high end AF fisheye lens that lacked an MF switch. An additional Appendix (G) called Idiot-Proofing Eclipse Equipment covers how to make equipment more user friendly, so it can still be used if the user is extremely fatigued. The idiot proofing section includes some information about the trackers used by both my brother and myself at the 2017 eclipse site. Finally, just in case I get to see another total solar eclipse, a simpler eclipse setup was developed. It was made mostly from items used in 2017. It was developed early, so that I would not inadvertently sell off items that could be useful in a smaller eclipse setup while downsizing. Details are in Appendix H: New Eclipse Setup Incorporating Lessons Learned.
$$$$$$$$$$$$$$$$$$$$$$$$$$$$$$$$$$$$$$$$$$$$$$$$$$$$$$$$ |
| The Mackay, Idaho area is a place I had wanted to visit for well over a year. The eclipse provided the perfect "excuse" to go there. It was my first real "vacation trip" since 2003. |
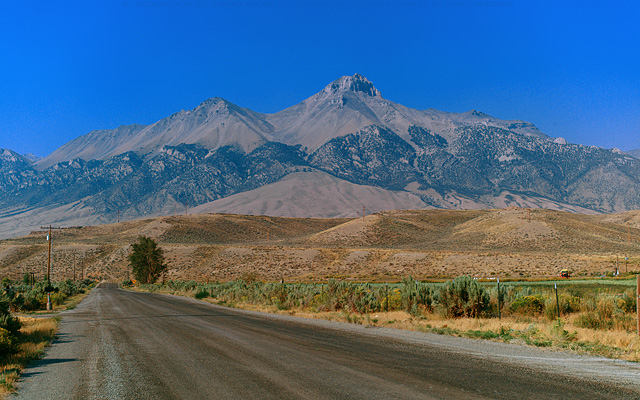
|
| Mt. McCaleb from about 1 km northwest of Mackay, ID (haze from smoke processed out). |
| Mt McCaleb is an interesting mountain that has a different appearance, depending on location and lighting. Taken with a Leica M9 camera and 50mm f/1.4 Summilux-M ASPH lens. Exposure was 1/750 second at f/6.8, ISO 80. Tungsten white balance was used as an experiment to see if adding more blue to the original image would make it easier to process out strong haze from the smoke by removing the large amount of excess blue color from the original. It may have helped a little. Copyright 2017 Jeffrey R. Charles. All Rights Reserved. |
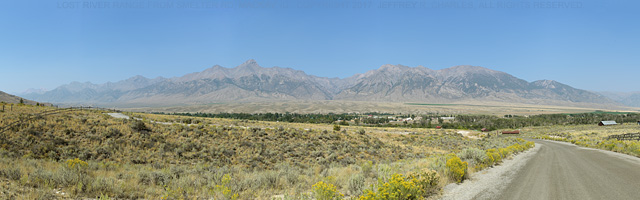
|
| Panorama of Lost River Range from about 1 km southwest of Mackay, ID. |
| Main St. becomes Smelter Ave. toward the southwest side of Mackay, then it crosses the river and becomes Smelter Rd., and continues up a slope to where this picture was taken. The White Knob mining exhibit is at the extreme right side. This area probably would have been my first choice for an eclipse site if it had been possible to arrive in Mackay when planned and look for sites. This is partly because it might have been possible to see the umbra move over the alluvial fan below the mountain range from this area. I did not have the stamina to scout for sites before the eclipse, and did not want to put off arranging a site until the day of the eclipse, partly because the media was saying that the Lost River Valley would be inundated with eclipse chasers by the 21st. Therefore, I went for the "bird in the hand", which was a site on Houston Road about 11 km southeast of this location. This photo consists of 6 images (photos 5882-5887) taken with a Leica M9 and 35mm f/2.0 Summicron-M ASPH lens. The original panorama is 360 degrees, and consists of several more pictures. 1/360 sec. at f/6.8, ISO 80. Daylight white balance, with some processing to reduce smoke haze. Copyright 2017 Jeffrey R. Charles. All Rights Reserved. |
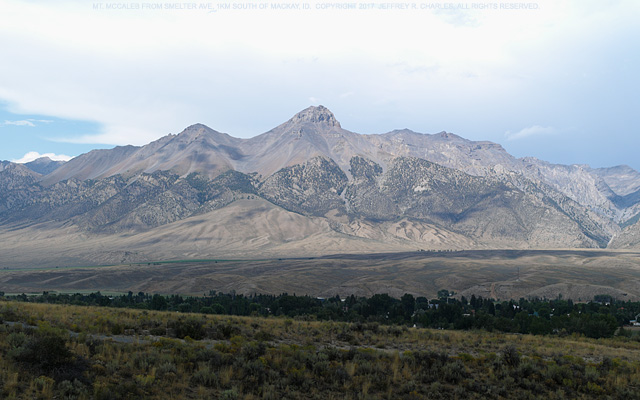
|
| Mt. McCaleb from about 1 km southwest of Mackay, ID. |
| Mount McCaleb, from the same location as the above panorama of the Lost River range, but on a different day. Photo taken with a Leica M9 and 50mm f/1.4 Summilux-M ASPH lens. 1/360 sec. at f/5.6, ISO 80. Daylight white balance on a nearly smoke free day. Copyright 2017 Jeffrey R. Charles. All Rights Reserved. |
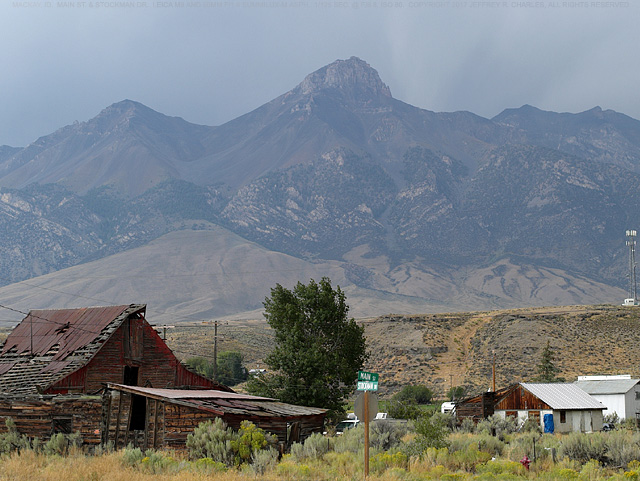
|
| Mt. McCaleb on rainy day, from near intersection of Main and Stockman in Mackay. |
| The rain temporarily cleared the smoke, and the clouds that came with it made for different lighting. Mackay has several rustic buildings such as the barn at lower left. However, it is not known how long such picturesque and rustic features will last because the City adopted a strict 55-page planning and zoning ordinance in 2015. (Mackay Ordinance 424, which is even more strict than Los Angeles ordinances in certain respects. It appears that Mackay has mountain grown ordinances, the strrrrictest kind!) This is a crop from a photo taken with a Leica M9 camera and a 50mm f/1.4 Summilux-M ASPH lens. Exposure is 1/125 at f/6.8, ISO 80. After three Mt. McCaleb photos in a row, you might get the idea that I like this mountain! Copyright 2017 Jeffrey R. Charles. All Rights Reserved. |

|
| The "Eye of the Needle", an interesting feature on a mountain northeast of Mackay. |
| There is considerable lore in Mackay about the Eye of the Needle. Rumor has it that someone attempted to fly a small plane through it, but some who have seen the feature up close doubt that a plane would have fit. (It may only be a matter of time before someone tries it in a wing suit.) Crop from picture taken with a Panasonic GX7 and Leica 250mm f/4 Telyt-R, Type 2. 1/800 sec. at f/6.8, ISO 125. Image processed to remove extensive smoke haze. Copyright 2017 Jeffrey R. Charles. All Rights Reserved. |
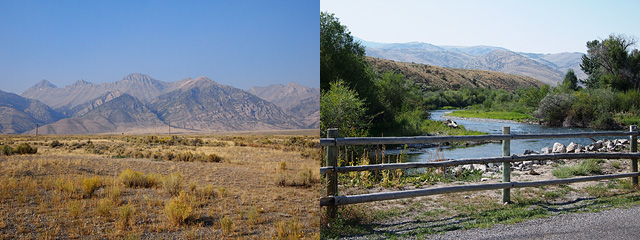
|
| LEFT: Mountains from Fish Hatchery Rd. RIGHT: Big Lost River from Smelter Ave. |
| LEFT: Mountains to the northeast of Fish Hatchery Road, which is about 8km northwest of Mackay. These are but a small fraction of the mountains that surround this location. Taken with Olympus E-P3 and Panasonic 20mm f/1.7 pancake lens. RIGHT: The Big Lost River from Smelter Ave, just outside the SW side of town. It was not in a "big" state this August. |
|
| LEFT: Geese in Formation. RIGHT: More "Wildlife" in Mackay. |
| LEFT: Geese in formation as they fly just north of the motel. The formation was better organized when the geese were at a distance, but a few of them peeled out of formation as they approached. Taken with Leica M9 and 50mm Summilux lens. RIGHT: Mackay is known for its wildlife such as moose and deer. I didn't see either of those, but I did see this soft cat near the motel. Olympus E-P3 and 20mm lens. These and other images Copyright 2017 Jeffrey R. Charles. All Rights Reserved. |

|
| Lost River Museum, a Well Implemented and Interesting Museum in Mackay. |
| LEFT: Front of the new Lost River Museum building, located next to the Post Office on Main St. in Mackay. When I was in town, the museum was open only on Fridays and Saturdays, though it was possible for groups of adequate size to schedule visits at other times. The museum was formerly in the old Community Church building, which had been moved from its original location to the 300 block of Capitol Ave (next to the library by Tank Park) on a big truck in the 1980's, then put on the market for $67k in 2016. The museum re-opened in their new building this year (2017). RIGHT: Mackay used to have two movie theatres. These Simplex projectors are from one that is no longer open. Carbon rods for the arc light are still inside. These are just a few of the many interesting exhibits at the Lost River Museum. There was no admission charge in 2017, but they will gladly accept donations. Copyright 2017 Jeffrey R. Charles. All Rights Reserved. |
|
| Lost River Museum. LEFT: Printing Press and Related Items. RIGHT: Musical Instruments. |
| LEFT: An old printing press is in the foreground, and several other printing related items are exhibited in the background. The large machine in the center background appears to be a smaller linotype machine. (?) RIGHT: Piano, organ, and smaller musical instruments. The piano is an Aeolian player piano. The small instrument on the piano bench is called a "Ukelin". It is part ukulele and part violin. It can be strumed, picked, or played with a bow. Most museum pictures taken with Olympus E-P3 and 20mm f/1.7 lens. Copyright 2017 Jeffrey R. Charles. All Rights Reserved. |
|
| Cowboy Church in Mackay. LEFT: Pastor at Horseshoe Lectern. RIGHT: Seating at Church. |
| LEFT: The Lost River Cowboy Church is one of the more interesting churches I've visited recently. Sermons are sound, but these pictures are about other aspects. Here, the pastor uses a lectern made from horse shoes and rebar. The welded horse shoes are in front of him. Services are on Sat. evening, which (unlike the Monday morning eclipse) fit my lingering late "bio-clock" schedule from former night shifts. RIGHT: The church is fairly informal and has a variety of seating. I used this rocking chair. The table in the background has popcorn and other goodies, and a coffee machine is behind the table. Those attending are free to have food from the table and a cup of coffee at any time, including during the sermon. The sermon was not long, but this makes for hearing a sermon of any length in style! Copyright 2017 Jeffrey R. Charles. All Rights Reserved. |
|
| LEFT: Retro Sign of White Knob Motel and RV Park. Right: Ivie's Market in Mackay. |
| LEFT: The White Knob Motel and RV Park is about 3 km southeast of town. I stayed there for my entire time in the Mackay area, partly because it was away from streetlights in the city. The motel units are in the red roofed building in the lower left corner. The motel is currently seasonal. The namesake for the motel is a mountain southwest of Mackay that has brighter rock near its summit, making it sometimes look like it has snow on it even in the summer. RIGHT: Ivie's Market in Mackay. In spite of its small size, Ivie's Market has almost as much selection as some medium size grocery stores in larger cities. They do this by putting less than a full case of some items on the shelves at a time. Prices were not a great deal different than in my town, so if I lived in Mackay, I'd probably do nearly all of my grocery shopping at Ivie's instead of going to markets in larger cities. Copyright 2017 Jeffrey R. Charles. All Rights Reserved. |
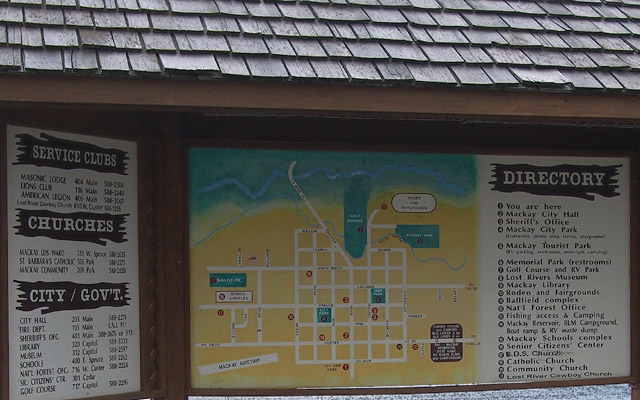
|
| Mackay City Directory, in a Parking Area near Main St. and Salmon. |
| This Mackay city directory sign on the northeast side of town shows many, but not all, attractions in the city limits. The Cowboy Church didn't make the church list on the left, but it is listed at the bottom of the directory on the right. North is toward the lower right corner of the map. The map is rotated this way because the city, which is right behind the sign, matches the orientation of the map when viewed from this area. (I use the term "city" here because Mackay really is an incorporated "city" instead of a "town".) Main St. becomes Bar Rd. just outside the northeast side of town, and Smelter Ave. south of town. There are of course many attractions outside the city limits, including mountains to see during the day and dark skies for amateur astronomy at night. (The city has too many street lights for serious astronomy.) This image is sharp enough to read most of the directory text if it is enlarged a little. |
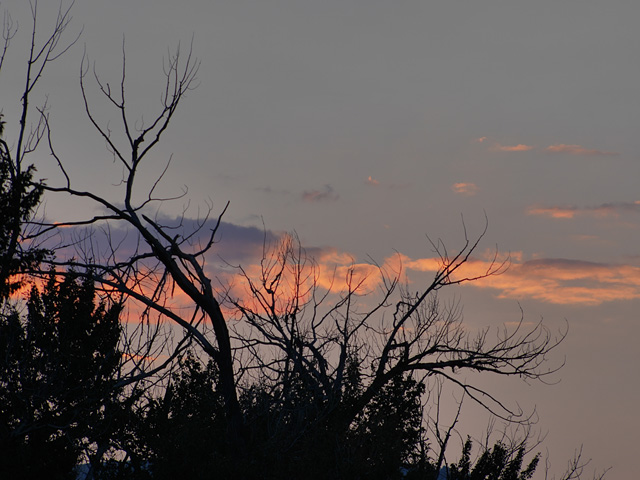
|
| Sunset behind trees, from the White Knob Motel and RV Park, about 3km SE of Mackay. |
| There is no shortage of interesting foregrounds to silhouette against a sunset around Mackay. Panasonic GX7 with Leica 250 f/4 Telyt-R T2 lens. 1/160 at f/5.6, ISO 125. Copyright 2017 Jeffrey R. Charles. All Rights Reserved. |
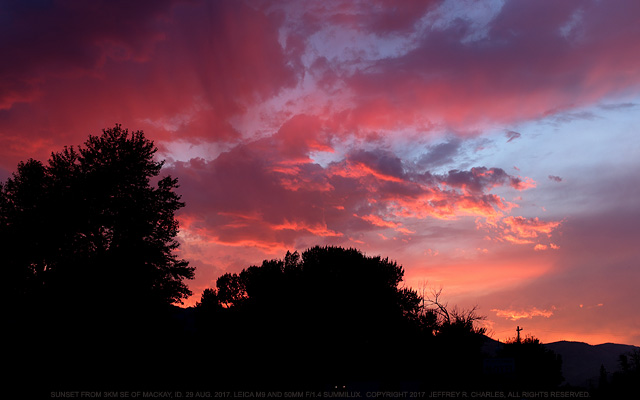
|
| Smoke-Enhanced red sunset, from the White Knob Motel, about 3km SE of Mackay. |
| Sunsets were very colorful due to the lingering smoke when clouds were present, and still interesting at other times. Leica M9 with 50mm f/1.4 Summilux-M ASPH. 1/45 at f/5.6, ISO 80. Copyright 2017 Jeffrey R. Charles. All Rights Reserved. |
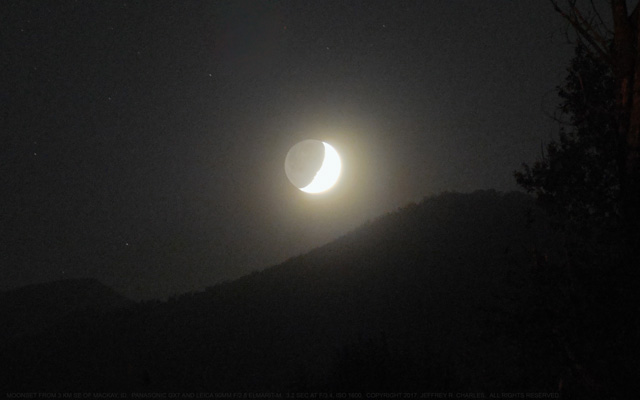
|
| Moon setting behind a mountain. Smoke made the backlit horizon more obvious than usual. |
| This moon set picture was taken from near the intersection of Houston Road and Highway 93. Panasonic GX7 with Leica 90mm f/2.8 Elmarit-M lens. 3.2 sec. at f/3.4, ISO 1600. Copyright 2017 Jeffrey R. Charles. All Rights Reserved. |
Return to Local Table of Contents
Astro Photos from Near Mackay, Idaho (Nothing fancy, but the sky was dark!)
| After getting 3 or 4 days of bed rest to partially recover from the arduous insurance nightmare and nearly marathon travel to the eclipse path, I was able to function well enough to competently use some of my cameras, quite unlike the situation at the eclipse. Once rested enough to use a camera, I took a few astro photos from the parking lot of the White Knob Motel and RV Park, about 3 KM SE of Mackay, Idaho. A few more astro photos were taken on two later nights, before moonlight became an issue. To my surprise, it seemed like I was temporarily a bit less fatigued when only wearing light clothes in the cool (58 to 62 deg. F) night air. This made it possible to acquire several modest deep sky image stacks in a couple of nights.
The sky southeast of Mackay Idaho was probably the darkest I had seen since I viewed the sky from Manning Provincial Park in Canada way back in 1988. Photos here do not use fancy astronomical cameras or complex techniques. They are simply 30 second to 1 minute exposures with regular "mirrorless" digital cameras. Most were taken with a Panasonic GX7 camera, and one was with a Leica M9. To get a fairly neutral sky color, at least one picture was usually shot with a daylight white balance setting, and another at the tungsten setting. These were then stacked in "brighten" mode. Other than that and scaling the pictures down for this web page, these images are more or less unprocessed.
Photos below are unguided exposures. Focal lengths used on Micro 4/3 cameras range from a 2.7mm fisheye lens up to 180mm. A Fornax LighTrack II mount (one of the same mounts that stopped tracking just before totality) was used for tracking. The mount was capable of tracking up to about 40 seconds with a 180mm lens before tracking rate errors became visible in a 16 MP image. The mount does not appear to need a lot of improvement beyond adding a "tracking time remaining" indicator, but the specification (and reviews of the mount) should obviously reflect the actual 107 minute tracking time. I still use the Fornax mounts, even though doing so occasionally reminds me of the day they stopped tracking.
|
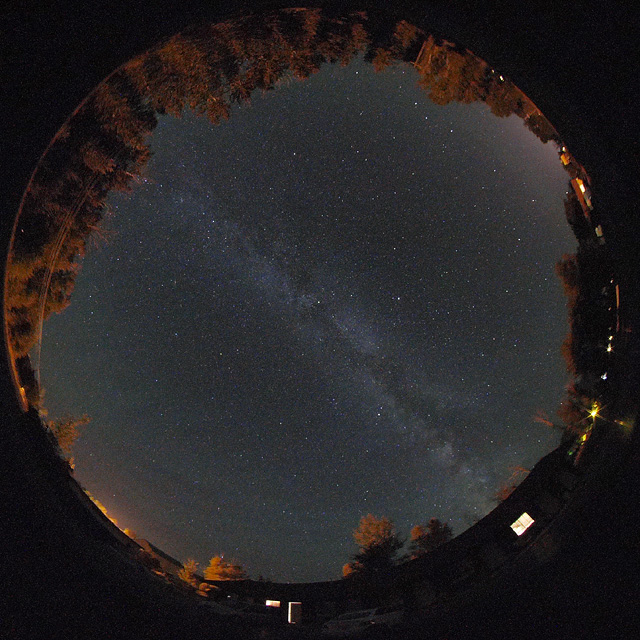
|
| All Sky Photo with Fujinon 185 Degree C-Mount Fisheye Lens |
| Panasonic GX7 camera and Fujinon 2.7mm f/1.8 C-Mount megapixel fisheye lens working at f/4. This and some other photos in this section are a stack of two or more 30 second exposures at ISO 1600, one or more with daylight white balance, and one with tungsten white balance to provide a more neutral sky color. Copyright 2017 Jeffrey R. Charles. All Rights Reserved. |
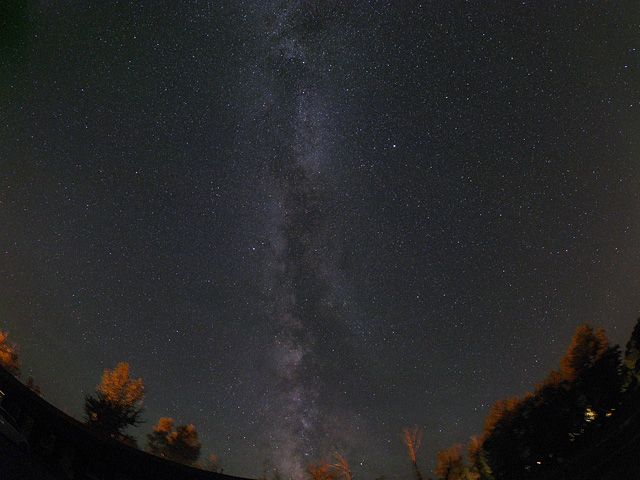
|
| Milky Way with 8mm f/1.8 Olympus Fisheye Lens |
| Panasonic GX7 camera Olympus 8mm f/1.8 fisheye lens. Two 30 second exposures at f/2.5, ISO 800. Copyright 2017 Jeffrey R. Charles. All Rights Reserved. |
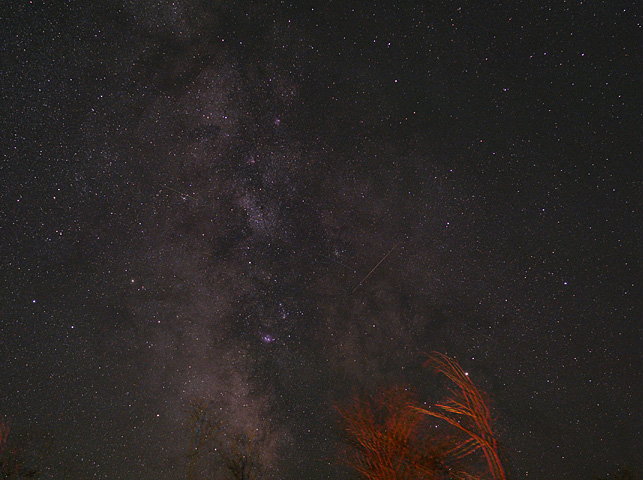
|
| Milky Way and Meteors with Normal Lens, from 3km SE of Mackay. |
| Panasonic GX7 camera and Panasonic/Leica 25mm f/1.4 Summilux lens working at f/2.5. Three 30 second exposures (one with daylight WB at ISO 800, one at ISO 1600, and the other at ISO 800 with Tungsten WB). Copyright 2017 Jeffrey R. Charles. All Rights Reserved. |
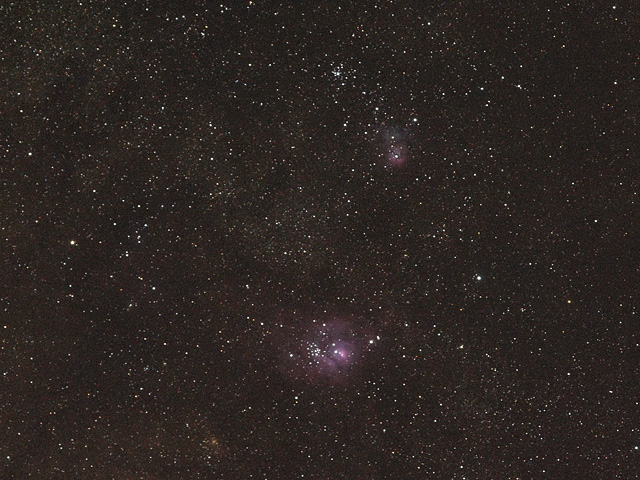
|
| M8 and M20 with Panasonic GX7 and Voigtlander 180mm f/4 Apo-Lanthar Lens |
| Panasonic GX7 camera and Voigtlander 180mm f/4 APO-Lanthar lens working at f/4.8. Three 30 second exposures (one daylight WB at ISO 1600, one at ISO 3200, and the other at ISO 1600 with Tungsten WB). Copyright 2017 Jeffrey R. Charles. All Rights Reserved. |

|
| Cygnus with Leica M9 and 35mm f.2 Summicron-M ASPH Lens. |
| Leica M9 and 35mm f/2 Summicron lens working at f/2.8. Stack of two 60 second exposures at ISO 800 with daylight white balance. Copyright 2017 Jeffrey R. Charles. All Rights Reserved.
|
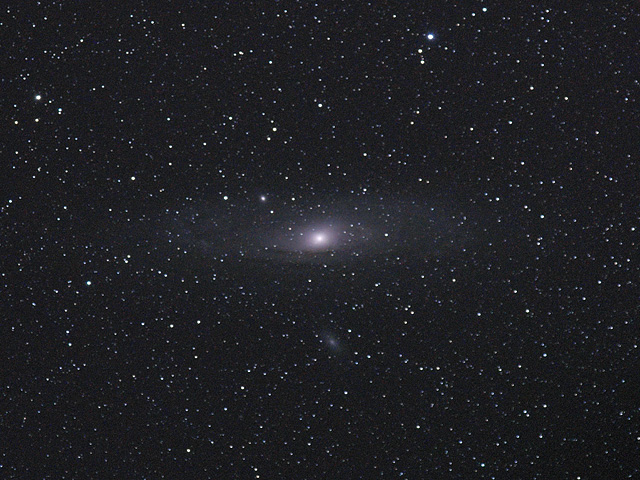
|
| Andromeda Galaxy with Panasonic GX7 and Voigtlander 180mm f/4 Apo-Lanthar Lens |
| Panasonic GX7 camera and Voigtlander 180mm f/4 APO-Lanthar lens. Stars are not pinpoints in this image because the 180mm APO lens does not quite focus to infinity at cooler temperatures, and it is slightly under-corrected at full aperture. Two 40 second exposures at f/4 with daylight white balance, ISO 3200, and one 60 second exposure at f/4.8 with tungsten white balance, ISO 1600. Copyright 2017 Jeffrey R. Charles. All Rights Reserved. |
| Seeing a dark sky was a nice change! It had been well over a year since I had the opportunity to take very many deep sky images from a moderately dark site, and more like 26 years since I got to image deep sky objects from a truly dark site. The last time I was at a truly dark site was way back when I was using only film cameras. Astrophotography is much easier with digital cameras, though some processing is needed to get nebulae to look as red as they do in an unmodified film image. (I didn't do that type of processing here.) While taking these astrophotos, I found that my condition temporarily seemed to fare a little better at temperatures below about 62 degrees F. than it does even at normal room temperature.
|
Return to Local Table of Contents
Appendix A: 2017 Eclipse Preparation and Instrumentation (Details):
(2017 photos and information. Most of this was written before the eclipse.)
|
This Appendix describes instrumentation used at the 21 Aug. 2017 total solar eclipse. It begins with the final version of the eclipse equipment and describes what was (or was not) accomplished with each camera. It then covers some basic concepts that proved useful at previous eclipses. After this, development of the equipment is described in more detail. Most of this appendix and some other appendices were written months before the eclipse, then edited only slightly after the eclipse. This allows the material to show what was planned.
Appendices A through E cover a variety of preparations for the eclipse. Judging by the meager eclipse results in this web page, it is reasonable to assume that things did not go well at the eclipse. Far from it, in that only third as many useful photos were taken during totality as the quantity of cameras in the setup (only 8 useful photos from 24 cameras). Most of the appendices were written before a huge health insurance nigtmare and its profound impact on the eclipse expedition. (See the Introduction and Appendix F.) Appendices A through E (written mostly before the eclipse) are shown first, to keep things in chronological order. As is noted afterward in Appendix F ("what went wrong..."), the insurance nonsense was the primary cause of image acquisition failure at the eclipse. Appendix F also covers re-enactments of some imaging failures to reveal and define certain equipment failures. The first appendices again show what was planned for the eclipse, and the extensive (given my condition) preparations for it. Then, Appendix F shows how a health insurance company in the "free market" can be the undoing of the eclipse expedition schedule, the eclipse results, and even one's health for months. (I'm not liberal. I'm just pragmatic. An unregulated free market doesn't work for health insurance that is available to everyone - without being worn down by corporate maneuvers.)
Contents of Appendix A (this appendix) include: The next Appendix (B) in this material briefly describes some of the camera, lens and filter tests that played a role in the selection of equipment, the impact that selected equipment has on the raw image quality, and the simplicity (or complexity) of post processing that may or may not be required. Other appendices cover site selection that was based in large part on webcam images from August of 2016. After that, the timeline of the eclipse procedure worked out for "eclipse day" is included. A0.1) Overview of the Final 2017 Eclipse Equipment Configuration The purpose of this Appendix (A) and Appendix B is to show the equipment as it was before the eclipse, as well as describing its intended uses. Unfortunately, the preparation, expedition schedule, and my health were all effectively undone by excessive time and energy required for a protracted, high stress, health insurance nightmare that consumed almost the entire month of July, plus parts of June and August. Details about that are in other sections, including Appendix F. Appendices A through E were written mostly before the eclipse - and before I had any idea how (badly) things would go at the eclipse. Rewind to the Summer of 2016: A considerable amount of instrumentation was acquired, built, and/or prepared for the 2017 eclipse. More cameras were transported to the 2017 eclipse than for any previous eclipse (25 cameras in all). Therefore, considerable preparation, including the noted camera lens lens testing, was required. (Equipment obviously does not make or test itself, and procedures don't write themselves.) Since I fatigue easily from a medical condition, preparation had to be spread out over an entire year. Some preparation emphasized miniaturizing the setup (partly because I can't lift much due to a torn rotator cuff, etc.), while other aspects emphasized partial automation by using timers to operate most of the camera shutters. This reduced most required manual operations to simply removing and replacing solar filters, plus changing the shutter speeds on certain cameras at appropriate times. (Comment: Obtaining or building custom automation hardware is time consuming. Completing it would have required considerable time in May and July. However, I was ill (in bed) almost all of May, and the above noted insurance nightmare consumed almost all of my stamina in July.) The eclipse setup was miniaturized partly by mounting several more cameras than usual on each tripod, and partly by using clusters of cameras on celestial trackers rather than using telescopes or telescope mounts. This was an acceptable solution, especially when using small format digital cameras. Micro 4/3 cameras were emphasized. Most were older (and thus more affordable) models, and all lenses except one were acquired used to keep cost down. A good part of the conventional camera gear found a new home after the eclipse, partly because some will be obsolete by the 2024 eclipse. It also doesn't require many cameras to adequately photograph other subjects. The miniaturization also would not have been possible without numerous aluminum parts, most of which are simple bars that support multiple cameras. Combined with the way they are attached to each tripod, these custom camera bars are more rigid than commercial Arca compatible bars, and are smaller and lighter than the cylindrical Manfrotto camera bar. Even though the final instrumentation could accommodate more than 20 cameras, none of the individual parts were heavy. Lifting limits prevented use of the Vernonscope 94mm f/7 refractor telescope I'd used at the 3 Nov. 1994 total solar eclipse. Therefore, I did not expect to get corona images anywhere near as good as those acquired back in 1994, when I could drag up to 100kg of telescopes and and luggage around by myself. But the 2017 corona images were not expected to be "bad" either. Fast Forward to the Middle of August, 2017:
The final version of the 2017 eclipse hardware is pictured and described below: | |
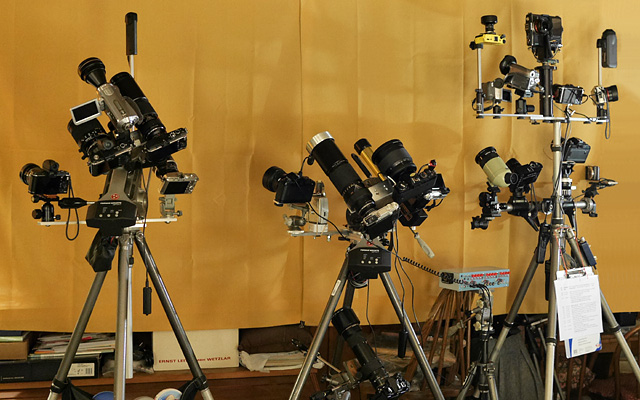
| |
| Final Assembly of 2017 Eclipse Equipment at Home, Shortly Before Going to Eclipse | |
|
This setup differs a little from detailed photos below that were taken months earlier. Equipment on each tripod will be described from the top down and from left to right. Tripods with tracking mounts each use a Gitzo PL-5 head as a wedge for the tracker, and a G1270 head to point the tracked clusters of cameras. The LEFT tripod supports the Corona Video Assembly of 6 cameras (called Assembly 3 below). * The upper level consists of an Olympus E-P2 camera with Tamron 500mm f/8 mirror lens, a Panasonic HDC-SD1 camcorder with Nikon TC-E3ED 3x converter, and an Olympus E-P3 with Leica 250mm f/4 Telyt-R V2 lens, set to f/5.6. * The lower level consists of an Olympus E-P3 camera with an Olympus 8mm f/1.8 Fisheye lens used at f/2.2 (to take wide angle video of the eclipse over the horizon), a Ricoh Theta S VR camera (on the tall post) with wired remote, and and an Olympus E-P3 with a Nikon 180mm f/2.8 ED Nikkor lens that is used at f/4. * RESULTS: Of equipment in this assembly, the tracker will stop tracking after 107 minutes, just before totality. The Olympus E-P3 with 8mm fisheye will prove useless at the eclipse, after changing itself from MF to to S-AF. (If the lens had an MF switch, it could have delivered even with a quirky camera.) The Theta will not be deployed due to extreme fatigue. The camera with 180mm lens will time out and I'll be too tired to notice. Results during totality will be obtained from only half the cameras in this assembly (the 3 tracked video cameras), and those results will only be partial. The CENTER tripod supports the Corona Still Image Assembly of 6 cameras (Assembly 2 below). * The upper level consists of a Panasonic GX7 camera with Leica 350mm f/4.8 Telyt-R lens working at f/6.8, and a Nikon N2020 film camera with a Vivitar 800mm f/11 Solid Catadioptric lens. * The middle level consists of a Nikon N2020 with Sigma 14mm f/3.5 rectilinear lens working at f/5.6, a Pentax Q camera with a fisheye lens to take video of a light meter, thermometer, and atomic clock; and a Panasonic GX7 on a Coronado PST. * The bottom level (down low, on a separate tripod) consists of a Nikon FM with 400mm f/5.6 ED Nikkor lens working at f/6.8, with Nikon TC-14A converter (final f-stop of f/9.5). * At the eclipse site, the Nikon N2020 with 14mm lens was moved to the far right side of the right most tripod, and a Nikon F film camera and Voigtlander 180mm f/4 Apo-Lanthar lens were used in its place. * RESULTS: Of equipment in this assembly, the tracker will stop just before totality, and will not resume tracking after being reset. The Nikon F and Coronado PST will (unintentionally) sit idle due to fatigue, and I'll end up dropping the light meter and knocking the clock off the tripod just before totality. As the clock falls, it will strike the leg of the Eclipse Video Assembly tripod and disturb all three videos of the diamond ring and Baily's beads just before 2nd contact. Thus, the Pentax Q video will be the sole result from this entire assembly! The RIGHT tripod supports the Wide Angle Assembly of 12 cameras (Assembly 1 below). * The Top level consists of a Pentax Q7 camera with Fujinon 1.4mm f/1.4 C-Mount fisheye lens (for all-sky pictures), a Canon Elura 100 camera (pointed at Mt. McCaleb), a second Canon Elura 100 with a 0.3x wide angle lens (for backup video of totality over the horizon), the custom rotating panoramic platform I made in 1991, with two Olympus E-P2 cameras and Samyang 7.5mm f/3.5 fisheye lenses on top (for 11k resolution 360 degree panoramas); an Olympus E-P2 with 7.5mm f/3.5 Rokinon fisheye lens (for still pictures of the eclipse over the horizon), an Olympus E-P1 with 7.5mm f/3.5 Rokinon fisheye lens (for still pictures toward the west), and an Entaniya Entapano 2 with its built-in 250 degree fisheye lens. * The lower level consists of an Ednar Mirror Scope 500 (for viewing the eclipse), a Leica M9 with 50mm f/1.4 Summilux-M ASPH lens and solar filter plus green filter (for an eclipse sequence picture), a Nikon N2020 with 16mm f/2.8 fisheye Nikkor lens, and a Panasonic ZS7 long zoom point and shoot camera. The blue box under the left side of the tripod is the custom camera controller, and the eclipse procedure is on a clipboard hanging from the tripod. * At the eclipse site, the Leica M9 was moved to a separate tripod, out of concern that I might accidentally jostle the wide angle tripod (which would spoil a sequence picture), and the Panasonic ZS7 on the right was assigned the M9 position. * RESULTS: Of equipment in this assembly, the Pentax Q7, Entapano 2, and Panasonic ZS7 will not be deployed (due to fatigue and battery failure), recording will not be done with either Canon Elura 100 (due to indadequate coordination when hands raised up that day), both Olympus E-P2 cameras on the panoramic platform will turn themselves off before totality, and the 16mm fisheye lens on the Nikon N2020 will for no good reason be set to f/11 instead of the intended f/4.8. Thus, out of this entire assembly, useful results will only be obtained from the Leica M9, the two Olympus cameras at the upper right, and the Nikon N2020 with the 14mm lens that was moved from the center tripod to this one at the eclipse site. (Only 4 results out of 12 cameras!) | |
| 
|
| Left: Equipment in One Camera Case. Right: Lots of Cases Packed and Ready to Go. |
LEFT: This aluminum Hasselblad camera case works well for transporting multiple cameras, lenses, cables, and solar filters. Plastic bags are used to keep excess dust away from most items. RIGHT: Equipment cases packed and ready to go, along with tripods and a few file boxes that keep certain camera systems together, or transport a camera controller (see A2.4 below) and various supplies. Now, back to the past, to cover development of the 2017 setup, more or less in chronological order. |
|
A1.0) Early 2017 Eclipse Setups (the final setup is covered above and below this)
About 22 years before the 2017 eclipse, in the time leading up to the total solar eclipse of 24 October 1995, I realized it would be desirable to automate some of my equipment to compensate for the brief 1 minute and 40 second duration of totality. For the 1995 eclipse, I developed a portable eclipse setup that could accommodate 7 or 8 cameras on two tripods. The setup would work on a single tripod, but two tripods were used in order to keep shutters on the still cameras from introducing vibration to the corona video. This equipment is shown in my 1995 Total Solar Eclipse Images web page. The equipment I built or modified between 1979 and 1995 accounts for about a third of the cameras and support equipment allocated for the 2017 eclipse. I began gradually improving my equipment for a later solar eclipse in about 2004, but did not realize that it would be another 13 years until I could see another total solar eclipse. Improving my equipment came to a screeching halt in 2007, when I lost sensation on my left side and could no longer use machine tools as a result. Over time, alternatives to custom machined parts were found, but the alternatives were more complex and more difficult to set up. Ultimately, the 2017 eclipse became the one to shoot for, and a setup to photograph it was slowly put together over a few years. New items include tracking mounts for the cameras, about 20 custom metal parts (made by another party), a few additional tripods, and several digital cameras. (Only film cameras had been used at the 1995 eclipse.) Most of these new items were not acquired specifically for the 2017 eclipse, but the eclipse had some influence on the timing.
Photos immediately below show some early (2016) camera setups for the 2017 eclipse that lack custom metal parts that a neighbor later kindly built per my drawings. Without the custom parts, each tripod supports only 2 to 4 cameras. With them, a tripod can support 5, 10, or even more light cameras. | |
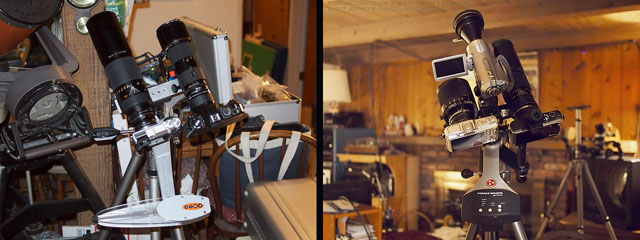
| |
| Clusters of Cameras on Astronomical Tracking Mounts | |
|
Tracking mounts are used to enable tracking with clusters of cameras. Most are much more compact than separate telescope mounts. These pictures were taken before custom parts were added to increase the number of cameras each tripod could support. LEFT: This AstroTrac TT320x tracking mount and its attachments support two cameras for capturing still images of partial eclipse phases and the solar corona. The AstroTrack was later replaced with a second Fornax LighTrack II, which was thought to be easier to use partly because it accepted a better (CG5) polar alignment scope. (My brother used the AstroTrac at the eclipse and got fantastic results.) * The left camera is a Panasonic GX7 with a Leica Telyt R 350mm f/4.8 lens that is used at f/6.8. * The right one is a Nikon N2020 film camera with a Nikon 300mm f/4.5 ED Nikkor lens set to f/6.8, with a 2x tele-converter (final f/13.6). (This was later changed to a 400mm f/5.6 ED Nikkor and 1.4x converter, then to a Vivitar 800mm f/11 "Solid CAT" lens.) RIGHT: This Fornax LighTrack II mount supports three cameras to capture video of the eclipse. The camera cluster support was one of the few that did not initially require custom parts. It consists of a 40mm ball head that accepts a 200mm long Arca compatible dovetail plate. A slow motion head is used as a standoff for the video camcorder in the center. A Gitzo G1270 head was later used on the tracker because it facilitates easier camera positioning than the ball head. * The left camera is an Olympus E-P3 with a Tamron 500mm f/8 mirror lens. * The center one is a Panasonic HDC-SD1 camcorder and Nikon TC-E3ED 3x converter lens. * The right camera is an Olympus E-P2 and Leica 250mm f/4 T2 Telyt-R lens, set to f/5.6. The tripods were later used with custom brackets (shown below) to support additional cameras that are not on the trackers. The additional cameras include a video camera that images a light meter and a camera with a wide angle lens to photograph the eclipse over the horizon. | |
| A1.1) Enhancing the 2017 Eclipse Equipment Setup | |
| |
| Custom Portable Metal Parts for Mounting Multiple Cameras on a Given Tripod | |
|
The Manfrotto multi camera bar on the wide angle tripod shown in this section can handle up to four cameras on one tripod, but it is relatively heavy and does not support the number of cameras required. Also, the commercial camera bar is not an optimum solution for supporting tracking mounts that must be polar aligned and have clusters of cameras on them. Therefore, several custom camera bars were designed, then a third party was going to be hired to make them. (I can't machine parts any more.) To my pleasant surprise, my neighbor Justin machined all of the parts for free! (Thanks Justin!) The camera bars are shown on the LEFT. The RIGHT picture shows how some of the custom bars facilitate mounting untracked cameras on the same tripod as a tracking mount.
A1.2) Interval Timers and Other Electronics Some of the available digital cameras have built-in interval timers, while others do not. Those that do are the Panasonic GX7 and the Pentax Q. Affordable ones that that do not include the Olympus E-P1, E-P2, and E-P3. Third party remote controls with interval timers are available from third parties, but these take time to set up, and it is difficult to know ahead of time if the setup is correct. One potential problem common to both built-in interval timers and the third party remotes with timers is that internal clocks for some of these may not be accurate, resulting in a loss of synchronization between cameras. Synchronization is important when multiple cameras share one tripod. For example, some cameras have mechanical shutters and others have electronic shutters. Since electronic shutters do not cause vibration, it is obviously better to take pictures with these at a time when a camera with a mechanical shutter is not firing. Fortunately, this can be addressed with simple logic such as that I used when automating my panoramic platform and its cameras for the 1995 eclipse. That circuit consisted mostly of a reference source (variable RC), a digital divider chip (4060 or similar), some flip flops (4013), some one shots (4538), a few MOSFETS (IRF-D1Z3), and some relays. The relays are used so there would be no polarity dependence for whatever was controlled with the circuit. This circuit operated the panoramic platform and two cameras, alternately rotating the platform and firing the cameras. While the same circuit may work as the basis for controlling digital cameras, it obviously cannot directly and safely fire a typical digital camera by simply shorting out a few contacts on the USB port. Instead, the circuit needs to be connected to the leads for the release button on a remote camera release that interfaces with the camera USB port.
Details about the interval timer are immediately below the images and descriptions of the three main tripod assemblies.
| |
A2.0) Semi-Final 2017 Eclipse Camera and Instrument Assemblies
(2017 eclipse photos and information.)
|
The final 2017 eclipse instrumentation includes 3 major camera assemblies, each on its own tripod. 1.) Wide Angle Assembly emphasizes wide angle still images and video of the lunar umbra. It can support up to 12 cameras, though most are older used cameras to control cost. 2.) Corona Still Image Assembly includes 5 cameras and emphasizes still images of the solar corona, but it also includes one wide angle camera and a camera to record light meter readings and time, with the eclipse in the background. One more camera was later added. 3.) Eclipse Video Assembly consists of 7 cameras. Six of these capture video and one is a VR camera. These are separate from the others so the image won't move when still pictures are taken.
When using the maximum capability of all assemblies, up to 24 cameras can be accommodated. A few of the more significant camera modules are shown and described below. | |
| A2.1) Assembly 1 Details: Wide Angle (11 Cameras, later changed to 12) | |
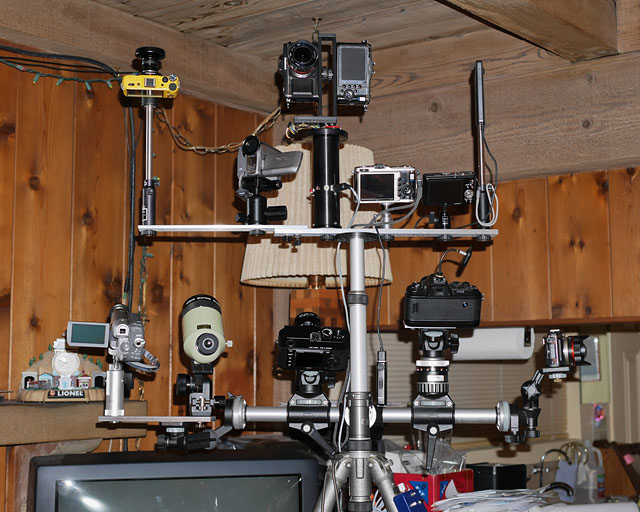
| |
| Custom Wide Angle Tripod Assembly that Accommodates 11-12 Cameras (rear view). | |
| The tripod shown here emphasizes wide angle imaging, and supports eleven cameras with the use of a Manfrotto multiple camera bar and some additional custom parts to support a second tier of cameras. This view is looking southwest. From left to right starting with the top tier, the cameras are: TOP TIER: 1.) Pentax Q7 with Fujinon 1.4mm f/1.4 lens working at f/4 (all sky still images every few seconds). 2.) Canon Elura 100 (A) camcorder pointing toward north (for video of umbra covering mountains). 3-4.) Two Olympus E-P2 cameras (A-B) with Samyang 7.5mm f/3.5 fisheye lenses set to f/4.8, mounted on motorized indexing panoramic camera platform I built in 1991 (for 360 degree panoramas). 5.) Olympus E-P1 with 7.5mm fisheye (for walk around video; pointed at eclipse azimuth here). 6.) Panasonic ZS7 camera on quick release tripod attachment (for walk around pictures). 7.) Ricoh Theta S spherical camera with wired remote. (Ricoh Theta S was later swapped with Entaniya Entapano 2 250 degree VR camera from Video Assembly.) Bottom tier covered next: BOTTOM TIER: 8.) Canon Elura 100 (B) camcorder with wide angle attachment (pointed at eclipse azimuth). 8A.) Ednar MirrorScope 500 visual telescope (25x) with solar filter. 9.) Leica M9 with 50mm f/1.4 Summilux-M ASPH lens and solar filter (for sequence picture). 10.) Nikon N2020 (A) film camera, 16mm f/2.8 fisheye Nikkor lens at f/4, detent head. C.neg. 11.) Olympus E-P2 (C) with 7.5mm f/3.5 Rokinon fisheye lens working at f/4.8, pointed to west. (In the final configuration, this camera was swapped with two cameras on the top bar (5 and 6) in order to reduce the risk of people obstructing the fisheye lens.) SHORTLY BEFORE THE ECLIPSE OR AT THE ECLIPSE SITE: By the time the Wide Angle Assembly was in its final configuration, a few changes had been made: * Canon Elura 100 camcorder at lower left was moved to upper level, near left end. * Panasonic ZS7 toward upper right was moved to Leica M9 position near bottom center; and, * Micro 4/3 camera at lower right was moved to former ZS7 position, and offset bar added. * Ricoh Theta at upper right was swapped for the Entapano 2 camera in Assembly 3. * Ednar telescope was moved slightly to left, to left end of lower level. * Leica M9 was moved to a separate tripod, to reduce risk of disturbing sequence image. * Nikon N2020 with 14mm lens from Assembly 2 was moved to lower right. This was done to facilitate operation of both wide angle film cameras from the same position. * Changes resulted in the Wide Angle Assembly having 12 cameras instead of 11. | |
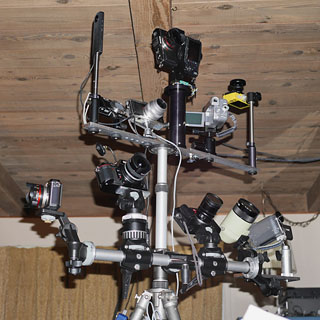
| 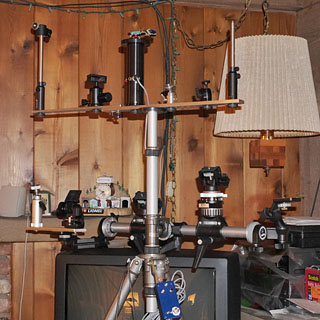
|
| Left: Front View of Wide Angle Assembly. Right: Rear View of Assembly Without Cameras. | LEFT: Wide Angle Assembly from front side, showing eleven cameras and one small telescope. RIGHT: Rear view of assembly without any cameras attached. |
A2.2) Assembly 2 Details: Corona Still Imaging (5 Cameras, later changed to 6)
(2017 eclipse photos and information.)
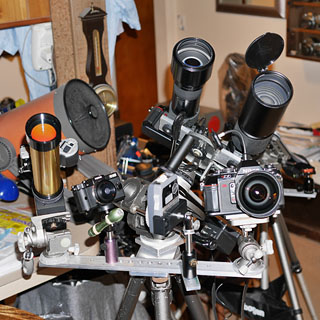 |
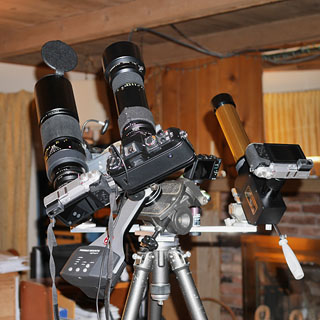 |
| Custom Corona Still Imaging Tripod Assembly that Accommodates 5-6 Cameras | |
| Cameras on this tripod emphasize still corona imaging. The assembly includes a Fornax LighTrack II tracking mount and supports up to five cameras and other instruments. It utilizes custom multiple camera bars and other parts to support a second tier of instruments. LEFT: Looking northwest at the front of the assembly. RIGHT: Looking southeast (the eclipse azimuth) at the rear of the assembly. Going from left to right as seen from the rear (right to left as seen from front), the cameras are: TOP TIER (on Fornax LightTrack II mount with Gitzo G1270 head): 1.) Panasonic GX7 (A) black MFT camera with Leica 350mm f/4.8 Telyt-R lens, set to f/6.8. 2.) Nikon N2020 (B) w/400mm f/5.6 ED Nikkor set to f/9.0 and 1.4x converter (f/12.6). Slide film. BOTTOM TIER (on Metal Cross Bar): 3.) Nikon N2020 (C) with Sigma 14mm f/3.5 lens, working at f/6.8. Color neg. film. 4.) Pentax Q with fisheye lens, to image eclipse, Gossen Luna-Pro light meter, and atomic clock. 5.) Panasonic GX7 (B) MFT camera on Coronado PST solar telescope with Barlow lens. SHORTLY BEFORE THE ECLIPSE OR AT THE ECLIPSE SITE: By the time Assembly 2 was in its final configuration, a few changes had been made: * 800mm f/11 Vivitar Solid Cat lens substituted for 400mm ED Nikkor lens with 1.4x converter. * 400mm f/5.6 ED Nikkor Lens with 1.4x converter then used with Nikon FM on separate tripod. * Nikon N2020 camera with 14mm lens was moved to Wide Angle Assembly. * Nikon F with 180mm f/4 Apo Lanthar lens was used in place of N2020 and 14mm. * Thermometer was added to objects imaged by the Pentax Q. * Changes resulted in the Corona Still Imaging Assembly having 6 cameras instead of 5. | |
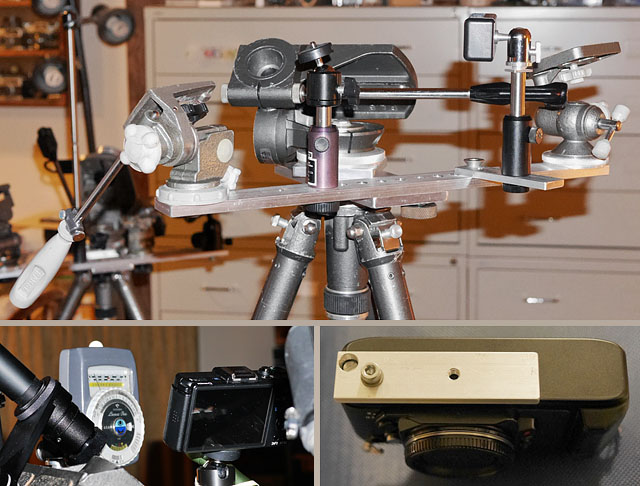
| |
| Unpopulated Corona Still Imaging Assembly, Light Meter, Nikon N2020 Centering Plate. | TOP: Corona Still Imaging Assembly without cameras. View is from south, looking toward front. The large tripod head at center acts as an equatorial wedge for the Fornax tracking mount. LOWER LEFT: Pentax Q camera pointing at light meter. Eclipse would be to upper right of meter. LOWER RIGHT: Nikon N2020 Centering plate. This plate provides a tripod socket right under the camera lens. This reduces the required sweep envelope when camera is panned. |
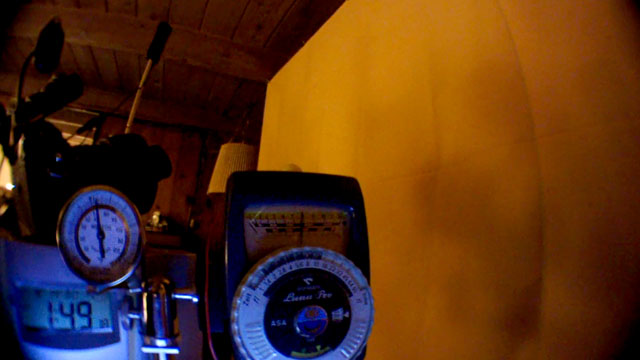
| |
| Video Frame from Pentax Q, while Locally Emulating Light Level of Totality | This image is from video taken with the Pentax Q camera while the approximate light level of totality is emulated indoors. The camera images a light meter (shown in its low range), an atomic clock, and a thermometer. A light below the light meter illuminates the clock, thermometer, and light meter scale, while not illuminating the white incident light dome at the top of the meter. The background will span from the northeastern sky (just above the thermometer on the left) to the sky just below the sun toward the right. The sun will be just barely outside the field of view in order to keep it from excessively biasing the camera gain just before and just after totality. |
A2.3) Assembly 3 Details: Eclipse Video (7 Cameras, later changed to 6)
(2017 eclipse photos and information.)
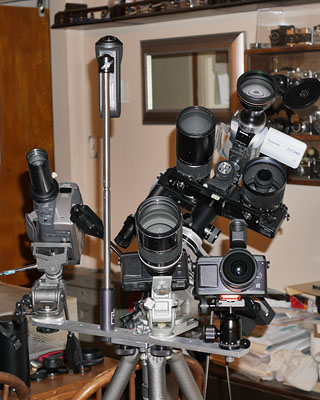 |
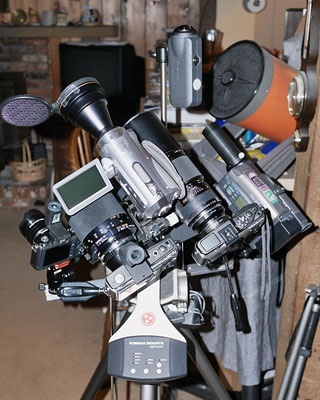 |
| Custom Eclipse Video Tripod Assembly that Accommodates 6-7 Cameras | |
| Cameras on this tripod emphasize video of the solar corona. The assembly includes a second Fornax LighTrack II tracking mount and supports up to seven cameras and other instruments. It utilizes custom multiple camera bars and other parts to support a second tier of cameras. LEFT: Looking northwest toward the front of the assembly. RIGHT: Looking southeast (the eclipse azimuth) toward the rear of the assembly. Going from left to right as seen from the rear (right to left as seen from front), the cameras are: TOP TIER (on Fornax LightTrack II mount with ball head; head replaced with G1270): 1.) Olympus E-P2 (D) camera with VF2 (A) finder and Tamron 500mm f/8 mirror lens. 2.) Panasonic HDC-SD1 camcorder and Nikon Coolpix TC-E3ED 3x converter lens. 3.) Olympus E-P3 (B) camera with VF2 (B) finder and Leica R 250mm f/4 T2 lens, set to f/5.6. BOTTOM TIER (on Metal Cross Bar): 4.) Olympus E-P3 (A) black camera with VF2 (C) and Olympus 8mm f/1.8 fisheye lens set to f/2.2. 5.) Olympus E-P3 (C) camera with 180mm f/2.8 ED Nikkor lens set to f/4. (Focus taped.) 6.) Entaniya Entapano 2 250 degree VR camera, on tall mast. (Entapano 2 later swapped with Ricoh Theta S spherical camera with wired remote from Wide Angle Assembly.) 7.) JVC SZ7 SVHC-C camcorder with home made 3x achromatic converter lens. This camcorder was later dropped from the setup after its battery would not hold a charge. SHORTLY BEFORE THE ECLIPSE OR AT THE ECLIPSE SITE: By the time Assembly 3 was in its final configuration, a few changes had been made: * Entapano 2 camera on tall post was swapped with Ricoh Theta camera in Wide Angle Assembly. * JVC SVHS-C camcorder eliminated, and E-P3 with 180mm lens moved to its position. * Changes resulted in the Eclipse Video Assembly having 6 cameras instead of 7. * Therefore, the final configuration of the full setup accommodated 24 cameras (12+6+6). | |
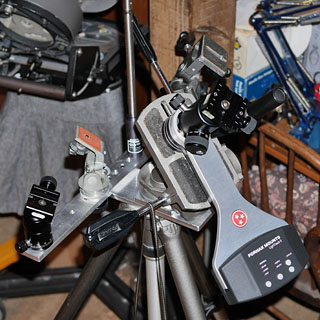
| 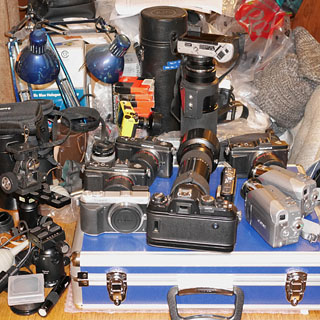
|
| Left: Unpopulated Eclipse Video Assembly. Right: Cameras, Lenses, etc., on Table. | LEFT: Eclipse Video Assembly from side, without cameras. RIGHT: Cameras for various eclipse assemblies on table. |
A2.4) Automatic Camera Controller (for up to 12 Cameras)
(2017 eclipse photos and information.)
| Twenty-two years before the 2017 eclipse, I automated releasing the shutters on 2 of the 7 cameras I used at the 1995 total solar eclipse. This was done with a home made triple output interval timer that controlled and synchronized two cameras with my custom motorized indexing panoramic camera platform. Two other cameras simply took video during totality, and another was not needed during totality. This left only 2 cameras to operate manually near or during the time of totality. The 1995 eclipse imaging success rate was 100 percent.
Automation of at least firing multiple cameras is an important step in orchestrating several cameras. This reduces most manual operations to changing shutter speeds and removing or replacing solar filters at appropriate times. The camera controller for a subsequent eclipse was envisioned to automate up to a dozen cameras. Combined with automation already possible with the panoramic platform camera controller, this would provide automation of up to 15 cameras. Then, when you consider that up to 5 or so cameras may just be taking video during totality, the use of about 20 cameras at once does not seem unreasonable. This would cover most eclipse scenarios, and the same interval timer box could be used for other things such as using multiple cameras to image deep sky objects at night. A camera controller of this scope is not exactly a small project, so I decided not to put time into building it unless it looked like a later total solar eclipse expedition would be possible. Seeing another eclipse seemed unlikely by 2005, because my endurance had waned to where I could no longer work full time even if I gave up a social life and recreational activity including eclipses. Then in 2007, I lost sensation on most of my left side and became chronically fatigued, but continued working as many hours as I could at the expense of everything else. I really liked my job, and this situation continued for 8 years, until my diminishing stamina was insufficient for the hours needed. Then, I was out to pasture. Even without a day job, preparing for the 2017 eclipse was a major undertaking for someone in my condition. It took about a year, even though I could have done the same thing in a dozen weekends 20 years ago. But the alternative would have been to get nothing of note done during the same year. Also, given the rate my stamina has changed, it looked like the 2017 eclipse may be my last chance to use enough cameras to complete the ground work for accurately simulating solar eclipses in the future. This meant that if I was going to use a lot of cameras at an eclipse, it probably had to happen in 2017. Preparation was approached it the same way I had approached my day job in healthier times. Namely, break a larger project down into "bite size chunks" and work on it little by little, even if it takes months to complete. The camera controller was in this category, but it was not finished in time for the eclipse because I was bedridden for the month of May, then a weeks-long health insurance nightmare began in late June. The stage I was able to reach on the camera controller by August is shown below. To save time and ensure some degree of compatibility with existing remote cables, the camera controller box was designed to be compatible with JJC cables for remotes that accept 2.5mm stereo plugs. The JJC cables have built-in resistors for cameras such as the Panasonic GX7. This eliminates the need to integrate switchable resistors into the camera controller. Another time saver was to use a Contax Interval timer (made for 1980's Contax RTS motor drives) as the clock, at least for now.
The internal DPDT relays of the camera controller are wired in a way that appears unlikely to "freak out" a camera when half press and full press are connected at approximately the same time: | |
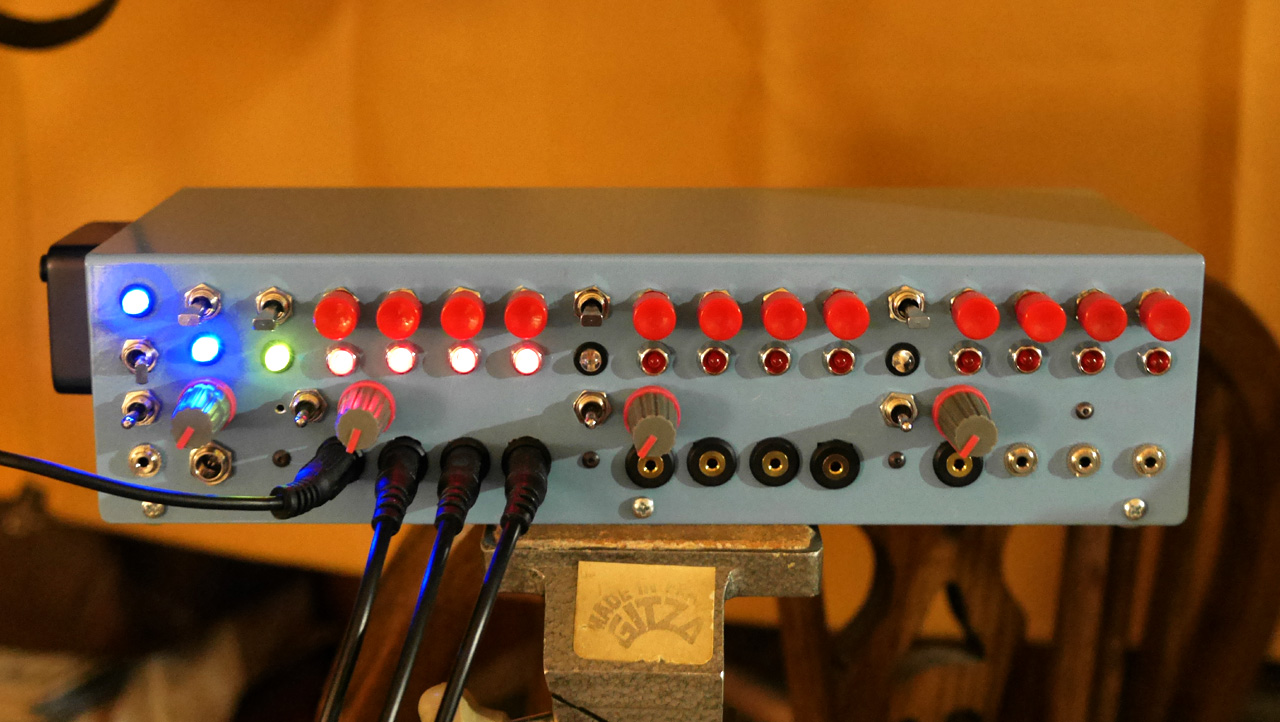 |
|
| Custom Camera Controller that (when finished) Automates up to 12 Cameras | |
| This camera controller is designed to automate firing the shutters of up to 12 cameras at selected intervals, but only 4 of its channels were completed before the eclipse due to protracted issues with a health insurance company that ate up over 5 weeks of eclipse preparation time. The small black object on the left side is a modified Contax interval timer, which was used as the clock to save time. The left knob (when enabled) will control an (as yet unbuilt) internal clock, and the other 3 knobs control the pulse duration for each group of 4 outputs. Buttons at the top are for firing cameras manually, and toggle switches to the left of each group of 4 buttons fire all 4 at once. The toggle switch at upper left fires all 12 outputs at once if the group enable switches (just to the left of each knob) are turned on. The unit runs on a 9 Volt battery. Jacks for external power and an external clock are at lower left. | |
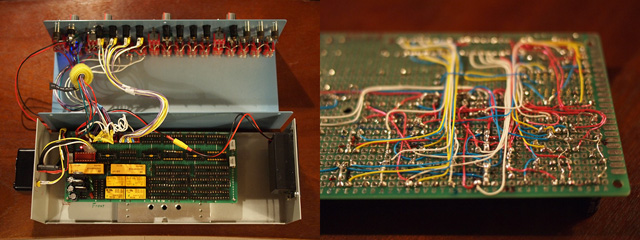
| |
| LEFT: Internal view of Camera Controller, showing first 4 channels populated. | |
| The original design (not fully built) has an internal clock, and a flip flop at the clock output alternates between firing channels 1-4, and channels 5-8. This makes it possible to fire cameras with electronic shutters (and thus no vibration) at different times than cameras with mechanical shutters. Channels 9-12 are for film cameras, and can be set to fire 2 or 4 times less frequently than the others, to keep from running out of film when channels 1-8 are firing every 4 to 8 seconds. Sockets on the second row of the circuit board are for clock related components. Sockets at lower center and lower right are for channel 5-12 relays. | |
| RIGHT: Numerous connections for relays and switches, etc., are required on circuit board. | |
| Soldering could only be done on medically "good days" due to tremor, and even then, my solder joints are not what they used to be. Numerous wiring errors were made while distracted by the insurance nonsense, and these had to be corrected before I could proceed after the insurance stuff wound down. By then, my stamina was down to where I could only deal with this sort of thing for up to 5 hours a week (tops), and even that required temporarily neglecting all housekeeping and laundry and such. | |
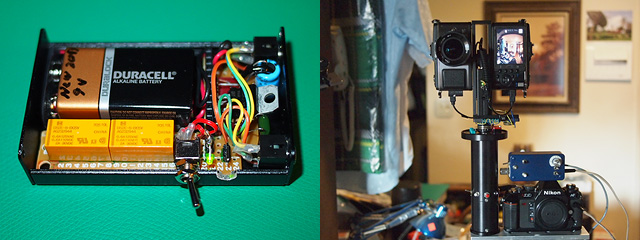
| |
| LEFT: Relay box for panoramic platform, to translate pulse into control for digital cameras. | |
| The box has to be small in order to avoid imaging it with fisheye lenses on the panoramic platform. It nests inside the right angle camera mount, but can also be attached to a camera flash shoe. | |
| RIGHT: Relay box on top of panoramic platform, also showing connections to two cameras. | |
| The clock that automates the panoramic platform is in the blue hand control box at lower right. The tall black cylindrical object at bottom center is the motorized indexing panoramic camera platform that I built for the 1991 total solar eclipse. The basic unit includes the motor, battery holder (for two 9-volt batteries), camera platform, indexing pins, and the switch that the indexing pins operate. In 1994, shutter release signal commutators were added to the top. This permits continuous indexed rotation in the same direction, which can reduce time distortion. In 1995, a 3-output synchronized interval timer was added to the blue hand control box. One channel controls the platform rotation, and the other two channels are for cameras. The digital camera relay box was added in 2017. | |
A3.0) Experimental Gadgets: Testing for Feasibility at 2017 Eclipse.
(2017 eclipse photos and information.)
| Over a long period of time spanning up to years before the eclipse, I intermittently looked into whether certain equipment or concepts would be useful for a solar eclipse. The emphasis was usually on what could provide a smaller and lighter setup without sacrificing capability, but a few items were not particularly compact. Material below shows only one or two such items, but may be gradually added to in later years. In the meantime, my Astro Gadgets! web page covers previous optical projects that are not necessarily eclipse related.
|
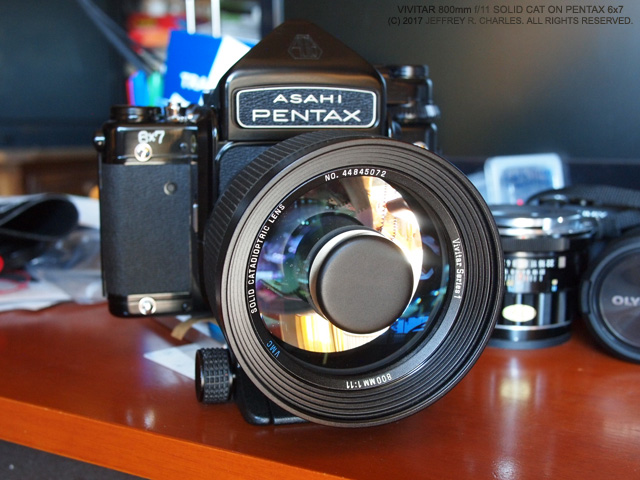 |
| Modified Vivitar 800mm f/11 Solid Cat lens on Pentax 6x7 |
| In the summer of 2017, I acquired an 800mm f/8 Vivitar Solid Cat lens to see if it would be useful for the eclipse. The Solid Cat was originally developed by Perkin-Elmer. The lens was tested for the usual flare and ghost images that can prevent imaging earthshine during totality or even ruin an otherwise good "diamond ring" picture. It was found to be a little below average, and an eclipse had to be centered fairly well to keep ghost images from being a problem. (Tests in Appendix B.) This particular Solid Cat lens had haze on the back of the front element, so it was disassembled to see if the haze could be removed. (The Solid Cat is not really one solid piece of glass. It has 3 full aperture air spaced elements, plus smaller elements.) The haze was found to be permanent, and looked like a case of the lens not being fully polished prior to coating. This particular lens also did not have a stop anywhere near the infinity mark. While in the lens, I found that the infinity stop can be moved to almost an inch past the infinity mark and still maintain adequate clearance from the rear element groups. Since the rear element groups have a negative focal length (and therefore act like a Barlow lens), the full working aperture is available even if focus is adjusted to provide a long back focus distance. Ultimately, it was found that the back focus could be extended to about 3mm farther than what is needed to work on a Pentax 6x7 camera, and that the lens covered almost the entire 6x7 format with the extended back focus distance! The result is pictured here. The Pentax 6x7 and Solid Cat lens combination was brought to Idaho for the eclipse, but was not deployed because I was too fatigued to set it up. Instead, the Solid Cat lens was used with a Nikon N2020 on one of the trackers. But since the trackers stopped tracking just before totality, I would have been better off using this camera with no tracker at all! |
Return to Local Table of Contents
Appendix B: Camera, Lens, and Solar Filter Testing for the 2017 Eclipse
(With Lens Recommendations that may be Useful to Other Eclipse Observers)
|
A total solar eclipse is a relatively demanding subject for many cameras and lenses. This is particularly true if you want to avoid excess flare in the area occupied by the moon during totality. Low (or at least uniform) flare is particularly important when attempting to photograph earthshine on the moon during totality. For this, digital cameras may impose more challenges than film cameras.
B1.0) Digital Camera Testing It goes without saying that basic testing of a camera and its lenses, to verify proper function, should be performed before any total solar eclipse expedition. It is also important to practice pointing each camera, lens, and solar filter combination toward the sun without sighting down the lens, since even briefly looking at the sun for this purpose is dangerous. The shadow of a lens on the front of a camera can often be used for this, but there will not be a clear lens shadow during totality. When film cameras were the only choice, the camera and film did not present significant problems for solar eclipse imaging. As long as the camera worked and a suitable fine grain film was selected, the lens would often be a more significant contributor to unwanted image artifacts than either the camera or the film. The only major artifacts from film include grain and halation. Grain is relatively predictable based on the exposure and the film selected. Halation causes blooming around bright parts of the subject, and is caused by light going through the film emulsion, then bouncing between the back of the film substrate and the emulsion. In total solar eclipse photos, one obvious manifestation of halation may be red "dents" in areas on the dark lunar limb that are near bright prominences. Some films also add false color to dimmer parts of the corona, but the effect is typically much more subtle and consistent than is the case with digital cameras. Digital cameras can be more problematic for photographing a total solar eclipse. This is because digital cameras have optical components in the optical path between the lens and image sensor. These components include a sensor cover glass which may have an infrared rejection coating on the front. The distance between the sensor surface and the front of a sensor cover glass is usually many times the thickness of photographic film. This can increase the size of blooming related artifacts. The sensor cover glass is usually smooth enough to provide a specular reflecion as good as that from a mirror, though much dimmer. If a filter or a certain type of lens surface is in front of the camera, light can reflect back and forth between the sensor cover glass and the other optical surface, causing hot spots or even ghost images. This is most obvious when flat filters (including solar filters) are mounted in front of a lens or telescope. Tilting a front-mounted filter will usually move the ghost image away from center. Digital cameras also incorporate small color filters in front of the pixels, and most have an anti-alias filter. Digital cameras can also have polarization effects. The small but regular pixel interval in some digital cameras can also cause color artifacts. By contrast, a typical film camera has nothing in the optical path between the lens and the film. This is why I elected to use both digital cameras and film cameras to photograph the corona. B1.1) Digital Camera Artifacts Artifacts unique to digital cameras (versus film cameras) include the following: Dust. A digital image sensor (usually its cover glass) can collect dust, and shadows of this dust are cast onto the image sensor when a picture is taken. If a slow f-stop is used (not unusual for solar eclipse images) the shadows of dust particles will be sharper. In a film camera, a new frame of film is used for every picture, so the chances of getting dust particle shadows in a picture are much lower. Digital image sensors may also have unwanted polarizing and aliasing effects. Blooming. In a digital camera, blooming in an eclipse image is likely to be much more pronounced than is the case for film imaging. One reason for this is the relatively long distance (up to 5mm) between the front of the sensor cover glass and the image sensor surface. This distance is over ten times larger than the thickness of a typical sample of photographic film. As with halation in film, light can pass through the sensor cover glass, bounce off the image sensor, and then reflect back and forth between the image sensor surface and the cover glass. The result is blooming that occupies a much larger angular area in the subject. Depending on the lens used, the angle occupied by blooming can be more than ten times that of a film image. Some digital cameras may also produce spikes around highlights that are caused by saturation of the image sensor. Many digital cameras also exhibit color artifacts in blooming. One frequently seen artifact is predominantly red or orange blooming in directions parallel to the sensor edges, and a green tint to blooming diagonal from a highlight. Ghost images. A digital camera sensor cover glass is a smooth specular surface that is capable of reflecting light from a subject back toward the camera lens. Some lenses have optical surfaces that reflect this light back to the image sensor as visible ghost images of highlights in the subject. This is rarely a problem with film, since film emulsion has a duller surface than an image sensor cover glass. When a filter is used in front of a lens on a digital camera, ghost images are almost guaranteed. This is because the lens focuses light onto the image sensor, but when the light is reflected back toward the lens by the sensor or its cover glass, the lens acts as a collimator for the light, which is then reflected back through the lens by the filter, where it forms a fairly clear ghost image at the image sensor. In certain astronomical photos, effects from this are obvious even with multi-coated filters. When a solar filter is used on a digital camera, tilting the filter slightly can help eliminate a solar ghost image that is overlapped with the primary solar image. This is easy to do with slip-on solar filters, but threaded solar filters may need to be disassembled so shims can be added to tilt the filter. (I have done this with my threaded solar filters since the mid 1990's.) In some cases, it may be possible to get adequate filter tilt by shimming one side of a filter adapter, such as a step-up ring. Noise and Noise Reduction Artifacts: Digital camera noise is fairly obvious in all digital cameras I've tested at medium to high ISO settings (400 and up). Even at low ISO, noise or noise reduction artifacts are obvious in almost all of the tested cameras. The only exception I've seen to date is the fairly clean image produced with the Leica M9 at its "Pull 80" ISO setting. For the other cameras, there is a trade between noise and noise reduction artifacts. Personally, I'd rather put up with a little noise than deal with noise reduction artifacts. This is because the latter introduces false texture to the image that does not exist in the original subject. In some cases, noise reduction also clips shadows all the way down to a DN of 0, which is not very compatible with imaging the dimmer outer corona at a total solar eclipse. In general, older cameras tend to have more noise at a given ISO setting, and newer ones tend to have more noise reduction artifacts. This is obvious in the tested Olympus E-P series cameras. The E-P1 through E-P3 models are 12 MP Micro 4/3 cameras that all have a 4.3 micron pixel interval. The Olympus E-P1 and E-P2 have similar amounts of noise, and the E-P3 has less noise even though it is said to have the same sensor. The difference is NR processing. Of the three E-P cameras, my preference is the Olympus E-P2 image at ISO 100. The ISO 100 noise is not excessive as long as the picture is not underexposed. The E-P3 provides cleaner images at high ISO settings, but has noise reduction artifacts at all ISO settings. The Panasonic GX7 is a 16 MP camera with a 3.8 micron pixel interval. The GX7 image has significantly more noise reduction than images from the E-P1 through E-P3 cameras at all ISO settings, but can outperform these E-P cameras at high ISO settings up to 3200. Low ISO is better for eclipse photos, but the high ISO may help image outer corona in video mode. By comparison, the tiny Pentax Q and Pentax Q7 cameras are almost toy cameras owing to their small sensors and correspondingly small pixels. The small pixels result in lower dynamic range and higher noise and NR artifacts. The Pentax Q7 is used only because its small format is compatible with a high end fisheye lens I already had, and it also has a built-in interval timer. B1.2) Digital Camera Efficiency When film was more commonly used, performance and efficiency of a given ISO of film was reasonably predictable, though not always precise to a small fraction of an f-stop. The efficiency of digital cameras tested to date differed by almost a full f-stop at the same ISO setting, depending on the camera brand and model. Here are basic figures for relative efficiency (in f-stops) of a few Micro 4/3 and other cameras. An Olympus E-P3 was the reference camera. Efficiency was compared at shutter speeds between 1/125 sec. and 1 sec. The "Image" column shows the most significant image number used for the data:
CAMERA MAKE/MOD:   EFFICIENCY:   IMAGE:   NOTES:
Leica M9            TBD           TBD
Olympus E-P1       -0.17 stops    TBD     Least efficient in test, ISO 200.
Olympus E-P2       -0.17          7757
Olympus E-P3        0.00          6539    Reference Camera, ISO 200. SN TBD.
Panasonic GX7      +0.67          0911    Most efficient in test. SN TBD.
Pentax Q7           TBD           TBD
B1.3) Digital Camera Menu Settings and Camera Setting Stability In addition to image artifacts, many digital cameras have menus that provide a myriad of settings. For a total solar eclipse, it is important to verify that menu settings which would have adverse effects on eclipse images are not used. Another consideration is that menu settings in some cameras are unstable and can change themselves back to a previous setting even if the menu is never accessed. During the 2017 eclipse, this was discovered "the hard way" when at least one Olympus E-P3 camera changed its own setting from Manual Focus (MF) to Auto Focus (S-AF) shortly before totality. The S-AF setting (rather than something like S-AF+MF) locked out manual focus, rendering both the camera and its 8mm f/1.8 fisheye lens (which lacked an MF switch) worthless during the eclipse. There was no practical way to salvage this camera's functionality during the eclipse.
Specifically, the menu setting instability made the camera change its setting from MF to S-AF, then hunt for focus as totality approached. This kept the camera from taking a wide angle video of totality that has the same field of view as the still picture in this web page that shows the eclipse over the horizon. Subsequent testing of several Olympus E-P3 cameras showed that all three E-P3 cameras I had access to would change their own settings from MF to S-AF under exactly the same conditions. Details are in the "Summary of Eclipse Failures" section.
B1.4) Camera and Lens Test Examples
Numerous pictures were taken of a variety of subjects to test various cameras and lenses. A few of the more useful or telling examples are shown below.
| |
 |
|
| Camera and Lens Tests on Crescent Moon | |
|
Long exposures (2-8 seconds) of the crescent moon can reveal important things about cameras and lenses that are applicable to total solar eclipse imaging. The LEFT photo of the 26 October 1984 conjunction of the moon and Venus was taken with a film camera and long focal length (over 1,000mm) lens on ISO 1600 color film. It has relatively little blooming around the sunlit part of the moon. The CENTER image was taken in 2016 with a small format digital camera and a Leica 90mm f/2.8 Elmarit-M lens set to f/3.4. It shows considerably more blooming and some color fringing, but this is partly because of its radically shorter focal length. When slightly more of the moon is sunlit, blooming can obscure a good portion of the earthshine detail. The RIGHT image was taken on the same night with a longer focal length 250mm lens on the same small format digital camera. It has less blooming than the center 90mm image, but a little more blooming than the film image. Since the digital camera pixel interval is considerably smaller than the grain structure on high speed film, resolution of this image is beginning to approach that of the film image that was taken at a significantly longer focal length. | |
 |
|
| Digital Camera Artifacts Around Highlights (Panasonic and Fuji). | |
|
The goal of camera and lens testing is to obtain a total solar eclipse image that is relatively free of artifacts that introduce false color or hinder getting a clean image of the lunar limb. LEFT: This long 8-second exposure of the half moon was taken with a Panasonic GX7 camera (ISO 200) and a Leica 250mm f/4 Telyt-R T2 lens set to f/6.8. (The exposure required to cleanly image earthshine on the moon during totality would not be much shorter at the same ISO.) The photo has uneven red color artifacts around the sunlit part of the moon. These are caused by the camera and not the lens. A possible cause is that the orthogonal pixel pitch in the Bayer pixel filter array is a multiple of a given wavelength of light, while the effective pixel pitch at other angles would correspond to multiples of different wavelengths. Saturation was increased 50 percent to make the color more obvious. RIGHT: This long exposure of the half moon was taken with a Fuji X-T10 camera. This camera's pixels are not arranged in a traditional Bayer array, and it does not have orthogonal artifacts like those in the GX7 image. Instead, artifacts in the Fuji are alternating circles of low saturation red and green that encircle the overexposed subject. I did not have an X-T10 at the eclipse, but acquired one later because it had a real marked shutter speed dial. Saturation is increased here too. | |
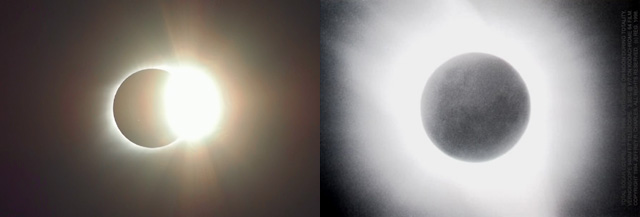 |
|
| L: Digital camera artifacts around highlights. R: Earthshine on Moon during 1994 eclipse. | |
|
LEFT: Manifestation of anticipated orthogonal red digital camera artifacts in image of "diamond ring" at 21 August 2017 total solar eclipse. Camera is an Olympus E-P3, which has a Bayer array image sensor. The 4.3 micron pixel interval of the E-P3 is a little larger than the 3.8 micron interval of the Panasonic GX7 used for one of the tests above, so the artifacts are not as strong. The iris in the 250mm lens has 8 blades, but the red color clearly favors orthogonal over diagonal directions. RIGHT: This image of the 3 Nov. 1994 total solar eclipse was taken with a Vernonscope 94mm f/7 refractor telescope and a Nikon N2020 film camera. It is a 3 second exposure at f/7 on Kodachrome 64 Professional film (Kodachrome is no longer available). This simple system (triplet objective and film camera) captured a fairly clean, though underexposed, image of earthshine on the moon during totality. The original was printed on black and white photo paper to brighten the lunar image. Excessive artifacts from lenses or digital camera sensors can spoil a picture like this. | |
B2.0) Lens Testing Camera lenses and telescopes can introduce a variety of image artifacts that range from ghost images, to veiling flare, to uneven flare, to blooming and color fringing. Starting in the 1990's, and over the years since then, I have tested numerous camera lenses as I had access to them. The tests covered both resolution and aspects such as flare that could severely reduce contrast. Color Fringing. Almost any camera lens will have some color fringing, though some mirror lenses with refracting components have less fringing at the expense of lower contrast and more blooming. If you do not yet own a lens suitable for the eclipse, it is advisable to read up on lenses you are considering, and to test them for fringing on high contrast backlit subjects if practical. If you do not need a fast f-stop, some low cost pre-set telephoto camera lenses from the 1970's should be adequate when used between f/8 and f/11. If you already own a lens, one thing to do is to test it at different apertures (f-stops) to find the widest aperture that will provide an image with acceptably low color fringing. Flare and ghost images. Some lenses and telescopes have more flare and ghost images than others. A telescope will usually have fewer ghost images than a camera lens because the telescope has fewer optical elements, though this is not a hard and fast rule. Some lenses may have bright ghost images, others may have uneven flare caused by reflections, and still others may have a combination of these flaws. Testing a lens can help you know what to expect when using it for eclipse imaging. A good subject for testing both lenses and digital cameras is the crescent moon. Specifically, when the moon is less than 3 or 4 days from new moon, you can test a lens for suitability in eclipse imaging by taking long enough exposures of the moon to capture the "earthshine" on the part of the moon that is not directly illuminated by the sun. A more extreme test is to overexpose the moon when it is about half illuminated. If you can get a clean image of the earthshine when the crescent (or even half) moon is relatively well centered in your camera, the lens or telescope will probably be adequate for the solar eclipse. If the imaged earthshine has a lot of artifacts in it, it is also likely that the image of the relatively dark moon in a long exposure of a total solar eclipse will have a similar level of artifacts, though the artifacts may look more symmetrical.
A lens or telescope that fails the "crescent moon test" may still be adequate for shorter exposures of the eclipse, and you can always resort to image processing to reduce or eliminate image artifacts related to longer exposures with a given lens or telescope. | |
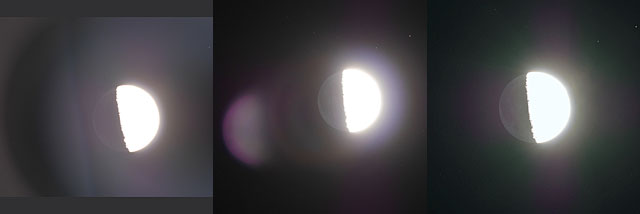 |
|
| Lens Flare, Blooming, and Ghost Image Tests on First Quarter Moon | |
|
A long exposure of the crescent moon or half moon can reveal important things about camera lenses and telescopes that are applicable to total solar eclipse imaging. A Panasonic GX7 digital camera was used for these images. LEFT: This image was taken with a 500mm f/5 Reflex Nikkor mirror lens. It has relatively strong asymmetrical flare. The diagonal line is from a power line and is not part of the flare pattern. Black at the top and bottom defines the image edges. CENTER: This image through a Viogtlander 180mm f/4 APO-Lanthar lens at maximum aperture has relatively low veiling flare (considering the subject) and almost no color fringing, but it has a strong ghost image. RIGHT: This image was taken with a 400mm f/5.6 ED Nikkor lens set to f/8. It has acceptably low flare and no ghost image, though it does have visible color fringing until stopped down to about f/9. In this and some other digital images, red blooming tends to be orthogonal, while any green blooming runs diagonal to the light source. This is a characteristic of the digital camera and not the lens, and is one more reason to consider using a film camera for at least some eclipse images. | |
|
B2.1) Lens Test Results
Some results from my lens tests are shown here. I tested almost every long FL lens I had access to. (f-stop column shows widest stop at which lens performed well, and for which testing emphasized.) Test results for few lenses and telescopes that were tested in preparation for the later 2024 total solar eclipse (which I was prevented from going to), have been added to the table below.
Lens Flare, Blooming, and Ghost Image Tests (Earthshine on Crescent Moon):

Lens FL/Brand         f-Stop Bloom Ghost C-Shk  Resol  Notes:
50 f/1.4 Leica Slx-M  2.4    VG    Good  None   Excel  Use f/4.4-6.8 f/sequence.
75 f/2.5 Leica Smt-M  3.8    VG    Good  None   Excel  Use at f/3.8 or slower.
90 f/2.8 Leica Elt-M  4.8    Fair  Fair  None   Excel  OK for wide corona image
105 f/1.8 Nikkor AIs  4.5    Fair  VG    None   Good   Use at f/2.8 or slower.
135 f/2.0 Nikkor AI   4.0 G  Good  VG    None   VG     MFT Video OK f/2.4-2.8.
135 f/2.8 Leica Elt-M 4.0    Fair  VG    None   Excel  OK for MFT video at f/3.4.
135 f/3.4 L.Apo-Tel-M 4.8    _     _     None   Excel  Sharp, but flares f/side.
135 f/4.0 L. Elmar    6.8    Good  Excel None   Excel  Clean seq. image f/6.8.
135 f/4.5 L. Hektor   6.8    Good  Excel None   VG     Clean image f/6.8-f/8.
180 f/2.8 ED Nikkor   4.0 E  Good  Excel None   Excel  Best corona f4.TAPE focus.
180 f/4.0 Voigtlander 4.0    Fair  Poor  None   VG     Strong ghost image.
200 f/5.6 Pentax SMC  9.5    VG    Excel None   VG     MFT video OK f/6.8.
250 f/4.0 Leica R T1  6.8    Good  Good  Mod.   Excel  Not quite as good as T2.
250 f/4.0 Leica R T2  5.6 G  Fair  Excel None   Excel  Good corona video f/5.6
250 f/5.0 Thorlabs    8.8 E  VG    Excel None   Excel  Fringe f/5. VG f/8.8.
280 f/4.8 Leica Viso  6.8 E  Good  Excel None   Excel  Best wide corona still 6.8
300 f/4.0 ED Nikkor   5.6 E  Fair  VG    None   Excel  Best >/=300mm at f/5.6.
300 f/4.5 ED Nikkor   6.8 G  Fair  Excel None   VG     Best at f/6.8 w-w/o TC
300 f/6.3 Tamron APS  8.0 V  Good  _     Slight Fair+  18-300. Res. OK for video.
300 f/6.3 Rokinon APS 6.3    Fair  Fair  Severe Fair   Moon photos unsharp. 2024.
300 f/6.3 Tele-Takum. 8.0    _     _     _      _      For APS. f/9.5 for full f.
300 f/6.3 Tokina MFT  6.3    Poor  Fair  Slight Good   Bright blooming. 2024.
300 f/6.7 Olympus ZII 8.0    Fail  Good  None	Fair   75-300 OK Vid. Gst250. 27.
350 f/4.8 Leica R     5.6 F  Fair  Fair  Slight Excel  Enlarged weak ghost image.
360 f/6.0 TeleVue 60  6.0    Good  Excel Excel  Excel  Field curvature w/o FF.
360 f/6.0 TeleV 60/FF 6.0    Good  Fair  Excel  Excel  w/Starz. EVO-FFv2 2024/27.
400 f/5.6 Fujinon FX  7.1    Good  Good  None   Excel  100-400 Varif. zoom creep.
400 f/5.6 ED Nikkor   8.0 E  Good  Excel None   Excel  Best tight corona f/9~9.5.
400 f/6.9 Tamron      10.0   Good  Good  Mod.   Excel  Non-Nestar model.
450 f/8.0 Soligor PS  11.0   Good  VG    Slight Good   Lightweight but long.
500 f/5.0 Reflex Nik. 5.0    Poor  Fair  Mod.   Fair   Obvious uneven flare.
500 f/6.3 Viv. Preset 11.0   _     _     _      Fair   Too front heavy f/tracker.
500 f/8.0 Ednar M'scp 8.0    Fair  Fair  Severe Fair   Low contrast vs Nikkor.
500 f/8.0 Reflex Nik. 8.0    _     _     None   VG     Best mirror lens resol.
500 f/8.0 Tamron M    8.0 G  Fair  Good  Severe VG     Best cls. cor.video 17/24.
500 f/8.0 Tokina Mir  8.0 G  Fair  VG    Mod.   Good   Best compact 500 mir.lens.
540 f/7.1 Borg 76ED F 7.1    Excel Excel Excel  Excel  Best image. 1.08xFF. 2020.
600 f/8.0 Viv. Modu.  9.5 G  Good  VG    Slight Excel  Vibrates on track. mount.
600 f/8.0 Vivitar Lng 15.0   _     Excel _      Excel  Too long for tracker.
640 f/7.0 Vernonscope 7.0 G  Good  Excel None   Excel  Lunar limb best w/o 1.5x.
760 f/9.7 Ad Astra 3  9.7 V  VG    Excel Slight Excel  Best Short FL Cassegrain.
800 f/10 B&L Mirror   10.0   Fair  Fair  Slight Poor   Low resolution on limb.
800 f/11 Viv.SolidCat 11.0   Fair  Fair  None   Fair-G Ghost image toward center.
900 f/11 Kasai Pico 8 11.2   Poor  Fair  Slight Poor   Baf.poor. Inac.p.mir edge.
1000 f/11 Celestron   11.1   Fair  Good  Severe Fair   Light baffles not optim.
1000 f/11 Reflex Nik. 11.0   Fair  Good  Severe Good   Strong asymm. blooming.
1400 f/16 Questar3.5  16.0   Fair  Good  Fair   Excel  Diamond ring can flare.
1470 f/14 Meade ETX   14.0   Fair  Food  Severe Excel  Camera shake from plastic.
0.6x FocalR M42 Q3.5  10.5   Fair  Poor  Slight VG     Strong ghost images/bloom.
1.5x Conv Nikon F     Varies Fair  Poor  Fair   Good   Borderline due to bloom.
2.0x Conv Nikon F     Varies Fair  Sev.  Fair   Fair   Poor flare prop. Use VsAd.
Versascope 2.2x Adapt 15.0   Fair  Excel None   Good   Test w/300 f/4.5 EDN f/6.8
B3.0) Solar Filter Testing The most basic solar filter tests are simply where you take pictures in order to determine the optimum shutter speed for imaging the entire sun, as well as the maximum practical additional exposure to image the somewhat dimmer solar limb when the solar photosphere is almost completely eclipsed. This is not something you want to wait until eclipse day to test. The solar images observed through various solar filters have changed considerably since I observed my first total solar eclipse in 1979. In general, the recent trend has been toward filters that produce an image that is a relatively saturated yellow-orange color. This is not necessarily a good thing for digital imaging, because yellow-orange is imaged in both green and red (stronger in red) with a digital camera, and very few camera lenses are designed to bring red and green to a common focus. In the 1970's and 1980's, many solar filters were either a relatively thick metal coated flexible film that provided an off-white solar image with a little tinge of blue, or a glass filter that provided a low saturation yellow-orange image. The flexible filters had relatively little scattering compared to many of today's flexible substrate solar filters, even when comparing a 40-year old sample to a modern filter. However, it is not known if the spectral band of the older filters was particularly safe for extended visual use. (But I can still see, if that's any indication.) Some vintage glass solar filters provided a slightly blue image (early Meade 2045 solar filter), or a yellow image (Questar solar filter), or a low saturation yellow-orange image (vintage Celestron glass solar filter). Older Thousand Oaks glass solar filers provided a somewhat more saturated yellow-orange image, though not as saturated an image as their modern glass filters produce. All of the noted vintage filters worked fairly well for solar observation and photography, though the low saturation yellow-orange was what I preferred most. In recent years, flexible solar filters appear to have more scattering than the older ones, and many recent glass solar filters have a more strongly saturated yellow-orange color or even an outright orange color. Fortunately, in a direct comparison of glass solar filters bought brand new in early 2017, Seymour Solar glass filters had a slightly less saturated image, which was preferable. For digital imaging, increased scattering (in flexible filters) or increased color saturation (in glass filters) is actually a step down from low saturation vintage filters. This is partly because, with increased yellow-orange saturation, data for fewer colors exists in the captured image. There is very little blue in the image. This makes it more difficult to adjust color in a digital solar image without introducing artifacts or non-uniform discoloration. A saturated orange or yellow-orange image divides most image data between green and red in a digital image, while again providing almost no blue image data. This is a disadvantage because (as touched on above) very few camera lenses can bring red and green light to a common focus. Furthermore, spherical aberration correction in most camera lenses is corrected better for green than it is for red, while an orange or yellow-orange solar image puts more light into the red image data than is the case for green. The result is often a solar image with strong red fringing on the limb. Owing to the number of cameras I wanted to use at the 2017 eclipse, it was necessary to use more solar filters than what had on hand. Some of these had to be new filters because vintage solar filters are not very plentiful, particularly in small sizes. Fortunately, there are at least two simple ways to solve the red fringing problem related to the new solar filters. The most obvious way to eliminate red fringing is to use only green information from the captured image. The resulting monochromatic solar image can then be tinted as desired. However, this will only work well if the lens or refracting telescope focus is optimized so green in sharp focus.
The second solution is to use a green filter to suppress the red part of the image from the solar filter. For this, a Wratten 58 dark green filter has worked best, even though the raw solar image looks yellow-green instead of yellow. The Hoya X1 dark green filter is fairly close to a Wratten 58, and is what I chose to stack with some of my newer solar filters. The exposure must be increased by about 1.5 stops when the green filter is stacked with a yellow-orange solar filter. | |
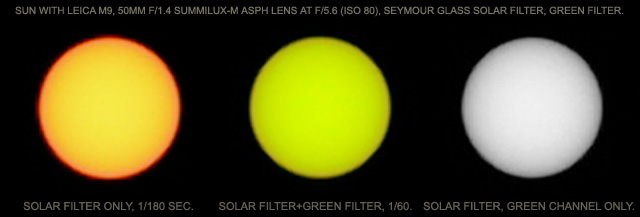 |
|
| Solar Filter Test Images (Solar Filter Only, Green Filter Added, Green Image Data Only) | |
|
Solar filter testing with a digital camera. These tests were performed to optimize off-axis resolution in a sequence image of the partial and total eclipse phases. All three are 200 percent crops (2x enlargement of each pixel) from solar images taken with a Leica M9 camera at ISO 80 through a 50mm f/1.4 Sumilux-M ASPH lens working at f/5.6. LEFT: 1/180 second exposure through Seymour Solar threaded glass solar filter. Red fringing from even a sharp lens like the Summilux is obvious at this magnification. CENTER: 1/60 second exposure through the same solar filter, stacked with a Hoya X1 dark green filter. This image looks cleaner owing to the lack of obvious fringing, but it not quite as sharp as it could be. About 20 DN of green was removed in post to provide a yellower color. RIGHT: Green data only from the left image that was taken with only the solar filter. This image is sharpest because the infinity focus stop of the lens is close to optimized for green light, and because no red image information is included. B3.1) Solar Filter Test Results
Results from some of my solar filter tests are shown here.
SOLAR FILTER DENSITY TESTS (Image column is filter test picture number): (Shown optimum shutter speeds are for ISO 200, and f/11 with Olympus E-P3.) Size RefDes Mfr: Shutter Image Cam / Lens Notes (plus util. cams / adapt) 046mm st46s1 Seymour 1/125 6507 JVC w/3x JVC SVHS, 3x conv. (w/37mm ad.) 046 t st46s2 Seymour 1/80 6501 MTLR 55mm Mamiya TLR (Kept in Hass case) 046 t st46t3 T.Oaks2+ 1/200 6485 LM9 Leica M9 (with 39mm adapter) 052 t st52s1 Seymour 1/80 6487 PanGX7a 1x Pan. GX7 (with 52-46, 52-55 ad) 052 t st52t2 T.Oaks2+ 1/320 6500 NA None. (Kept in Hasselblad case.) 058 t st58s1 Seymour 1/100 6496 300f63 Tiny 300mm Vis. Scope (Hass cs.) 062 t st62c1 Custom 1/200 6490 L280f48 Leica 280 f/4.8 Viso (Hassel. case) 062 t st62t2 T.Oaks2+ 1/180 6504 NA (None. Kept in Hasselblad case.) 067 t st67c1 Custom 1/200 6494 L250f4 Leica 250mm f/4 T2 (Hass. case.) 067 t st67c2 Custom 1 sec. 6492 NA None, OD7+, solar streak (Hass. cs) 072 t st72s1 Seymour 1/60 6483 E500f8 Ednar Mirror Scope 500 f/8 (kept w) 072 t st72s2 Seymour 1/100 6406 N300f45 ED Nik 180,300,400 (I.6521,37c,39) 082 t st82s1 Seymour 1/60 6391 L350f48 Leica R 350mm f/4.8 (In Hass. case) 082 t st82s2 Seymour 1/80 6394 T500f8 Tamron 500mm f/8 (Alt f/slip on) 082 t st82t3 T.Oaks2+ 1/220 6414 V640f7 (8wf) Vernonscope 94mm f/7 (82-95ad) 082 t st82t4 T.Oaks2+ 1/280 6403 H500f8 Hasselblad 500mm f/8 (Alt f/slip on) 082 t st82t5 T.Oaks2+ 1/320 6397 NA None (Kept in Hasselblad case) 089 s ss89t1 T.Oaks2+ 1/400 6510 Alt500T Alt. for Tamron 500mm f/8 (Hass c.) 090 u su90u1 Unknown 1/100 6518 Unmounted Numerous black marks on coating. 095 t st95s1 Seymour 1/160 6410 Questar Questar 3.5 (maybe not at eclipse) 096 s ss96u1 Unknown 1/80 6512 Alt500H Hasselblad 500mm (felt for 90 ID) 102 s ss102t1 T.Oaks2 1/60 6515 Alt Questar None (or Alternate Questar) 105 ct st105u1 JMBclA 1/125 6517 Meade ETX 105mm, dedic. thread 127 s ss127s1 Seymour 1/125 6519 Meade 2045 LX3 and Alt. V 94mm 203 s ss203s1 Seymour 1/100 6522 Celestron C8 (Tests w/Oly E-P3,400 EDN,f/11) 280 s ss280t1 T. Oaks 1/200 6524 Celestron C11 off-axis solar filter. 095 t st95qo Quest OA 1/2500+ 6528 #12 weldGls 1/320 6532c *ViewCard 1/50 6535c + Note: The Questar solar filter is uncomfortably bright, so it may be degraded. | |
|
At least a year before the 2017 total solar eclipse, several web sites published weather statistics to assist observers in eclipse site selection. A few even included photos of various areas that were taken exactly two or three years before the date of the eclipse.
By also viewing weather statistics at sites completely unrelated to the eclipse, and comparing the data with web cam images from various cities, I noticed that days with thin clouds were often shown as being clear days in some weather archives. For eclipse viewing, even thin clouds can obscure the outer corona. In some cases, thin clouds are seeded from jet contrails, though this is less common in the summer than the winter. Because of observations concerning thin clouds versus weather archives, I decided to supplement previously published data with my own brief analysis of web cam images from up to 25 areas, over at least a one week period corresponding to the approximate date of the eclipse, in order to capture separate statistics for completely clear days versus days with thin clouds. The resulting data (shown below) is more pessimistic than most eclipse web sites, at least in regard to statistics for "clear" days. The weather data below is for the time of day that the eclipse occurs in each area. In addition to basic statistics, I also noted if a given day began with clouds that burned off throughout the morning (since that's less likely to happen after the partial phase of the eclipse begins) or if the morning was clear and clouds built up throughout the day (more favorable for the eclipse than the morning cloud situation), though these details are not included here.
Evening webcam images were also observed for each site, since an eclipse can sometimes cause clouds to behave as they would as evening approaches. This contributed to our group to being clouded out in Mazatlan Mexico at the 1991 total solar eclipse. (No webcams back then.) The clouds moved from the mountains toward the shore as they would in the evening. By contrast, the selected 2017 site usually experienced some clearing in the evening. | |
| August 2016 Images from Webcams in 2017 Eclipse Path: | |
 |
|
| Salem and Culver Oregon Webcams | |
| LEFT: Webcam image of Salem OR from 23 Aug. 2016, for a little after time of day for 2017 eclipse. RIGHT: Webcam image of lake near Culver OR from 27 Aug. 2016, for near time of day for 2017 eclipse. | |
 |
|
| Mackay ID and Jackson Hole WY Webcams | |
| LEFT: Webcam image of Mackay ID from 22 Aug. 2016, for near time of day for 2017 eclipse. (OFFLINE 5/2017) RIGHT: Webcam Image of Jackson Hole, WY from 23 Aug. 2016, for near time of day for 2017 eclipse. | |
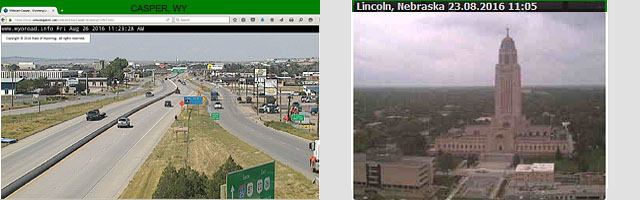 |
|
| Casper WY and Lincoln NE Webcams | |
| LEFT: Webcam image of Casper WY (looking west) from 26 Aug. 2016, for near time of day for 2017 eclipse. RIGHT: Webcam image of Lincoln NE from 23 Aug. 2016, for 2 hours before time of day for 2017 eclipse. | |
In addition to fixed time weather data, it was also possible to determine that if certain mountain sites north of the eclipse path began to experience a buildup of clouds in the late morning, mountain sites in the eclipse path to the south were often likely to develop similar conditions a day or two later. One example of this was that Mackay ID would often experience cloud conditions similar to what had occurred in Salmon ID up to a day or two before. Two cases of this are shown below. | |
 |
|
| Cloud Conditions in Salmon ID that Preceded Similar Conditions in Mackay ID. | |
| Apparent relationship between weather in Salmon ID, and weather in Mackay, ID the following day. UPPER LEFT: Broken clouds forming over mountains near Salmon ID on 24 Aug. 2016, near time of day for 2017 eclipse. UPPER RIGHT: Broken clouds forming over mountains northeast of Mackay ID at about the same time the next day. The clouds did not get as far as town until about an hour after the time of day for the eclipse. LOWER LEFT: High Clouds forming over mountains near Salmon ID on 25 Aug. 2016, at about the time of day as the 2017 eclipse. The high clouds became thicker and covered more of the sky by early afternoon. LOWER RIGHT: High clouds forming over Mackay and mountains near Mackay ID at about same time on following day. | |
It was also found that if Mackay experienced thick clouds, the same was often true for many mountain areas in Idaho and Wyoming within the eclipse path, meaning that if heavy clouds were over the Mackay area, it may be necessary to go as far east as Casper WY, or as far west as Madras, OR to find clear skies. Likewise, when Casper was cloudy, mountain sites in Idaho were clear more often than not. This is of course from only a 7 to 11 day sample of local weather. Ultimately, the Mackay Idaho area was selected as the primary eclipse site, even though its weather prospects did not appear to be as good as Madras OR, or Jackson or Casper WY. Mackay was selected partly because mountain ranges around it were oriented in such a way that it might be possible to see the moon's shadow (umbra) move over them as it passes through the area at close to 1,500 miles (2,400 km) per hour. Mackay was also an area I had wanted to visit even if there was no eclipse. The weather data follows, along with the altitude and azimuth of the eclipse from each area. The eclipse position data is from the USNO. Weather data for north of Boise is based on data from Boise, so it may not be entirely accurate. Sites such as Scottsbluff and Lincoln NE are only shown to illustrate that many low elevation areas in the midwest appeared to have similar conditions on a given day. Data for St. Joseph MO is based on webcams in Kansas City. This weather data was compiled for my own use and is not warranted to be accurate, so it should not be used as an authoritative weather resource.
TABLE C1. PROSPECTS FOR CLEAR SKY AND/OR EXTREMELY THIN CLOUDS: CITY-STATE: CHANCE CLEAR SKY / CHANCE CLEAR OR THIN CLOUDS / NOTES Salem OR: 33% clear / 58% clear or thin clouds / (4th best weather) Madras/Culv.OR: 38% clear / 54% clear or thin clouds / (3rd best weather) N.of Boise ID: 00% Clear / 14% clear or thin clouds / (inadequate data) Mackay ID: 38% clear / 54% clear or thin clouds / (tie 3rd best) Primary Jackson WY: 46% clear / 62% clear or thin clouds / (2nd best weather) N.of Lander WY/ 14% clear / 43% clear or thin clouds / (poor weather) Casper WY: 58% clear / 83% clear or thin clouds / (best avg. wea. 2016) N.of SctsblfNE/ 14% clear / 29% clear ot thin clouds / (poor weather) S.of LincolnNE/ 00% clear / 14% clear or thin clouds / (worst noted weather) St.Joseph MO: 17% clear / 36% clear or thin clouds / (poor Weather) TABLE C2. SITES, SOLAR POSITION AT SECOND CONTACT, PATH WIDTH, TIME, ETC. Eclipse Sites vs Solar Elevation Angle, Path Width (km), Time, Duration (USNO): CITY-STATE: / N.LAT / W.LN. / S.EL./S.AZ./WIDTH/ U.T.2C / LOCAL2C / DURATION Salem OR: / 44:57/123:02 / 39.0/116.0/ 100 / 17:17:21 / 10:17:21 / 1:54 Madras/Culv.OR / 44:38/121:08 / 40.8/118.5/ 101 / 17:19:36 / 10:19:36 / 2:02 N. of Boise ID / Not considered for primary site (sparse data, etc.) Mackay ID:3kmSE/ 43:54/113:37 / 47.9/129.7/ 105 / 17:30:15 / 11:30:15 / 2:14 Jackson WY: / 43:37/110:48 / 50.0/135.0/ 107 / 17:35:30 / 11:35:30 / 2:19 N.of Lander WY / Not considered for primary site (possibly marginal weather) Casper WY: / 42:50/106:19 / 54.0/143.1/ 108 / 17:42:36 / 11:42:36 / 2:26 N.of Sctsblf NE/ Not considered for primary site (potentially poor weather) S.of Lincoln NE/ Not considered for primary site (potentially poor weather) St.Joseph MO: / 39:45/094:50 / 62.0/171.9/ 113 / 18:06:26 / 13:06:26 / 2:38 | |
Return to Local Table of Contents
|
Over a year before the eclipse, I went through some maps and developed a series of routes that stay within the eclipse path as much as possible. The text below emphasizes roads that are in or near the path of totality of the 21 August 2017 total solar eclipse. The area described is between the west coast of Oregon and St. Joseph Missouri.
The selected roads make it possible to move east or west along the eclipse path, usually without leaving the path of totality, or in some places, without going outside the path very far. The purpose is to provide a way to seek out reduced cloud cover, yet still be within the path of totality as much as possible, in the event of a vehicle breakdown. The purpose is to make it feasible to select a primary eclipse site location, then plan a route to the east or west that remains within the path of totality as much as possible. This reduces the risk of missing the whole eclipse due to vehicle breakdown or other mishap while trying to find clearer skies. The routes assume a starting point near Rexburg, Idaho. Alternately, Victor, Idaho, just south of Driggs and at the junction of routes 22, 31, and 33, is one of the more strategically placed towns to gain access to either go east of the Tetons or west further into Idaho. Swan Valley, near the junction of 26 and 31, is almost as good, and Idaho Falls is of course OK in terms of a starting place. To describe the routes, I will start with the west end of the eastern leg, which extends from Rexburg Idaho eastward. However, since my primary site is Mackay ID, the first step is to note how to get from Mackay to Howe, ID, then from Howe to Rexburg:
To get from Mackay to Howe, Idaho, then to Rexburg or the I-15: In addition to showing routes between Howe on the west and Moneta WY on the east, later entries in the routes below show the western leg, which is one way to get to the west coast from Mackay or Howe Idaho, with minimal parts of the travel being outside the total eclipse path. Combined, the routes show one way to go from the west coast to as far east as St. Joseph, MO, while leaving the path of totality as little as is practical. However, the western leg must be taken in reverse to achieve a continuous west to east route from the west coast to St. Joseph MO. This list was compiled for my own use, and the shown routes do not compensate for local road construction, etc. This and all other information is provided without warranty or assertion of accuracy, and should not relied on for route information.
POSSIBLE ECLIPSE ROUTES, EASTERN LEG: From a "Home position" on either the I-15 or Rexburg, you can go: A.) NORTH on I-15 to Dubois and back west on 22 (limited options). B.) EAST on 33 to Tetonia, continue SOUTH to jct. with 22 at Victor. * Go East on 22 to Wilson, Teton Village and beyond. * KELLY is just a little East-Southeast of Moose. C.) OR: Northeast on 20 to Ashton, then Southeast on 32 to Tetonia. * If necessary, continue south on 33 to junction with 22 at Victor. * Go East on 22 to Wilson, Teton Village and beyond. D.) OR: Go SOUTH to Roberts, Idaho Falls, or other access to Route 26E. * From near the 26 and 31 Junction by Swan Valley, you can: D1.) Continue on 26 E beyond Alpine Junction (near path edge) or: D2.) Take 31 east to Victor, then 22 east to Wilson and beyond. E.) To Continue East from routes B through D above: * Take 22 to Moose Wyoming, then 26 North to Moran. * Go EAST on 26/287 to Dubois (Wyoming), Burris, Morton, and beyond. * Continue east on 26/287 to Riverton, take 20/26 east to Moneta. * (Use 134 from Kinnear to Shoshini to stay closer to center line.) F.) To continue farther EAST out of Wyoming: * Take 20/26 to I-25 at Casper, continue to Orin, Glendo, or Dwyer. * Then, 20 East from Dwyer to Henry, Nebraska. Can go N-S on 85; or, * Take 20 East from orin (exits path of totality in Nebraska); or, * Take Route 94 west from Glendo (limited options). G.) TO continue farther EAST, into and beyond Nebraska: * Take 20 East from Henry, Nebraska, past Scottsbluff to Redington. (Scottsbluff Nat. Mon. provides good view, but totality only 1m 50s.) * Take 385 NORTH to Alliance, then take 2 EAST to Thedford. (OR, Can go south on 61 or 97 to stay closer to center line.) * Take 61/92, 97, or 83 from Route 2 to Stapleton on center line. * Take 70 West to 2 at Merna, continue 2 EAST to I-80 near Grand Island. * (OR, 70 to 40E at Arnold, 40E to 30E at Kearney, 30E to Grand Island.) * From Grand Island, I-80 East to Fairmont, or 34S to 6E to Fairmont. * From Fairmont, take 6E to 103S or 81S to 41, 4, or 136E to Beatrice. * From Beatrice, NE, 136E to Auburn, then 73S and E to Falls City. H.) To continue into Kansas and Missouri: * From 136E, 73S to Hiawatha or Nortonville KS, or 75S toward Holton. * From Hiawatha, take 36 East, or take 73S to Horton, then go East. * St. Joseph MO is farthest east point covered here. POSSIBLE ECLIPSE ROUTES, WESTERN LEG: I.) To Go WEST from Driggs or Swan Valley, Idaho (Routes 2-4 above): * Take 33 west to Salem, 20S and 48W to Roberts, OR take 20/33W to Arco. * OR, take 26 West to Ririe, then 26W to Idaho Falls or 48 west to Roberts. * From I-15 (Idaho Falls or Roberts) Take 20/33W to Arco. Take 93NW (exit). * (OR, from Idaho Falls, 15S to 86W (out of path) to Boise to Ontario, OR.) * From Ontario, take 95N to Cambridge (exits path), OR 26 WEST to Madras. * From Madras, 97S to Redmond, 126W to 20W to Santiam Jct. OR: 26W (exit). * From Sant.Jct, 22 N-W past Salem, to 101/Roads End, OR 99W-20W to Newport. * Lincoln Beach, Oregon is near center line on 101. Farthest West Point. |
Appendix E: 2017 Eclipse Image and Data Acquisition Procedure (Timeline)
|
As with previous eclipses, it was useful to develop a procedure that could be rehearsed before the eclipse and used at the eclipse. This increases the number of cameras it is practical to use. A draft outline of the part of my 2017 eclipse procedure that is for use at the eclipse site on eclipse day is shown below. To save time when making camera settings, digital cameras that lack dedicated shutter speed and aperture dials are set to 1 EV steps, where possible. The procedure is unique to equipment I use, but it illustrates details that must be considered when preparing for a short duration event that does not offer a second chance to get things right. If a camera or instrument fails during the eclipse, it is dropped from the procedure. There is no time to fix gadgets at a total solar eclipse! Shown times are for a notional site 3 km SE of Mackay, ID.
MDT Event
Time: Based Time: Process or Event:
09:00 2c -2:30:15 Arrive On Site (may be latest adv. time unless pre-assembled)
10:00 1c -0:15:36 Corona video/still tripods set up, aligned, trackers running.
* View sun in Hydrogen Alpha.
10:09 1c -0:04:36 START sequence cam int. timer.
* Take Hydrogen Alpha pix (if moon impinges on prominences).
* START 250mm MFT video for partial phase time lapse.
* START taking periodic light meter readings (f/light curve).
10:13 1C 2c-1h17m FIRST CONTACT! 10:13.36 (USNO) (1:00 on sun) Obs/time it.
10:40 2c- 0:50:15 Wide angle tripod set up/tested, take 1st 360 degree panorama.
10:45 2c- 0:45:15 Take stills/narrated video of setup, other�s stuff.
* Check tracking versus drift.
11:05 2c -0:25:15 REPLACE batteries in cameras used for sequence / time lapse.
11:10 2c -0:20:15 RESET Fornax Trackers, re-center sun in tracked cams (option).
11:15 2c -0:15:15 Take 2nd 360 pano, cameras on auto, 360 at f/4.8, all sky f/4.
11:20 2c -0:10:15 Take 3rd 360 pano, on auto.
* START light meter/clock video camera.
11:23 2c -0:07:15 Check status of all cameras, including interval timers.
* Re-point M9 (if 135mm used instead of 50mm).
11:25 2c -0:05:15 Take 4th 360 on auto, set to manual and 1/60 sec.
* Turn on shutter speed dial and other illuminators.
11:26+ 2c -0:03:45 Take 5th 360, man. at 1/60 sec.
* START WNW wide angle video cams.
11:27 2c -0:03:15 Sun photo w/350mm, w/o solar filter (Aperture Priority)
* Set all digital still (corona) cameras to MANUAL.
* START 360 pano automation.
11:27+ 2c -0:03:00 * START all other wide angle video cams.
11:27+ 2c -0:02:45 * Set 360/all-sky cams to 1/30 sec.
11:27+ 2c -0:02:30 Briefly rem. 250 solar filter (corona check video.)
* START all corona video.
11:29 2c -0:01:15 Set 360 pano. shutter to 1/15 sec. (while automation running).
11:29+ 2c -0:00:55 Take 350 sun photo w/o solar filter, then replace solar filt.
11:29+ 2c -0:00:30 Set 360/all-sky shutters to 1/8.
11:29+ 2c -0:00:25 Set Nikon 300mm/2x camera shutter to 1/1000.
* Start to REMOVE solar filters.
11:30 2c -0:00:15 REMOVE last solar filter, SET 360/all-sky shutters to 1/4 sec.
11:30+ 2c -0:00:10 Set Nikon 300mm/2x camera shutter to 1/250 (f/12.6).
* Set 360+all-sky shutter speeds to 1/2 sec.
11:30:15 2C SECOND CONTACT! TOTALITY 11:30:15 (11:30:16 USNO) Look at it!
11:30+ 2c +0:00:05 Set 360/all sky shutter to 1 sec. (OK aft. 300 chromo. shots.)
11:30+ 2c +0:00:10 Set Nikon 300mm/2x (f/14) shutter to 1/500, then to 2~4 sec.
11:31+ 2c +0:00:45 Set Leica 350mm (f/6.8) shutter to 1/250, then down to 1~2 s.
11:31+ 2c +0:01:25 Various stuff (Ricoh Theta S/Entapano2 pix, if not auto, etc.)
11:31+ 2c +0:01:40 Set Nikon 300mm/2x shutter to 1/15 (for diamond ring).
11:32 2c +0:01:45 LOOK at totality in scope and/or binoc's to 11:32:14 (3c-15s)
11:32+ 2c +0:01:59 (3c -00:15) [Set long FL corona cam shutter speed to 1/250?]
11:32+ 2c +0:02:03 (3c -00:11) Set pano/all sky shutters to 1/2 sec. (Optional)
11:32+ 2c +0:02:09 (3c -00:05) LOOK at eclipse for third contact.
11:32:29 3C THIRD CONTACT! 11:32:29 (11:32:31 USNO) Look! (02:14)
11:32+ 3c +0:00:08 Set pano/all sky shutters to 1/2 (or 1/4) if not done earlier.
11:32+ 3c +0:00:10 REPLACE solar filters on video cameras, then still cameras.
11:32+ 3c +0:00:20 Set pano/all sky shutters to 1/8 sec.
11:33 3c +0:00:31 Set pano/all sky shutters to 1/15 sec.
11:33+ 3c +0:00:46 Briefly remove 350 solar filter for sun pix; repeat to 3C+5:00
11:33+ 3c +0:01:00 Set pano/all sky shutters to 1/30
* Look for (unlikely) shadow bands.
11:35 3c +0:02:31 Set pano/all sky shutters to 1/60 sec.
11:37 3c +0:04:31 Set pano/all sky shutters to auto (or approp. manual settings)
11:38 3c +0:05:31 RESET Fornax Trackers, re-center sun in tracked cams (altern).
11:45 3c +0:12:31 Replace batteries in time lapse and sequence cameras.
* Reset Trackers (not required if trackers reset at 11:38)
12:54:51 4C FOURTH CONTACT! 12:54:51 (USNO) Observe and time it!
12:55 4c +0:00:09 View sun in H-Alpha, image if moon visible against prominence.
* Take any missed setup pix/video, dismantle, pack, leave site
|
Return to Local Table of Contents
Appendix F: Summary of 2017 Eclipse Failures (what went wrong, lessons learned, etc.)
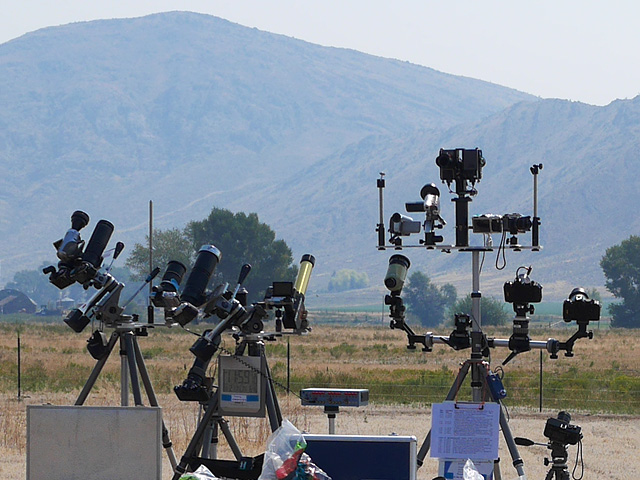
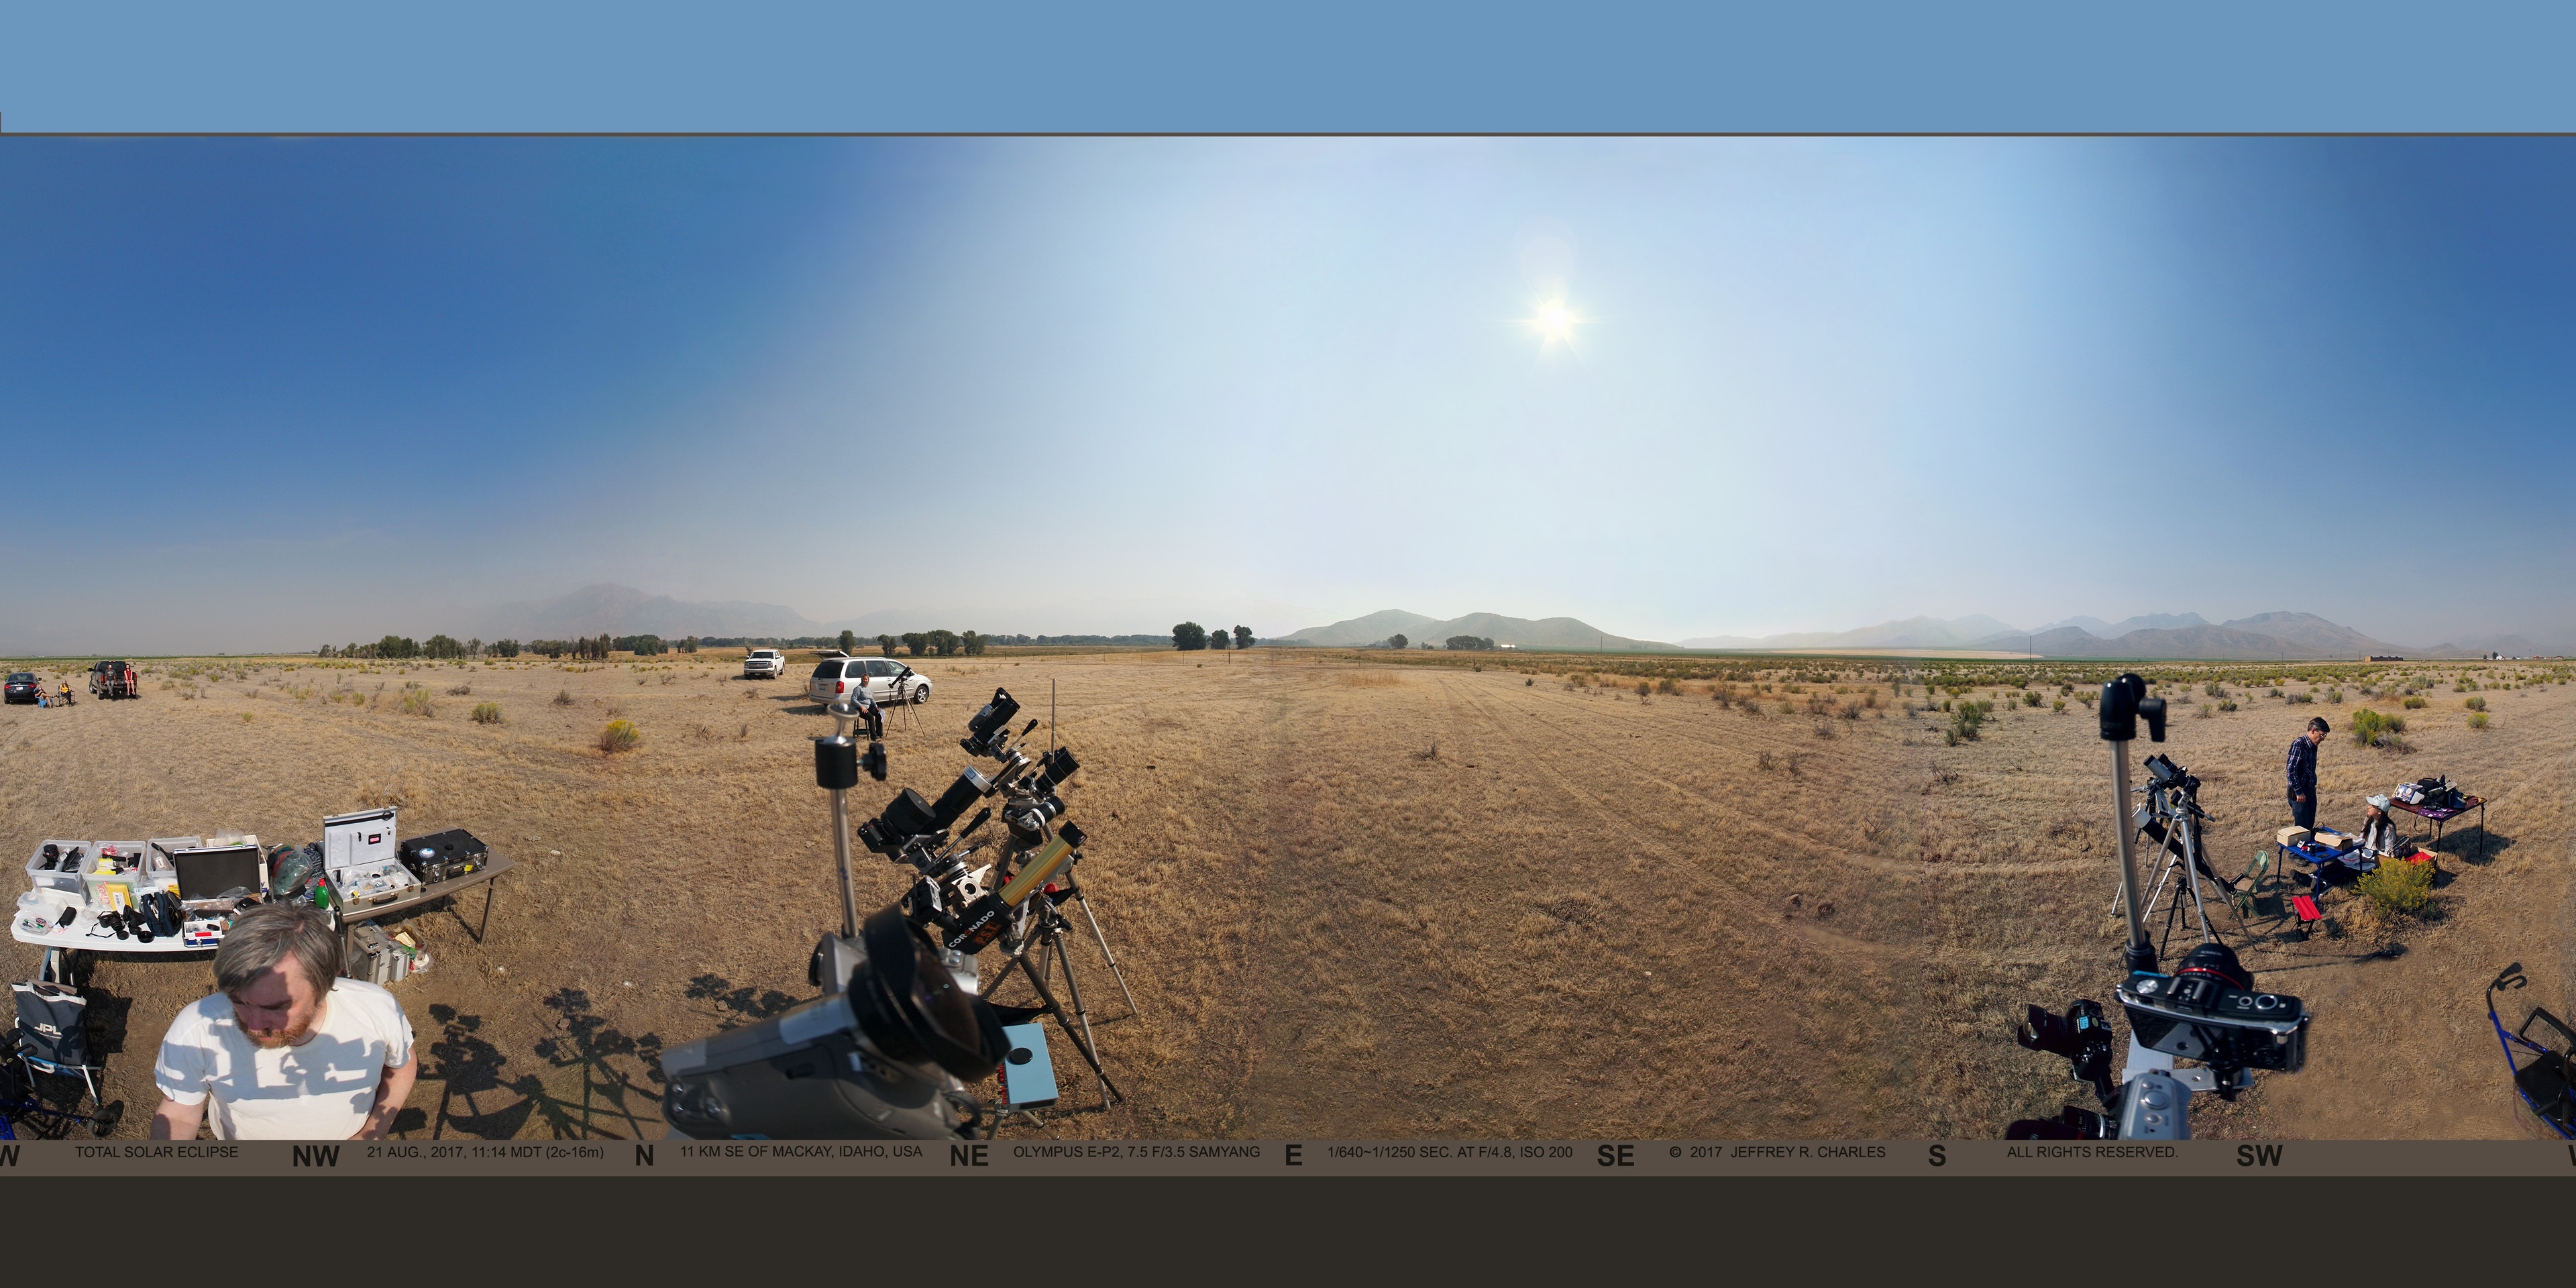
Return to Local Table of Contents
| In this chapter, the term "idiot proofing" obviously is not intended to imply that anyone is an idiot. Instead, idiot proofing refers to making equipment more user friendly and less susceptible to human error. This is important because fatigue from lack of sleep or other causes can temporarily lower a person's ability to properly use equipment that they have successfully used without error for years.
Some aspects of idiot proofing may be as extreme as replacing a camera that has unstable menu settings, but more often than not, it's just a matter of making modifications to existing equipment. Other aspects may include acquiring camera remote cable adapters that have larger and easier to handle connectors. A good part of this section is about camera trackers, since at least one of these failing to track as long as specified resulted in my not getting any corona still images at all. Some cameras on the tracker were automated, so I was not looking at them on a regular basis. Well before the 2017 eclipse, I began to gradually write a combined review and comparison of the Fornax LighTrack II and AstroTrac TT320x tracking mounts, but decided not to continue it after realizing that both mounts need tweaks to enhance either reliability, or (after the eclipse), confidence in their tracking times. Some material from the unpublished review text that relates to tweaking each mount is included here. Fornax LighTrack II: At the eclipse, I found out (the hard way) that the Fornax LighTrack II mount does not track for the "approximately 2 hours" indicated in its specification. Its actual tracking limit is more like 107 minutes. (One of the two mounts could track up to 108 minutes and 50 seconds if reset just right.) There is nothing wrong with a 107 minute tracking time - IF the user is informed about it! Therefore, the Fornax mount could use edits to its specification, plus addition of a "tracking time remaining" indicator. This would permit it to be more confidence inspiring (like an AstroTrac) in terms of knowing how much tracking time is available. (To their credit, Fornax revised their spec to show a maximum tracking time of 107 minutes after I informed them of what happened at the eclipse.) After adding my own tracking time remaining indicatiors to my Fornax LighTrack II mounts (see below), I decided to retain them for any future eclipse I may get to see. The mounts were retained partly because of their accuracy for unguided deep sky imaging, and the ability to do a "partial reset" that keeps them within their optimum tracking range. AstroTrac TT320X: My used sample of the AstroTrac TT320X needed major tweaks in how its guide rods were anchored, plus tweaks to its polar scope before it could be aligned properly and perform reliably. But it did track for the specified two hours.
I don't think anything needs to be fundamentally changed on either mount. The Fornax user manual just needs to show the correct tracking time (which it now does, as of 2018), and the unit should provide some indication of how much tracking time is remaining at a given time. An audible warning that tracking is running out would be nice too. Some of my tracking mount modifications and related photos follow: | ||||||
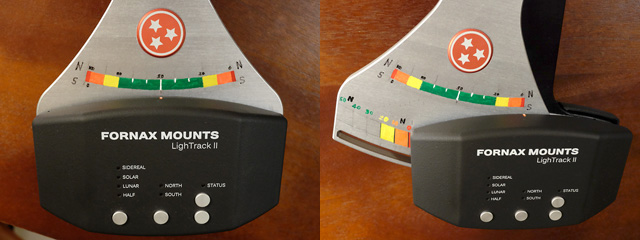 |
||||||
| Partially Idiot-Proofing LighTrack II Mount: Adding Tracking Time Remaining Indication | ||||||
|
LEFT: Simple hand painted colored sector showing tracking time remaining on a Fornax LighTrack II mount. The green area represents the optimum tracking range, and outer ends of the orange areas represent reset and tracking limits that should be assumed. The marked tracking limits correspond to 100 minutes of sidereal tracking time. Narrow red areas at the ends of the sector indicate that the mount is tracking on borrowed time. A simpler indicator need only consist of 4 dark lines. Two at the ends of the green area, and two more at the outer ends of the orange areas. RIGHT: This photo of the mount near the end of its travel shows a second painted area near the bottom end of the drive sector. The outer edge of the yellow area indicates 20 minutes remaining, and orange represents 10 minutes. Red again shows the end of tracking is imminent. Black lines between yellow, orange and red areas make the boundaries visible when illuminated with a red light at night. These modifications were NOT made before the eclipse. I just believed the "Approximately 2 hours" tracking time in the specification and reviews. (BIG mistake!) After being informed after the eclipse, the manufacturer added a 107 minute tracking time specification to the lower left part of the last page of their user manual. So it appears that they do listen to customers! Copyright 2017 Jeffrey R. Charles, All Rights Reserved. | ||||||
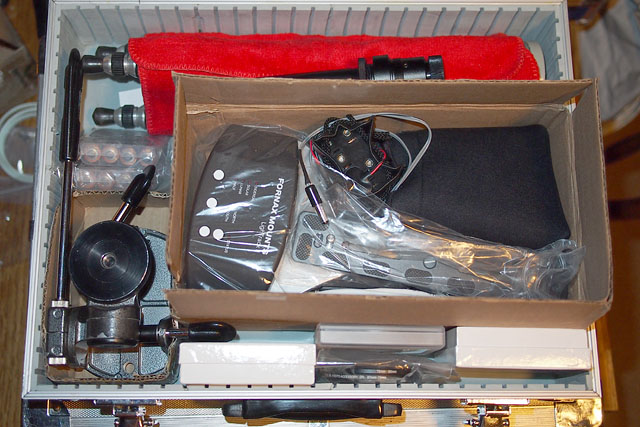 |
||||||
| Keeping Everything Together so Nothing Important gets Left Behind | ||||||
|
The Fornax LighTrack II mount fits in this very compact (5x12x16 inch) case, along with a small Gitzo Sport tripod (top) and G1270 head (lower left) and a ball head for a camera (in black bag at center right). The case also holds the polar alignment scope (top), battery holder (just above mount), spare batteries (center left), cables and a dual camera bracket (center), and filters (bottom). The mount is kept in the padded box at center to protect it from compression or surrounding hard surfaces. A heavier tripod is used when there is no need for things to be this portable. | ||||||
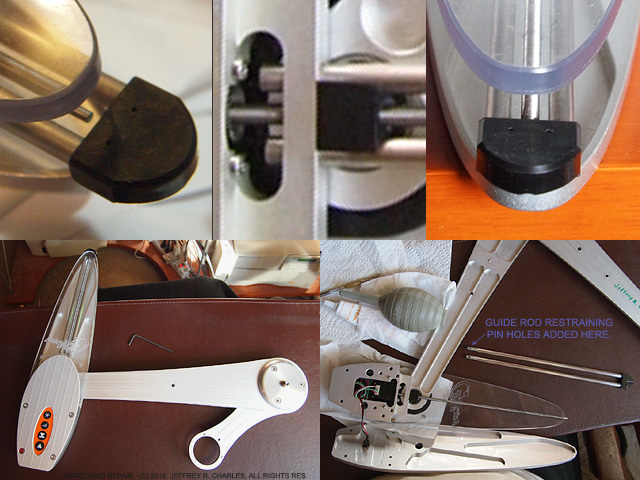 |
||||||
| Correcting Obvious Problems Before Using a Pre-Owned AstroTrac at the Eclipse | ||||||
Drive nut guide rod instability in my AstroTrack TT320X.
TOP LEFT: When I received my used AstroTrac, the drive nut guide rods had "walked out" of their anchor points near the drive motor, leaving outer end of threaded drive rod unsupported.
TOP CENTER: Uneven guide rod positions at the anchor point, which is somewhat flimsy, given how critical the guide rods are. It would not surprise me if guide rod instability is common in this model.
TOP RIGHT: Plastic fitting at outer end of guide rods. When deploying and stowing the AstroTrac, this fitting moved up to 4mm laterally, in each "step" of the rods walking out of their anchor points.
LOWER LEFT: Preparing to repair guide rod instability. AstroTrac did not respond to my questions, so I was on my own.
LOWER RIGHT: The present fix for the guide rod instability included drilling small holes in the sides of the guide rods, very near the ends, then placing pins in the rods after they were installed, followed by using super glue at the guide rod anchor points. This improved performance, but is not a complete fix. Better rod stability will result from adding elongated metal guides just outboard of the guide rod anchor points, to support the rods from their outer sides for the first 10 cm of their length. After the shown basic modifications were made, my brother used this AstroTrac at the 2017 eclipse and got excellent results. It actually did track for 2 hours. Copyright 2017 Jeffrey R. Charles, All Rights Reserved.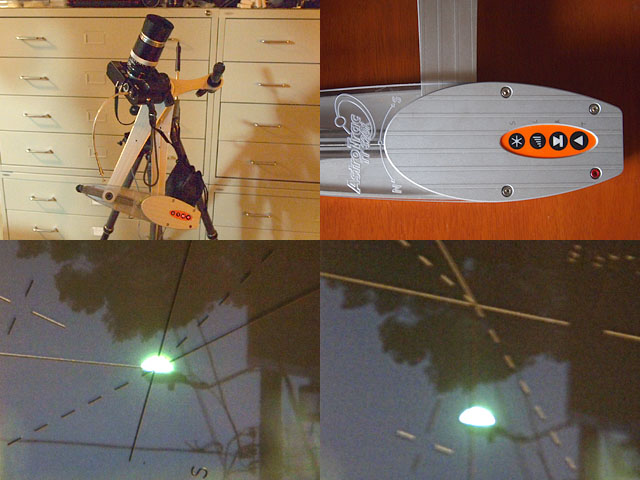 Setting Up and Using an AstroTrac (with its Plastic-Tubed Polar Scope)
|
UPPER LEFT: AstroTrac, set up as usually used for deep sky photos. The camera is a Panasonic GX7 with a Voigtlander 180mm f/4 Apo-Lanthar lens. The AstroTrac is powered with the shown rechargeable 12 Volt battery, or 8 AA batteries. | UPPER RIGHT: Controls of the AstroTtac. The right triangular button indexes the unit the first time it is pressed, and stars the track the next time it is pressed. The button next to it rewinds the unit so it can be folded and stowed. LOWER LEFT: The plastic-tubed polar alignment scope is not very inspiring. It attaches to the AstroTrac with only magnets, and is easy to knock loose. It was obvious that my AstroTrac polar scope had many epic encounters with the ground before I got it. Looping a rubber band around the front of the polar scope, then around the battery holder toward the back kept the scope from falling if it was knocked loose. In this photo, a distant street light centered in the polar alignment scope reticle. LOWER RIGHT: The street light is no longer centered after the polar scope is rotated 90 degrees counter-clockwise. Small adjustment screws in the scope are used to move the reticle laterally until the image remains centered on the reticle when the scope is rotated. Unfortunately, the scope does not stay aligned for long. The main cause appears to be the relatively thin walled plastic tube that supports the polar scope objective. The tube is not straight and as it bends (with temperature or who knows what else) the image becomes misaligned. Idiot Proofing Other Items
| Numerous other "idiot proofing" changes are gradually being made to the eclipse hardware. Some are simple and others are more complex. Simple changes included purchasing short 10cm long remote cords for the Olympus MFT cameras. These are short enough that they can be plugged into the cameras up to days before the eclipse. Then, for the eclipse, it is only necessary to plug a 2.5mm remote extension cord into the short 10cm cable. This eliminates having to deal with the tiny 12-pin jack on the camera just before an eclipse. This in turn makes it possible to connect the cameras to remotes or a multiple camera controller, even if my finger dexterity is as bad as it was on the morning of the 2017 eclipse.
More involved changes included retrofitting a 3.5mm non-shorting coaxial connector to the panoramic platform relay box. This type of connector is easier to use than the previous 2-pin connector whenever finger dexterity is off. The 2.5mm stereo jacks in the relay box were also replaced with Philmore jacks that are more reliable and less fussy about the brands of plugs used. | |||
Return to Local Table of Contents
Appendix H: New Eclipse Setup Incorporating 2017 Lessons Learned (for future eclipse)
| This chapter covers a new eclipse setup that incorporates many of the previously listed "Lessons Learned" from the 2017 total solar eclipse. Given that I was blindsided by a weeks-long health insurance acquisition nightmare a few weeks before the 2017 eclipse, I thought it best to get right into developing a new setup that could be used at a future eclipse. You never know when something stressful or that eats a lot of time may happen again, possibly including right before a later eclipse.
Another reason to develop a new setup soon was to determine what equipment I would or would not use, so I could sell equipment I had no further use for. Yet another reason was that my shoulder needs work, and I may not be able to set up even a single tripod for several months after surgery.
For the most part, the new setup uses items from the 2017 eclipse setup, but since it is smaller, it does not use anywhere near all of the 2017 equipment. The cameras are mostly my existing older models, as opposed to new ones. Cameras can always be updated later, and there is no need to get newer cameras unless seeing another total solar eclipse becomes likely. No other subject requires using so many cameras at once. The final version of the new setup is pictured below.
| |
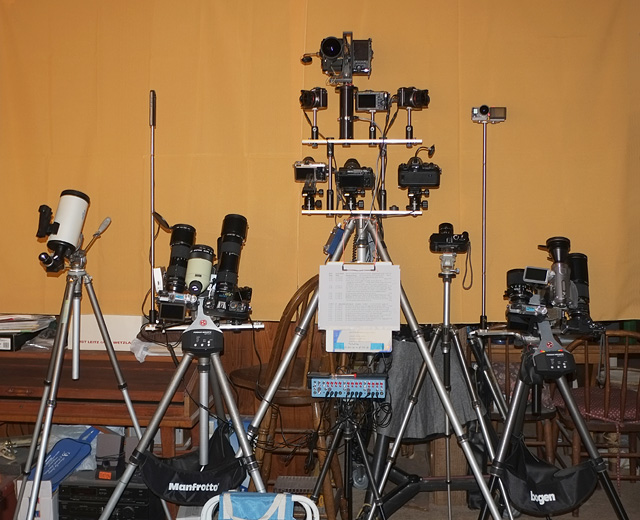 |
|
| New (Simpler) Eclipse Setup that Incorporates Lessons Learned from 2017. | |
|
The new eclipse setup uses up to 80 percent as many cameras as the 2017 eclipse setup, but is much smaller and lighter. Its volume (when efficiently stored) is only about 2/3 that of the 2017 equipment. Some size reduction is achieved by using more custom camera bars (which are more compact), smaller tripod heads, smaller cameras, and fewer cameras. Two of the larger tripods are lower (to permit use when seated), and can thus be lighter. A setup that is even lighter is achieved by simply leaving out certain cameras. An alternative that may be small enough to fit carry-on luggage would use smaller (and fewer) tripods, and rely more on small action cameras. The full version of the new setup is shown and described here, from left to right: The FAR LEFT Tripod supports a small visual telescope with solar filter, for use by passers by. The SHORT LEFT tripod supports the Corona Still Image Assembly of 4 cameras. 1.) Ricoh Theta S VR camera with wired remote is to the left, mounted on a 28" tall post. 2.) Panasonic GX7 camera with Nikon 300mm f/4.5 ED Nikkor lens (used at f/6.8) is near the center. v.) A small Ednar Mirror Scope 500 visual telescope is just right of the GX7. 3.) Nikon N2020 with a 400mm f/5.6 ED Nikkor and 1.4x converter is just right of the visual scope. 4.) A Pentax Q camera that takes video of light meters (as in 2017) is behind the tracked cameras. Three meters are now used, so one can be set to low range ahead of time, and not dropped! The SHORT CENTER tripod supports the 12-channel interval timer. * A small lighted mirror on an extendable rod and my glasses are stored on top. The CENTER tripod supports a smaller Wide Angle Assembly of 8 (to 9) Cameras. Cameras on the UPPER LEVEL are as follows (directions assume totality is to south): 5.) Olympus E-P2 with Rokinon 7.5mm f/3.5, pointed northeast (actually to 60 deg), for horizon photos. 6.) Fuji X-T10 with Samyang 8mm f/3.5 lens (to be replaced by modified 7.5mm) on Panoramic Platform. 7.) Fuji X-T10 with Samyang 7.5mm lens, also on Panoramic Platform. (Olympus E-P2 is in photo.) 8.) Olympus E-P2 with Rokinon 7.5mm f/3.5, pointed level to south (180 deg), for horizon photos. 9.) Olympus E-P2 with Rokinon 7.5mm f/3.5, pointed northwest (actually to 300 deg), for horizon photos. 20.) Optional W1: If eclipse elevation angle low enough, 4th fisheye camera used, then all 4 in portrait orientation. Cameras on the LOWER LEVEL are: 10.) Olympus E-P1 with Samyang 7.5mm f/3.5 fisheye lens (set to f/4.8), for stills of eclipse over horizon. 11.) Panasonic GX7 with Olympus 8mm f/1.8 (or Meike 6.5mm) fisheye lens, for video of eclipse over horizon. 12.) Nikon N2020 with 16mm f/2.8 Nikkor lens, working at f/4. b.) Ball bearing in a small cup (used for a level) is between the GX7 and Nikon N2020. p.) Hard copy of eclipse procedure is on a clip board, down lower on tripod. The SECOND FROM RIGHT tripod supports only the eclipse sequence camera. 13.) Leica M9 with 35mm f/2 Summicron ASPH, set to f/5.6, for sequence photo. The RIGHT tripod supports a Video Assembly of 6 (to 8) Cameras. 14.) GoPro Hero 4 Black camera and Entaniya 220 degree lens on a 30" tall post toward left side of tripod. 15.) GoPro Hero 4 Black camera and Entaniya 220 degree lens is also on the tall post, next to other GoPro. 16.) Panasonic GX7 camera with Tamron 500mm f/8 mirror lens is on left side of tracker (but shown on right). 17.) Panasonic HDC-SD1 camcorder with Nikon TC-3ED 3x converter is centered on tracker (but not shown). 18.) Olympus E-P3 camera and Leica 250mm f/4 Telyt-R V2 lens is on right side of tracker (but shown on left). 19.) Panasonic ZS7 point and shoot camera on a short post is on right side of assembly (but is not shown). 21.) Optional V1: Third GoPro camera and Entaniya 220 fisheye, all 3 then being in portrait orientation. 22.) Optional V2: Additional GoPro with Entaniya 280 degree fisheye lens, pointing up. (Optional items not shown.) The full version has 19 cameras, plus 3 optional cameras. A greater percentage of the cameras are either run by an interval timer while on auto exposure, or are simply free running video cameras.
A SIMPLIFIED version eliminates the following items, but leaves other cameras where they are:
The simplified version removes up to 7 cameras, so it has 12 cameras, plus 3 optional cameras. | |
| Selected Features of the New (Simpler) Eclipse Setup, Full Fersion: | |
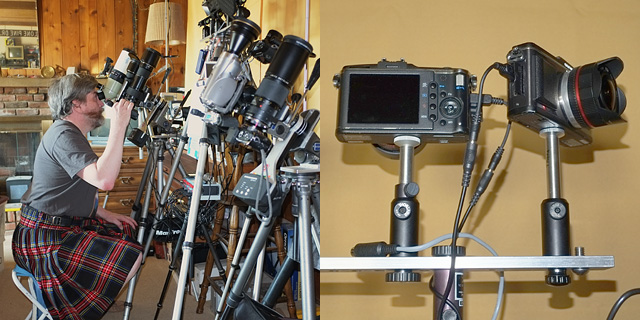 |
|
| LEFT: Handicapped Accessible! RIGHT: Dongles on Olympus Cameras. | |
|
LEFT: The new setup is accessible from an all-important seated position! Since I'm handicapped, it's about time I put together a handicapped-accessible eclipse setup! In this photo, I'm practicing changing shutter speeds on a camera while looking through a small visual telescope. Periodic rotation of the motorized panoramic platform provides audible cues for when to change shutter speeds. (Here, I'm in a men's kilt, not a skirt! A kilt is a practical form of "handicap wear".) RIGHT: Dongles on Olympus cameras simplify connections on the day of an eclipse. The dongles can be plugged into the "tremor-unfriendly" Olympus camera jacks ahead of time. On the day of an eclipse, 2.5mm stereo extension cables provide an easy to connect interface between the dongles and camera controller. Copyright 2018 Jeffrey R. Charles, All Rights Reserved. | |
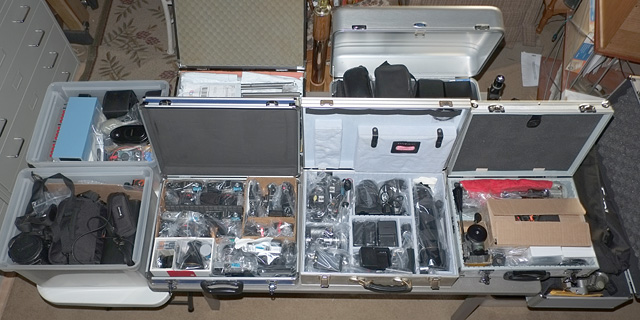 |
|
| Cases Deployed for Equipment Assembly Pracice Run with New (Simpler) Setup. | |
|
In the new eclipse setup, all cases and boxes except the tripod case fit on a 48 x 30 inch table, plus a smaller luggage table. The upper left case contains only camera brackets, tripod heads, and two G1370 heads that are used as tracker wedges. Most tripod heads are stored right on the camera bars, which reduces set up time. In the lower right case, the only eclipse related items are a tracker, its batteries, and one tripod head. After these are removed, this case can be stored under the table. (Other items in the tracker case are used only for deep sky imaging.) My walker is used to move cases and boxes from my van to the table one at a time. I was fortunate in 2017, in that a few healthy people moved the cases. The arduous looks simple when watching non-handicapped people easily move this much equipment. Copyright 2018 Jeffrey R. Charles, All Rights Reserved. | |
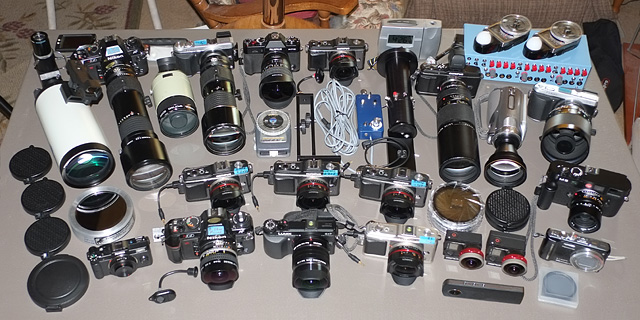 |
|
| Cameras and Instruments in New (Simpler) Eclipse Setup. | |
|
All cameras and instruments in the new eclipse setup can be organized on a single 48 x 30" folding table. On an average day, all cameras can be attached to the tripods in less than 20 minutes. For an indoor practice run, total setup time including cabling, power up, alignment, and taking and reviewing test images was only about 50 minutes. Setup time will likely be longer for an outdoor test on a hot day. From left to right, starting with the back row, major items on the table include: Back Row: Small visual telescope, Nikon N2020 with 400mm f/5.6 ED Nikkor and 1.4x converter, Ednar Mirror Scope 500, Panasonic GX7 camera with Nikon 300mm f/4.5 ED Nikkor lens, Fuji X-T10 with Samyang 8mm f/3.5 lens (to be replaced by modified 7.5mm), Olympus E-P2 (to be replaced by second Fuji X-T10) with Samyang 7.5mm f/3.5 fisheye lens, Atomic Clock, custom 12 channel interval timer, two Sekonic L-428 light meters. Just in front of Back Row: Gossen Luna-pro meter, dual camera bracket, custom motorized indexing panoramic platform (built in 1991) with automated control and relay box, Olympus E-P3 with VF2 finder and Leica 250mm f/4 Telyt-R V2 lens, Panasonic HDC-SD1 camcorder with Nikon TC-3ED 3x converter lens, Panasonic GX7 camera with Tamron 500mm f/8 mirror lens. Middle Row: Flip caps (to be fitted with 43mm aperture polymer solar filters), glass solar filter for visual telescope, three Olympus E-P2 cameras with dongles and Rokinon 7.5mm f/3.5 lenses, threaded glass solar filters (82mm, 72mm, 67mm), more flip caps, Leica M9 camera with lens. Front Row: Pentax Q camera with compact generic 2.7mm fisheye lens, circa 1994 CamLite (illuminates camera shutter speed dial), Nikon N2020 with 16mm f/2.8 Nikkor lens, Panasonic GX7 with Olympus 8mm f/1.8 fisheye, Olympus E-P1 with Samyang 7.5mm f/3.5 fisheye, two Ribcage Modified GoPro Hero 4 Black cameras with Entaniya 220 degree fisheye lenses, Ricoh Theta S VR camera, 52mm solar filter with 46mm and 39mm adapters, Panasonic ZS7 camera. Copyright 2018 Jeffrey R. Charles, All Rights Reserved. | |
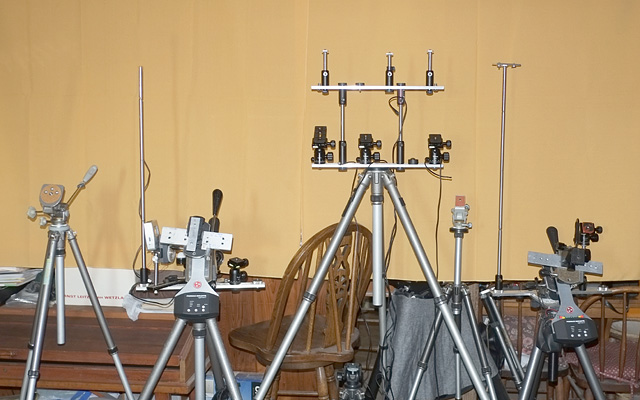 |
|
| Tripods for New Eclipse Setup, Shown with Trackers but without Cameras. | |
|
Tripods for the new the new eclipse setup, shown with trackers, but without cameras or other instruments attached. The wide angle tripod is the same Gitzo 326 tripod used in 2017, but with different camera support bars, heads, and posts on top. The other two larger tripods are more compact than the tripods used in 2017. Copyright 2018 Jeffrey R. Charles, All Rights Reserved. | |
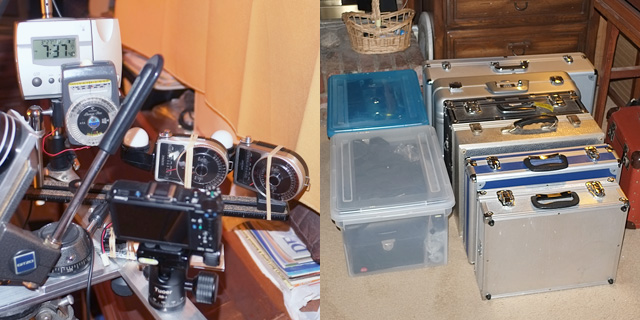 |
|
| LEFT: Multiple Light Meters. RIGHT: Cases Containing New (Simpler) Eclipse Setup. | |
|
LEFT: Multiple light meters, so no need to change ranges - and risk dropping a meter! Uses two Sekonic L-428 meters, plus the same Gossen Luna-Pro (set to low range) I used at prior eclipses. Final version will use something more substantial than rubber bands to retain the meters. RIGHT: The new eclipse equipment configuration fits in 6 cases and 2 file boxes, including the tripods. The 2017 equipment required 7 cases, 2 file boxes, plus all of the tripods had to be transported separate from the (full) cases. The new setup fits in about 2/3 the space of the 2017 equipment. It is also easier to transport on a walker because all items, including tripods, are in cases. Copyright 2018 Jeffrey R. Charles, All Rights Reserved. | |
|
Tripod heights (in inches, not counting heads or tracking mounts) and positions are shown here. Tripod center positions are relative to the Corona Still Image Tripod. Positions assume the wide Angle Tripod camera bars run perpendicular to the eclipse azimuth. Measurements are toward the right (w) and the front (d) relative to the datum tripod: MAIN TRIPODS: Corona Still Image Assembly Tripod (Gitzo Studex): 38.0 high, 0w, 0d Wide Angle Assembly Tripod (Gitzo 326 Studex): 57.0 high, 21w, -7d Video Assembly Tripod (Gitzo 326 Sudex): 38.0 high, 45w, -8d OTHER TRIPODS: Visual Telescope Tripod (Tall Gitzo Sport): 46.5 high, -20w, +2d Interval Timer Box Tripod (Gitzo Weekend): 30.0 high, 19w, -3d Sequence Camera Tripod (Custom 5-sec. Gitzo Sport): 46.0 high, 33w, -11d Solar filters: Almost all solar filters used in 2017 were glass filters in threaded cells that fit filter threads on my camera lenses. Threaded filters are more secure, and thus can be safe and practical for many solar applications. But threaded filters are not as well suited to total solar eclipses, because it takes time to remove threaded filters. I had planned on making slip-on and hinged adapters for the glass filters, but the insurance company nonsense took up too much time. After the 2017 eclipse, the approach for solar filters was changed considerably. I realized that high quality partial eclipse images (and glass filters) are only needed for a few cameras: The sequence camera, one corona still image camera, one video camera, and one visual telescope. The solar filters on all other cameras are only there to facilitate focusing, and to keep tabs on tracking. This means that polymer solar filters, and even sub-aperture filters, are adequate in most cases. In the new setup, small polymer filters are adapted to 3 or 4 flip caps, for faster removal. Attributes of the 2017 Eclipse Setup that were Retained:
Some aspects of the new system are similar to the 2017 setup. For example: The most obvious changes in the new system are in the Wide Angle Assembly. Here, there are many changes in both the type and number of cameras used, and in hardware that supports them. Incorporating "Lessons Learned" from the 2017 Eclipse:
The new setup has many improvements that are not obvious in the picture. A few include: With the new setup, the first practice run was performed on a day I was tired, staring cold (i.e. without studying the procedure) from a point only 3 minutes before totality. The assumed circumstances included the same totality duration as in 2017 (2m 11s), but with the sun at a higher elevation angle. On that first practice run, over 90 percent of the cameras (13 out of the 14 applicable for that part of an eclipse) were operated properly in the available time. In the second practice run weeks later, all cameras except one were properly operated during a mock totality duration of just under 2 minutes. The new setup also made it possible to (mock) view totality through a telescope for about 45 seconds (out of a brief 120 second simulated totality duration), while taking a mock corona still image series. I was too zoned out during both tests to know if I was doing things right at the time, but review after the fact showed a good result. My initial impression is that the new system should work even better on a day I'm not as tired. The practice runs performed thus far assumed that the multiple camera inteval timer box was completed, and it is not actually completed yet. Because finishing all 12 channels of the interval timer box would take quite some time (given my conditon), I do not expect to complete it unless the prospects of seeing another total solar eclipse are good. It has 4 good channels now, which is plenty for anything except a total solar eclipse.
A lot of things still have to be done before another eclipse, but these tasks may be delayed until after shoulder surgery (probably by up to a year). Completion will also depend on the prospects of seeing another eclipse, and on my condition at the time. Unfinished preparations include: So, there may gradually be more improvements as my shoulder, etc., allows. Clear skies, Jeff C. An Even Smaller Eclipse Setup that is Compatible with Air Travel (Unlikely): At one point, I was going to develop a smaller eclipse equipment configuration that would fit in one rolling carry on bag, plus one shoulder bag. A setup that required two rolling carry on bags (such as my equipment for the 1995 eclipse) was no longer an option due to having to use a walker or cane. The smaller setup would be used in the event I was able to go to a foreign destination to see another eclipse, as opposed to waiting for the 2024 eclipse. It was by no means certain that I'd have the stamina to get to a foreign desination and still function during an eclipse. There was also a good chance that my condition could worsen for a few weeks or months afterward, and relapses can pose some long term risk. When you add on the time it takes to register equipment with US customs and otherwise arrange and implement a foreign eclipse expedition while in my fatigued condition, a lot of time and energy would be required. In spite of these drawbacks, I still had not completely ruled out a foreign eclipse expedition. However, something far more meaningful than eclipses was about to change this situation. The Greatest of the "Lessons Leaned": On 15 March, 2018, something of a very positive nature happened that inspired me to change many of my priorities and tweak my outlook. At 5:30 that evening, I took a share ride home from a dental appoinment. Out of the blue, a kindred spirit, who had been through more than I can comprehend, happened to be on the same share ride. This person did not always smile, but there was a radiance and positive outlook that shone through. And this person required a wheelchair. The person's outlook was not preached or forced onto anyone, but it left a meaningful impression. Within three hours of this unexpected meeting, I was beset by news that weighty and sad things had recently happened to a close relative and to a friend. The same evening, I also developed a severe dental anesthetic reaction that lasted several days. All of this would have brought me much lower than it did if I had not met such a luminous person earlier that day. The gravity of this made me realize that making time consuming preparations for eclipses was not the best use of my time. (This is especially true when success increasingly depends on getting enough rest as I age.) Doing things that positively influence people in everyday life is a far more worthy use of time. Some day, I hope to later re-write this 2017 eclipse web page in light of such perspecives and priorities. To say the least, eclipses had been eclipsed. A person eclipsing an eclipse had happened before, and to a far greater degree, on my solo trip to the 1994 solar eclipse in Bolivia. That is when I first met Wilma Silvia Alcocer Borda, director of the school (colegio) Buenas Nuevas in Cochabamba. She put others first and dedicated herself to the children there. I mentioned her to the person I met in March of 2018, because there were some similarites between them. And receiving news that Wilma needed heart surgery was one of the sad things that I learned of on that very evening in 2018. Lack of stamina before and after the surgery kept her from moving to the USA to live with her sister as had been hoped. And sadly, she passed away in 2023, while still in Bolivia. An announcement concerning her passing is near the end of my 1994 Total Solar Eclipse photo web page. For now, a foreign eclipse expedition (at least to a remote ground site) has been ruled out because it would require a lot of time, a lot of funds, and far too much of my limited energy. Time is not a renewable resource, and numerous things are more important. Time is not a renewable resource, so every day must count for something. This may be the most important "lesson learned" of all.
When one heart shines on another, and the newly illuminated heart thanks and praises its Creator for such radiance, the light of dawn shines into once dark valleys; shadows from the dark of night lighten to become like refreshing open shade on a bright and sunny day. | |
Return to Local Table of Contents
Notes about the terms "handicapped" and "disabled" in this publication:
| In this publication, the term "handicapped" (as opposed to "disability") is used in reference to a medical condition that limits endurance and frequently requires use a walker, etc. This is because there is precedence for using the term "handicap" in the USA (or "impairment" in the EU) to describe a person's condition, while the term "disability" relates more to the degree to which a society effectively restricts the scope of participation a handicapped person can enjoy in society.
These definitions are derived from the World Health Organization "International Classification of Functioning, Disability and Health" (2001), and an older (c1976) Union of the Physically Impaired Against Segregation (UPIAS) reference. In other words, in the context of this document, there are differences between a handicap and a disability. A "handicap" relates to a person's condition, while the scope of a "disability" is determined by factors external to a handicapped person. This is an important distinction, since it was a combination of both that ended my enginerring career. Terms may vary, but it is important to maintain a distinction between internal and external factors.
A "handicap" does not diminish a person's wholenss in the slightest, partly because wholeness is mostly a state of mind. A "'disability" may detract from the scope of what a handicapped person can do in society with a given amount of effort, but the limitations of a "disability" are external. In more recent years, there has been a reversal of the meaning of these terms within some agencies.
|
Appendix I: Another Kind of Eclipse: "Local" Solar Eclipse of 5 Dec. 2017 (by Smoke)
The Battle for Our Neighborhood Block Against the 2017 Creek Fire
| Fires will long be associated with my experience of the 2017 total solar eclipse. Smoke from forest and brush fires blanketed the Lost River Valley during the eclipse. Then, the southern California La Tuna fire happened as I was on my way back home. News reports indicated my part of town was probably toast, which did not make for a relaxing return trip. That fire got within half a mile of my house, but did not harm our block.
On 5 December 2017, there was another fire. My cat had been freaking out from hearing unusual howling wind most of the previous night, so I did not get to sleep until morning. When I went to sleep early in the morning, the "Creek fire" seemed small and distant enough that I figured it would not reach our area until evening, if ever. But high winds drove it many miles in less than 6 hours, and it was bearing down on the north side of our neighborhood by late morning. One neighbor woke me to inform me of the fire. After the fire came over the mountains, it took only 20 minutes to burn all the way down to the wash. A few neighbors left within the hour, but some evacuated to areas that the fire would reach by the end of the day, and had to move again. About 3/4 of the residents on our block had evacuated by late afternoon, even though no one I spoke with knew of any evacuation order or advisory. Online maps (viewed after the fact) also showed our immediate area was not under an evacuation order. (Yet, many days later, one person said he found our block might have been under mandatory evacuation, but we just didn't know it!) The mass exodus marked the first time in weeks that parking spaces were available on our street. I decided not to go until I made sure I had things needed for my medical condition packed, because I would not have fared well if I'd evacuated but forgotten some of my prescriptions, etc. It also was not possible to move much stuff to the car on the seat of my walker without stopping numerous times to rest. I had zero information about where I could evacuate to, but started getting things together anyway. (No TV reception, and cable/sat costs too much.) Some who evacuated went to visit family members who lived less than an hour away. I did not have that option. While I was getting things together, the main part of the fire slowly veered a little toward our west. Helicopters then started making water drops about 200 meters to the west in an attempt to keep the fire from reaching several large homes on a hill to the south. The main part of the fire was just west of our block, and moving away to southwest. But peripheral parts of the fire were still a concern. Word also trickled back that people who left our area were not being allowed back in for any reason (presumably even for forgotten prescriptions). There was also a first hand report of police at a road block telling a person from our area that they could leave and come back, but then the person was briefly handcuffed by different police while doing what the first officer had said they could do. At this point, all of us who remained decided to stay. A fire is a force of nature that is governed by the laws of physics. On the other hand, police are emotional beings who did not all appear to be communicating with each other that day, and who seemed volatile under stress, while having night sticks, handcuffs, and guns. Between the two, I thought the fire seemed like a safer option. This was obviously just one small part of many reasons to stay. Not sure what others thought, since each had their own reasons for staying. We masked up and prepared for "the battle for our block" against the fire. No firemen were working in our immediate area, and no air drops were aimed at the part of the fire that concerned us. The area of greatest concern was the part of the wash berm slope adjoining uncleared non-residential property, that in turn adjoined a house at the end of our street. It looked like some of that property had not been cleared of brush in years, and it provided a narrow but unbroken approach for the fire. There may have been no threat at all if the non-residential land outside the wash had been cleared. But that's a very big "if" after a fire approaches uncleared land. Those who were able bodied prepared to fight the fire when it arrived, provided it was small enough. I had successfully fought fire once before (3-4 meter high flames inside and outside my folks' garage in Colorado back in the 1970's). But I was physically of no use in fighting the 2017 fire, so most of the time, I just stayed near my house to keep an eye out for hot embers and looters. Hot but dark embers up to 3 cm long fell or blew in on a few occasions, and some of us sprayed water on our eves and kept an eye on nearby houses at such times. It only took about 3 minutes of drawing water to wet down the eves after getting set up for it. (In previous fires, embers getting caught in eves or vents had been observed on the news to start numerous house fires.) At one point, parts of the fire were on three sides of our block at once, but it was in isolated areas on 2 of the 3 sides. Not anywhere near as serious as an unbroken arc of flame. The neighbors (and no doubt prayer) were successful in keeping the fire at bay and keeping hot spots under control. It took hours of vigilance and intermittent fire fighting, but every person, pet, and structure on our block survived. One person's wood fence had caught fire, but it was quickly extinguished. Dozens of other homes, some within 200 meters of our block, did not fare as well. Our block is not technically in a high fire risk area, even according to insurance maps. However, because of the patch of uncleared non-residential land by the wash, the fire could have approached umimpeded and lit off several homes people had not stayed home to fight it. Given the geography of our immediate area, this certainly made a good case for staying home. Our area is not hemmed in by a narrow canyon, and is not too difficult to escape from at the last minute. Our block might have been toast if the fire had not been fought by neighbors in the uncleared non-residential areas. Flames that had to be fought were mostly a network of small spot fires (each 1-5 times the size of a fire in a home fireplace), plus the occasional larger (up to truck-size) bush or tree fire. These were burning and jumping their way toward our block. According to those physically able to fight the brunt of the fires, most fire fighting was done with shovels. If flames were too large to approach, they were knocked down with water before approaching with shovels. Or, in other cases, people just waited out flash fires in bushes or trees. When a necessary task is addressed with a "can-do" attitude, it may not always be as intense as some might think. Fighting the threat can help drive away thoughts of the worst case scenario, and may also help prevent the same. Being in a temporary shelter (if there was one for our area) and not knowing what is going on would probably be worse. The fact that it worked out well for some to stay and fight nearby parts of the fire does not mean that the same actions are advisable for other fires, or in other areas. Fires and winds are bound to vary, and every area is unique in terms of escape routes versus the path of any given fire. In other words, fighting a brush fire (or staying near one) is in the "don't try this at home" category. Numerous assaults from the fire wore some of us down, but also had a numbing or desensitizing effect. With the first assault of the fire, I just went numb, and with little emotion thought: "So this is what it's like to lose your house and everything in it." There was no thought of how hard it would be to rebuild from scratch. There was no fear. There was just deciding whether to leave or stay, and a focus on essentials like the cat, prescriptions, family photos, and the computer and backup drive. There was no thought of bringing eclipse equipment, books, LP records, movies, or other items that it took years to build, find, or collect. Anything beyond dealing with the basics at the time would have increased physical and cognitive overload in that situation. And it was an overload. (Leaving would have been an even bigger overload, partly because I need to sleep in a blacked out area.) But then, after a few approaches of the fire, some of us just calmly thought: "Well, here it comes again." By the next evening many of us were sitting on lawn chairs by the side of the street, watching another wave of flames come down the mountainside in the calm before another firestorm. Then the wind died down and flames stayed away after that. Afterward, there was a strong smoke smell in everything. Even my toothbrush tasted like smoke. Fortunately, the smoke smell cleared up in a few weeks. I did not run the furnace until after the house was cleaned.
As the main part of the fire went around to our west and proceeded south on Dec. 5, smoke from it blocked out the sun, just as smoke from some other fires had done. Photos of the fire are below. | |
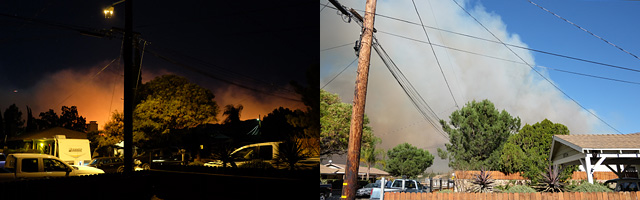 |
|
| LEFT: Smoke in the Distance at 5:40 AM. RIGHT: Smoke not so Far Away by 11:42. | |
| LEFT: Smoke from the distant Creek Fire ominously backlights local mountains at 5:40 AM. The smoke is illuminated by a combination of light pollution and the fire that produced it. Very little was being reported about the fire at this point because coverage was focused on the larger Ventura fire well to the west of this one. The wind had been blowing hard all night and kept going throughout the day. RIGHT: Just six hours later, at 11:42 AM, the smoke is almost overhead as the fire races across the parched Tujunga wash. The rest of the sky would not stay blue much longer. Minutes after this picture was taken, upper level winds blew smoke directly over us, but lower level winds drove the fire toward the left just enough for the main part to miss our block. Peripheral parts of the fire that later approached our neighborhood were not exactly trivial. There are no photos of intense parts of the situation, as we were busy keeping the fire at bay and watching for embers, etc. Fuji X-T10 with 18mm f/2 lens (28mm equivalent). Copyright 2017 Jeffrey R. Charles, All Rights Reserved. | |
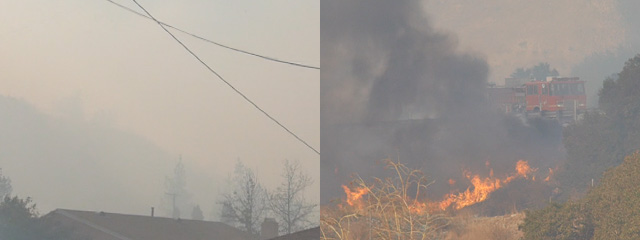 |
|
| LEFT: Poor Visibility Downwind from Fire. RIGHT: Creek Fire Jumps 210 Freeway. | |
| LEFT: Visibility rapidly decreased as the fire approached. The nearby hill that is barely visible in the background is only 200 meters away, but it is directly downwind from the main part of the fire. By this time, we wore masks and goggles when venturing outside. Visibility was a little better than it had been when smoke from a more distant fire blew into our area the previous year. The 2017 Creek fire smoke seemed a little easier to tolerate than the 2016 smoke when breathing through a mask, but it caused a considerably stronger burning sensation in the eyes. RIGHT: The Creek fire jumps the 210 freeway. By now, the freeway was closed to all traffic except police and fire fighters, etc. The traffic detour was almost 20 miles long. As spot fires jumped closer, each was visible only during a few seconds after ignition (if seen from directly downwind), then smoke obscured the fire if it was more than 20 meters away, while the air warmed a little. Stepping a meter or two to one side again revealed the spot fire and provided cooler, clearer air. This unexpected observation was made from a cleared area, while soaking wet from head to toe. I retreated to my own yard after spot fires got within 20 meters. Copyright 2017 Jeffrey R. Charles, All Rights Reserved. | |
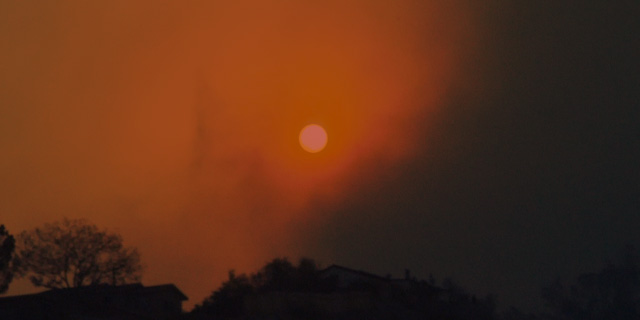 |
|
| Another Kind of Eclipse: Solar Obscuration by Thick Smoke. | |
| The sun dimly shines through smoke above a steep hill toward our south. The actual appearance of the sun was deep red, not too unlike its appearance in a hydrogen Alpha filter, except that you obviously can't see prominences. The foreground was darkest under thicker smoke to the right. During early stages of the fire, the dimming light made gray and white objects look a little yellow. It reminded me of the color just before totality at the 21 August eclipse, except that the 5 December light was a stronger yellow color. Most pictures in this section were taken with a Panasonic GX7 Micro 4/3 camera and Lumix 14-140mm f/4-5.8 lens. Copyright 2017 Jeffrey R. Charles, All Rights Reserved. | |
 |
|
| Flash Fire! Flames Fully Engulf a Berm in 5 Seconds. | |
| These photos are ordered from left to right, and top to bottom. The entire sequence covers less than 10 seconds of time. The road sign is less than 50 meters from my house, and the fire is less than 35 meters beyond that. The man in the picture is about 20 meters from the fire. The pictured flash fire proved to be a good thing, because it created a 5 meter wider buffer between part of the wash and some of the houses closest to the large fire raging in the wash. UPPER LEFT: A neighbor cautiously approaches a berm at the edge of the Tujunga wash to check the status of the fire. UPPER RIGHT: A few seconds later, fire starts to erupt and he briefly pauses (as shown here), then starts to retreat. MIDDLE LEFT: Less than a second later, fire starts to come over the berm, accompanied by a blast of very hot air that instantly makes him turn away. I could feel heat from the fire in wind gusts even from where this picture was taken. From my location, the air in a gust was noticeably warmer than usual, but was not actually hot. MIDDLE RIGHT: A fraction of a second later, a long line of fire flashes over the top of the berm. Instead of going up in the air, most flames follow the contour of the ground and roll down the side of the berm. LOWER LEFT: Another fraction of a second later, the fire has almost reached the bottom of the berm over a wide area, instantaneously igniting at least a hundred square meters. LOWER RIGHT: Less than five seconds after the initial flash, some of the larger flames begin to withdraw a little, but everything in the flashed area is now either blackened or still ablaze. Smoke in front of the fire makes this picture more hazy. These flames are tiny compared to some of the tree-sized flames raging in the wash. We could hear intermittent popping from the fire at this point. Copyright 2017 Jeffrey R. Charles, All Rights Reserved. | |
 |
|
| The Many "Faces" of the Creek Fire. | |
| While going through video of the fire to select frames for the flash fire sequence, most flame images looked random as you might expect. But in a single second of the video, all of the above shapes appeared in the flame. This is random as well, but seemed a bit odd. People may see the images in different ways, but in the top 4 images, from right to left, I had the impression that the first looked sort of like a blunt nosed dog or monkey (facing toward the right); the second looks like something you would not want to meet in a dark alley (facing down and to the right); the third looks like a generic face (round eyes, open mouth, short nose, maybe wearing a hat, and facing toward the right when in focus; something else if out of focus), and the last looks sort of like a dog or calf (one facing slightly toward the left). None of the images were rotated. The lower image has a few shapes that look a little like faces, though only one (dim part of flame to extreme upper left) has any sort of human look. Copyright 2017 Jeffrey R. Charles, All Rights Reserved. | |
 |
|
| LEFT: Helicopter Drop Just to Our West. Right: Fire Creeps Up Hill, Igniting Structure. | |
| Shortly after the fire burned its way out of the Tujunga wash (starting 100 to 200 meters west of our block), it burned south, where it quickly went up a hillside and lit off the first of what would be dozens of area homes. LEFT: A helicopter fights the fire only two blocks west of our steet, in a valiant but failed attempt to keep it from reaching numerous large homes on a hill to the south. RIGHT: In spite of several water drops west of our block, the fire quickly burned up the side of a nearby hill and ignited structures only a few hundred meters away. These images (plus the two below) are video frames from a Panasonic GX7 camera and 14-140mm lens. Copyright 2017 Jeffrey R. Charles, All Rights Reserved. | |
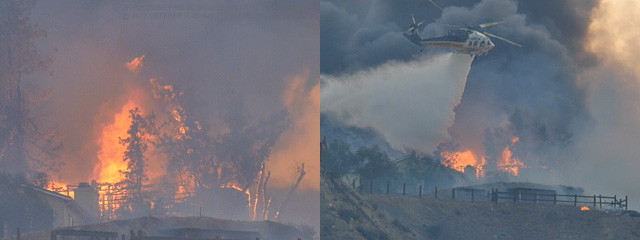 |
|
| LEFT: Structure Fully Involved in Flames. RIGHT: Water Drop on Burning House. | |
| LEFT: In only a few minutes, the structure on the hill is fully involved in flames, which backlight deck railings, fences, trees, and members of the burning structure itself. Some flames briefly reached 15 to 20 meters in height. RIGHT: A helicopter makes a water drop on the first major structure to burn from our vantage point. This house is 200 to 300 meters away. Less than 15 minutes after the structure caught fire, all that remains are some framing members on the left and a possible window opening on the right. The chimney of a house that survived is backlit by the flames. Copyright 2017 Jeffrey R. Charles, All Rights Reserved. | |
 |
|
| LEFT: One of Many Flames in Wash. RIGHT: Smoke Blows Directly Toward Our Block. | |
| LEFT: The Tujunga wash was filled with flames like these. Even the edge of the wash was not approachable until the main front of the fire had moved well to the southwest. The nearly vertical gray feature to the lower left is a dead tree. The fire was large, but the silhouette of brush in the foreground makes it look smaller than it really is. RIGHT: While the first house on the hill was still burning, a neighbor looked upwind from his roof as we got our first sign of real local trouble. Smoke began rapidly blowing directly over our block and was fairly close to the ground. Heat from the fire could be felt in every gust of wind as a temporary but noticeable warming of the air. All of this meant that flames were close, and directly upwind. Our block was in a salient that had not burned. And thus began round 2 of the battle for our block. Copyright 2017 Jeffrey R. Charles, All Rights Reserved. | |
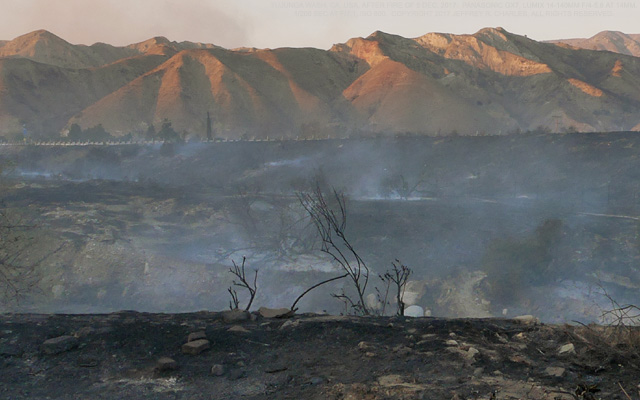 |
|
| Lunar Landscape. The Tujunga Wash, Two Hours After Being Burned to a Crisp. | |
| There were many surreal sights on 5 December, including this view of the Tujunga wash, less than two hours after the main part of the fire had burned almost everything in sight. The scene looks more like a volcanic caldera than a wash. This picture is taken from where the flash fire (pictured earlier) had occurred only a few hours before. Hot spots that flared up over the next couple of days were put out by neighbors. Rumor has it that a few years before, the City had poisoned many of the trees in this part of the wash, which is downstream from a nearby golf course, but then did not remove the dead wood. If this is true, it set the stage for a rapid spread of fires that would be catastrophic for some neighborhoods near the wash. Panasonic GX7 with Lumix 14-140mm f/4-5.8 lens, used at 14mm. 1/200 sec. at f/7.1, ISO 800. Copyright 2017 Jeffrey R. Charles, All Rights Reserved. | |
 |
|
| LEFT: Smoldering Trees. RIGHT: More Flames on Mountain to Northeast at Dusk. | |
| LEFT: Remnants of smoldering trees glow red at their upper ends. In recent years, these trees were frequently imaged when testing lenses for my Leica M9 and Leica M Mount Lens Review web page at www.versacorp.com . RIGHT: A small part of round 3 of the Creek fire, shortly after it came over mountains to the northeast at dusk. Fortunately, these flames did not burn all the way down the mountain. The flames appear to be going up in this shot, so this area might be a deliberate backfire. Copyright 2017 Jeffrey R. Charles, All Rights Reserved. | |
 |
|
| LEFT: Front Lines in the Battle for Our Block. RIGHT: Early Warning Cat. | |
| LEFT: The front lines in the battle for our block included this uncleared brush on non-residential land just outside the edge of the wash. This brush runs all the way from the inside of the wash beyond the left of the picture, over the berm on the left side of the image, and clear up to within about 5 meters of the tree on the right. The tree is in the fenced yard of a house in our neighborhood that's close to the wash. There was concern that this house could be the first domino to fall. To make matters worse, someone had dumped (I assume illegally) a huge pile of wood chips between the brush and the residence fence (lower right of picture). RIGHT: The cat was freaked out the entire night of the 4th, and it turned out that she had good reason to be alarmed. This is her on the 5th, meowing in a frantic pitch she'd previously used only during trips to the vet. She'd calm down if I could stay indoors a while each time I came back inside. She'd have been stressed a great deal more if we'd evacuated. She does not do well away from home, and is not very socialized because I have not had many guests in the last few years. Copyright 2017 Jeffrey R. Charles, All Rights Reserved. | |
 |
|
| Photo from an Earlier Fire: Plane on its way to Drop Fire Retardant on 2016 Sand Fire. | |
| While fighting the "Sand fire" this heavily loaded converted MD-11 (or possibly DC-10) aircraft was photographed while flying in front of heavy smoke and the sun on 23 July, 2016. The angle of attack was actually 4 degrees more than what is shown here. Olympus E-P1 MFT camera and Leica 90mm f/2.8 Elmarit-M lens. 1/200 sec. at f/4.8, ISO 100. Copyright 2016, 2017 Jeffrey R. Charles, All Rights Reserved. | |
Return to Local Table of Contents
Appendix J: Solar Transits of ISS (NOT during eclipse) and Equipment Tradeoffs
|
Much of the same equipment that is used to photograph the partial phases of a solar eclipse can also be used to image the International Space Station (ISS) when it transits the sun from a given location. Unlike a total solar eclipse, ISS transits are reasonably frequent, so imaging an ISS transit does not cost hundreds to even thousands of dollars per opportunity.
However, since some of the most important aspects of imaging an ISS transit are high resolution, a fast shutter speed, and low distortion, certain types of equipment are better than others for imaging ISS transits. Equipment related tradeoffs are discussed below the transit images.
After partially recovering from the eclipse trip and the insurance nightmare that immediately preceded it, I realized that some of the same equipment I used for the eclipse would also work to image solar transits of the ISS. My equipment is not capable of taking extremely good ISS transit images, but it is adequate for at least capturing the basic shape of the ISS against the sun. I had never attempted an ISS solar transit before, but decided to give it a go because transits were visible from my house on 25 Oct. and 2 Nov., 2017. The latter was clouded out, so results from my first attempt on 25 Oct. are shown below. |
|
| ISS Transit of 25 Oct, 2017, 16:26:22 PDT. Questar 3.5 (89mm Mak) on its Own Mount |
| Solar Transit if ISS, taken with a Questar 3.5 (89mm f/16 Mak) on its own fork mount but without motor drive. Seymour 95mm threaded OD5 solar filter. Camera is a Fuji X-T10, used in low speed burst mode with its mechanical shutter. 1/4000 sec. at f/16, ISO 6400. Stack of 3 exposures, each showing the ISS in different positions, at 3:00, 4:30, and 6:00 clock angles. The transit occurred about 1.3 seconds earlier than what was calculated on transit-finder.com about an hour earlier. The enlargement at lower left is a stack of all three ISS images. It does not show much detail due to the small angular size (26 arc sec.) of the ISS in this transit, the atmospheric conditions, the low elevation angle (18 degrees), and the high ISO setting required to get a fast shutter speed with my existing OD5 solar filter. This was my first attempt. Copyright 2017 Jeffrey R. Charles. All Rights Reserved. |
| ISS Transit Imaging Considerations.
Somewhat like solar eclipses, there are quite a few things to consider when imaging ISS passes. Those well versed in imaging transits will already know this material, but this description is mainly for others who may want to try imaging a transit for the first time. A favorable transit of 13 October 2017 will be referred to in examples below, even though it is not a transit that I photographed.
Some of the basic things to consider when imaging ISS solar transits are: Favorable versus Unfavorable Transits Not all ISS transits are created equal. There is a large veriation in the angular size of the ISS, with the larger angular sizes generally coinciding with transits that occur when the sun is at a high elevation angle. Since the ISS orbit is comparatively (but not exactly) circular, the ISS is closest when it is directly overhead, and farther away when it is low on the horizon. A high elevation angle transit is a win-win in that the angular size of the ISS is larger, plus there is less atmosphere (i.e. air mass) between the observer and the ISS. At such times, the ISS may approach an arc minute in width, which is larger than the angular size of Jupiter. This makes it possible to image more detail on the ISS than what is possible with the same telescope with a low elevation angle transit. A transit above a 45 degree elevation angle should be good, and higher elevation angles are even better. Of course, if the first available transit is unfavorable, it is worth imaging it anyway, since this makes it possible to come up with imaging techniques that can be used for favorable transits. There is also benefit to using an actual transit as a practice run. That's what I did on my first attempt. Solar Filters All ISS transits are imaged with solar filters, or with strong ND filters that may not be necessarily be marketed as solar filters. A typical safe solar filter is OD5 or darker (at all wavelengths that can enter the eye), which is 10 to the 5th power attenuation, or about 16.5 f-stops. All solar filters and ND filters MUST be used in FRONT of a telescope or lens, not inside of it or behind it. ND filters that are NOT marketed as SAFE VISUAL SOLAR FILTERS should NEVER be used visually, no matter how dark they are. Not even for a quick peek through an SLR camera. Live view is the ONLY safe way to use such a filter, where you see only an electronic image. Again, ANY filter that is NOT specifically marked as being a "Safe Visual Solar Filter" should NEVER be used visually. Using such non-visual filters for ANY purpose (even if only with live view) is a "USE AT YOUR OWN RISK" proposition. If you don't agree that using such a filter is a "use at your own risk" situation, don't even try to use one. The same can be said of second hand solar filters of unknown provenance, or any solar filter though which the sun "looks" bright. Any filter used to image the sun needs to be dark enough to protect your camera sensor from too much light. The damage threshold for most camera sensors is higher than that of your eye, so slightly brighter filters can be used on most cameras - as long as they are NEVER used visually. The optical density that is safe for a given camera sensor depends on whether or not an ND filter transmits more UV or IR than it does visible light. If this is not known, the filter should have an Optical Density (OD) of at least 4.0. (Even this may not be safe for some cameras if the filter "leaks" infrared light.) An OD 4 filter has 10 to the 4th power (10,000) attenuation, or about 13 f-stops. This is WAY too bright for visual use, so live view is again the only safe way to see the solar image. If an ND filter is known to attenuate UV and IR more than or just as much as visible light, it can be a little bit brighter, up to maybe OD 3.5 (a factor of 3,000 attenuation), or about 11.5 f-stops. Here again, ANY VISUAL USE IS DANGEROUS. This filter information is for lenses and telescopes slower than f/8, for cameras with typical solid state consumer grade image sensors, and pointing the filtered camera at the sun for less than 5-10 minutes. If a lens or telescope is faster than this (e.g. f/5.6, etc.) the filter should be correspondingly dimmer than shown above. ND filters less than OD5 are mentioned only because they can facilitate faster shutter speeds at a given ISO setting.
It is important note the difference between "Optical Density" (OD) units, and the "ND" (Neutral Density) values that are sometimes used for photographic filters or welding glass: OD Value: Attenuation: ND Value/stops: Notes: OD 0.5 3x 1.6 OD 1.0 10 3.3 OD 1.5 32 5.0 OD 2.0 100 6.7 OD 2.5 320 8.3 OD 3.0 1000 10.0 Use only at your own risk on any camera. OD 3.5 3000 11.6 All of above are UNSAFE for photo use. OD 4.0 10,000 13.3 This+ALL of above UNSAFE for visual use. OD 4.5 32,000 14.9 UNSAFE at low mag. Questionable at high. OD 5.0 100,000 16.6 Standard eye-safe camera solar filters. OD 5.5 320,000 17.9 Safer naked eye solar filter density. Effects of Different Types of Shutters (some aspects may vary with camera brand) A few brief tests were performed with rolling shutters and mechanical shutters. The tests were relatively simple, in that I just panned the camera at the same rate that the ISS would be crossing the frame while using each type of shutter. In the 13 October transit example, the ISS would transit 31.5 arc minutes (1890 arc seconds) in 0.67 seconds. If the solar image is 80 percent of the sensor width, the ISS would cross the camera sensor width in 0.84 seconds. The camera was put in burst mode and then simply panned at the appropriate rate for the tests, using an envelope as the subject. Rolling Shutters: Almost any electronic shutter in a contemporary consumer digital camera is going to be a rolling shutter, where one row of pixels are exposed and read out at a time. When the ISS is moving at its normal rate, a rolling shutter it will cause up to 20 percent distortion in the shape of its image. This happens because the ISS image is rapidly moving over the rolling shutter operation of the sensor. The distortion is quantified herein by how much the image of a square would be distorted, so 20 percent distortion means that the top of the image of a square is skewed to one side by 20 percent of the width of the square, which is considerable. Another way of putting it is that a vertical line will be imaged as a line that is tilted to such an extent that the top is shifted to one side by 20 percent of the line's original length. Some digital cameras (such as the Nikon Z9, which was introduced well after this web page was first published) are said to be free of distortion from rolling shutter, meaning that using their electronic shutters will not result in significant distortion of the ISS image. This could make such cameras a good choice for ISS transit imaging. In the Fuji X-T10 camera I tested, if the camera was panned to cause a subject to rapidly move from side to side on the focal plane during an exposure, the leading edge of the subject (and all features parallel to it) were slanted about 10 degrees in the image. If the subject is moved only up or down in the frame, its proportions will be compressed or expanded (rather than tilted), depending on what direction it is going, but it will still have orthogonal features. Mechanical Shutters: If a mechanical shutter is used, neither type of distortion happens, though it theoretically could happen because a slit is used for faster speeds. I think the reason no distortion resulted from the tests was because a mechanical shutter slit is many times wider than the ISS image. Mechanical shutters can cause camera shake, but this is usually less of a problem at high shutter speeds. This section is in the context of using a camera in still image mode to get the highest resolution possible in an ISS transit image. If a video is instead the objective, there may be no choice but to use a rolling shutter. The ISS image will probably be distorted in a video, but the video resolution may also be low enough that the distortion won't be noticed. Solar Filter Trades: Shutter Speed versus Noise with a Given Solar Filter. For reasonable resolution on the ISS, a shutter speed of 1/2000 second or faster is usually required. For example, if the diameter of the sun during a transit is 31.5 arc minutes (1,890 arc seconds) and the ISS transits the sun in 0.67 seconds, it is moving at a rate of 2,821 (1,890/0.67) arc seconds of angle per second of time. The angular size of the ISS in the example of a 13 October 2017 transit was 52 arc seconds, which is a larger angle then even the diameter of Jupiter. Motion blur in 1/2000 second will be 1.4 arc seconds. Even this is enough to see when an 8 cm or larger telescope is used, so a 1/4000 second shutter speed is better. Even 1/8000 second would be preferred for larger apertures. The best shutter speed with a given telescope and solar filter is a balance between motion blur and noise. For example, a relatively high ISO had to be used to get even a 1/2000 second shutter speed with most of the optics and solar filters I had access to in 2017. In the case of a Fuji X-T10 with an f/16 telescope and an OD5 solar filter, the ISO setting had to be 6400 to get a properly exposed solar image at 1/2000 second. Using a faster f-ratio telescope with a camera having a small sensor may at first seem like a good solution, but cameras with small sensors also have small pixels, and once the pixel size gets below about 4 microns, noise (or even worse, noise reduction artifacts) may become a problem. One solution for PHOTOGRAPHY is a solar filter that is about 10 to 30 times brighter than a typical OD5 visual solar filter, but these are NOT SAFE for visual use, even briefly when framing a shot in an SLR. All precautions noted in the "Solar Filters" section must also be considered, and all solar filters must be used in FRONT of the telescope or lens, not inside it or behind it. Some companies used to sell OD4 solar filters just for photography, but I have not seen these for sale in recent years. The risks associated with a lower density filter can be reduced if only a "mirrorless" camera (e.g. NOT an SLR) is used with the filter, and if the filter is NEVER used visually. A mirrorless camera prevents direct observation of the filtered image by providing only an electronic image to use for focusing and centering. An OD4 filter that equally attenuates UV, visual, and NIR wavelengths is not likely to damage a typical mirrorless camera during short events (i.e. when the filtered camera and optics are pointed at the sun less than 5-10 minutes), because an OD4 solar image at the focal plane with an f/8 or slower telescope is still dimmer than would be the case if the lens was removed from a camera and direct sunlight was simply allowed to illuminate the sensor. If a lower density solar filter is used, limited bandwidth filters can also be considered for use with it when imaging the sun. Such filters can improve the image in cases where a telescope is not apochromatic. A Hydrogen Alpha filter intended for solar observation is another approach. These are not used with conventional solar filters, but most are used with some sort of dedicated solar energy rejection filter that is used in front of the telescope. Camera Burst Rates versus Burst Duration. If only a single image of the ISS transiting the sun is desired, a relatively slow burst rate is adequate. Low burst rates can usually be sustained for several seconds, which makes it easier to time the burst properly. However, if the goal is to obtain a series of ISS images as the ISS transits the sun, a faster burst rate is needed. In most consumer digital cameras (those available as of when this is written), fast burst rates have a very limited duration, though this may improve with time. Of the cameras I have, one will do at least 6 frames per second for several seconds, and another will do 10 frames per second for up to maybe 4 seconds. A 4 second burst duration makes timing for the start of a burst less critical, but the camera will have captured fewer ISS images during the transit. Six frames per second means that 3 or 4 frames should capture the ISS in front of the sun during a 0.7 second transit. One of my cameras is capable of a 40 frame per second burst, but only for a maximum time of 2 seconds. This makes the burst start time more critical, to where it has to be down to the second. On a first attempt, taking high definition video is worth trying because it will provide a backup, though at lower resolution. Video frames are all I obtained at the 2017 solar eclipse because I got zero still images of the corona for the first time ever at an eclipse that had not been clouded out. Focal Length, Optics, and Seeing Versus Central Obstructions and Portability The ideal focal length should long enough to provide a solar image that fills somewhere between 75 percent and 90 percent of the short dimension of the camera sensor. For example, in a Micro 4/3 camera (17.3 x 12.98mm sensor) a solar image of at least 9.7mm diameter is desirable. This corresponds to about 1,000mm focal length. The focal length can be as long as nearly 1,200mm if tracking is accurate. If 16:9 movies on Micro 4/3 format are the objective, the focal length should be about 20 percent shorter because of the increased vertical crop factor for 16:9 video. Large aperture fast f-ratio optics are desirable for getting a fast shutter speed with a given solar filter, but on some occasions, daytime photos with larger aperture optics can actually have lower resolution than photos with smaller aperture optics. This is because of atmospheric turbulence, or "seeing", which is usually worse during the day than it is at night. Atmospheric seeing has a major influence on the optimum aperture. One of the most important considerations is the "coherence length" of the atmosphere for a given site, time, and elevation angle. Coherence length may also be referred to as the "air cell size", or "R zero", depending on the vernacular of local observers. The atmospheric effects that contribute to the coherence length are related to the effects that influence the average distance between the most prominent features in "shadow bands" that are sometimes seen shortly before totality at a total solar eclipse. It is not unusual for the coherence length to be shorter than 4 or 5 cm in the middle of a hot day, or longer than 9 or 10 cm on a calm evening. A 5 cm aperture is a little small for a good ISS image, so some compromise often has to be made. A good compromise for many locations is often in the 9 to 13 cm aperture range. If a telescope toward the larger end of this range is used, it can always be stopped down to a smaller aperture with an aperture stop fitted to the front. I installed an iris diaphragm in my refractor telescope, but it was more for the purpose of using the telescope for terrestrial photos than for solar transits. A central obstruction (as in a the secondary obstruction in mirror lenses or Cassegrain telescopes) will also result in lower ISS image detail with a given aperture. For many locations and conditions, the optimum aperture for an unobstructed system is in the 9 to 13 cm range. Portability considerations may require the use of smaller optics such as mirror lenses and small aperture refractors. For example, a 10 cm APO refractor on an equatorial mount may often be close to an ideal instrument for an ISS transit, but it may be impractical to transport such equipment to a remote transit site. If an observer's lifting capacity is limited (as in my case), any sort of conventional equatorial mount may be impractical. This requires resorting to a tracker that can be attached to a standard photo tripod. Using a tracker on a medium weight tripod imposes size and weight limits on the optics, and may require using optics that are less than optimum. I had to make some compromises in this area. Portability and ease of deployment is also a consideration if a transit is observed from an area where it is not acceptable to linger for long. Such areas may include parking lots, in cases where a transit is observed immediately before or after doing business at establishments the parking lot serves. Alignment and Tracking Regardless of the optics used, it is good idea to track the sun prior to and during a transit. This makes it more practical to use a larger solar image in relation to the camera sensor size. Tracking also eliminates having to perform potentially frantic last minute pointing adjustments in the seconds just before a transit. Daytime polar alignment can be accomplished in the same way it is done for a solar eclipse. In my own case, I aligned the mount on a night before the event, while making certain that the tripod was level. I use a 1.25 inch ball bearing on a flat metal surface for a level, since this is usually more accurate than a bubble level. (And you can feel which way the ball is rolling without using a light!) When the mount is aligned at night, a compass is used to measure the difference between the celestial pole and the magnetic pole. On the day of the event, it is then only necessary to level the tripod, then use the compass to align the mount in azimuth. It is even easier if a terrestrial reference can be used to determine true north during the day. Conclusions
One basic conclusion is that the optimum setup for ISS solar transits will vary with the observer, the location, and local conditions. In these conclusions, four basic approaches will be considered:
C1.) This first approach is for people without lifting limitations. Here, the optimum optics may be used without worrying about size and weight:
C2.) The second approach is for people with moderate lifting limitations or limited space in a vehicle. Some reasonable optical compromises are necessary to reduce size and weight:
C3.) The third approach is for people with significant lifting limitations or those who to may travel by air. Additional optical compromises are necessary to further reduce size and weight:
C4.) The fourth and final approach is for people with severe lifting limitations, or those who want equipment small enough to have on hand even if travelling by air. Further optical compromises are necessary to reduce the size and weight even more:
Some people have acquired surprisingly good ISS transit images with long zoom consumer cameras such as the Nikon P-900. In samples I've seen, noise reduction artifacts (typical in cameras with small sensors) appeared to degrade the image more than any shortcomings of the zoom lens.
|
|
| Equipment used for ISS Transit if 25 Oct. 2017 (my first attempt) |
| The equipment here is similar to that listed in Conclusion 3, except that the tripods are heavier and the solar filters are the standard OD5 density. The OD5 filter, combined with the telescope being f/16, required an ISO setting of 6,400 to properly expose the sun at 1/4000 sec. From left to right, the items are: Atomic clock; Questar 3.5 telescope with full aperture solar filter and Fuji X-T10 camera (for still images), Ednar Mirror Scope 500 with solar filter and 18mm eyepiece, Tamron 500mm f/8 lens with solar filter and 1.4x converter on Panasonic GX7 (for video). The Mirror Scope and Tamron 500mm lens are mounted on a Fornax LighTrack II tracker. (Same one used at the 2017 eclipse.) The ISS was visible in the still images, but not the video. Copyright 2017 Jeffrey R. Charles. All Rights Reserved.
To prepare for future ISS transits, I acquired a 95mm Format Hitech Firecrest ND 3.0 filter, which will screw part way into the front of the Questar without binding. This filter is actually an OD3, for an attenuation of 1,000x. A 1.25" 3-stop ND filter was added behind the telescope, for a total attenuation of 8,000x. This combination makes it possible to use a 1/4000 second shutter speed while setting the camera (a Fujifilm X-T20) to ISO 200, for cleaner solar (and ISS) images. However, since acquiring these filters, there have not as yet been any favorable ISS transits over my place at times when I had free time to research or image them. |
Return to Local Table of Contents
Appendix K: References (Data, webcams, etc.) Links are NOT monitored or updated.
|
Note: Links below were good when the links were compiled in late 2016. Most links are shown as text and must be entered into a browser for use. None of the links external to eclipsechaser.com or versacorp.com will be monitored after the 2017 eclipse, so corrections related to any broken links below will not be made. When linking to external sites, broken links will invariably occur and increase in number over time.
Amateur Astronomy, Newer Internal Links: List is ordered by aperture. Rankings are in colunms each tested attribute. Rankings (1 is best) for contrast, real detail, max. useful magnification, etc: TELESCOPE / SPECIFICATION / CONTR. /AngRes/ BestMag / MaxUMag / NOTES: * TeleVue 60 / 60 f/6 ED Refr / 03 / 10 / 144x / 218x / Custom 1.65mm, 2.5 Nag. * B&L 800mm / 80 f/10 Hybrid / 11 / 11 / 089x / 160x / OR9,OR5 (others,yr) * KasaiPico8 / 80 f/11.2 MCas / 12 / 12 / 100x / 180x / OR9, OR5 Bad Img. WORST * Questar3.5 / 89 f/14.4 MCas / 04 / 06 / 182x / 273s / 7mm Nagler,1.5xB * Vernon. 94 / 94 f/6.85 Refr / 05 / 07 / 230x / 258x / 2.8 Tak Hi OR, 2.5 Nag. * Meade 2045 / 102 /10 SCTel. / 07 / 09 / 167x / 200x / OR6, 5 (tested other yr) * MeadeEtx105/ 105 / 14 MCass / 06 / 05 / 245x / 245x / OR6 (test in other year) * Intes MN56 / 127 f/6 MakNwt / 02 / 04 / 272x / 272x / 2.8mm Tak. Hi OR * MysteryMak / 130 f/15.4 MCs / 10 / 08 / 129x / 222x / 15.5RG, OR9, 7Nag, Oth. * Intes MN61 / 150 f/6 MakNwt / 01 / 01 / 321x / 394x / 2.8Tak,2.5N,16w/7xB BEST * Skywtch180 / 180 f/15 MCass / 09 / 03 / 300x / 386x / OR9, 7 Nag SensToTubeCur * Celestron8 / 203 f/10 SCTel / 08 / 02 / 290x / 423x / 7mm, 4.8 Nag. 2nd BEST* * When Celestron 8 used with an Atmospheric Dispersion Corrector (ADC) in good seeing conditions, its images are as good as those of the Intes MN61 Mak-Newt.
Eclipse Data References:
Internatinal Space Station (ISS) Pass and ISS Transit References:
Weather Forecasts, Data and Archives:
Weather Webcams (some are seasonal, some are live, some have archives):
Idaho Webcams:
Kansas Webcam:
Nebraska Webcams:
Oregon Webcams:
Wyoming Webcams: |
|
Recommended Reading:
Light intensity graph for the 1995 eclipse, by Jeffrey R. Charles
Steps to a Successful Eclipse Expedition, by Jeffrey R. Charles
Use of material herein is subject to conditions in the Versacorp Legal Information Page. |
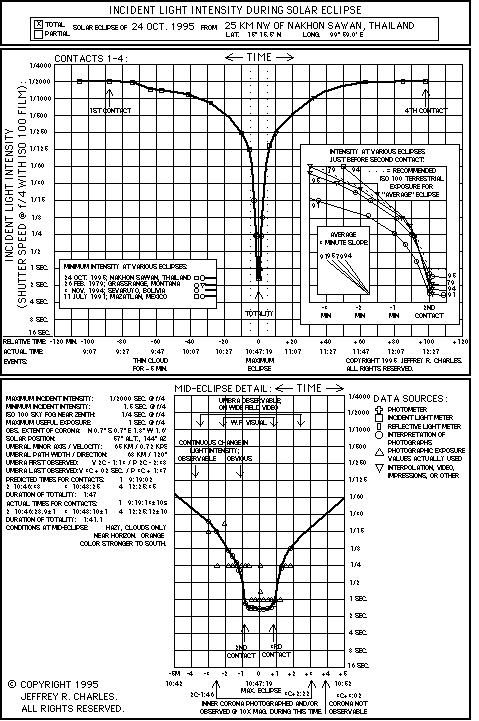
| Return to Local Table of Contents |
|
© Copyright 1979, 1991, 1994, 1995, 1998, 2017, 2018 Jeffrey R. Charles. All Rights Reserved.
jcharles *at* eclipsechaser dot com
Document (2017 eclipse page, unpublished) created: |
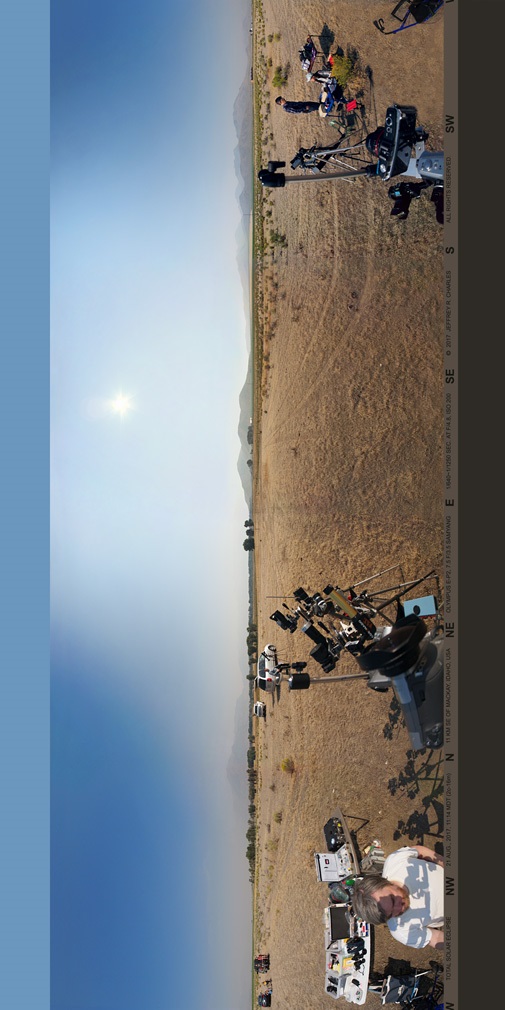
|
| Larger version of equidistant panorama from 16 minutes before totality. (Includes Tilt Correction. Rotate 90 degrees clockwise for viewing in a VR viewer.) (Or view a larger 36 percent scale, 3840x1920 uncorrected equidistant rectangular version.) (May need CCW rotation to view.) Copyright 2017 Jeffrey R. Charles, All Rights Reserved. |